Being present when your customer needs you the most displays how much your business values responsiveness and customers engagement. Having a chatbot enables your business with these capabilities and more. A chatbot is a computer algorithm that simulates a human conversation. People interact with these bots by selecting predefined options. To give valid answers, chatbots require people to make a few selections.
With Drupal, you can try your hands out at different chatbots using modules like the Drupal Chatbot or other integration modules and APIs. In this article, we will be exploring more on Drupal Chatbot which uses Dialogflow as the NLP agent.
Why use a Chatbot?
A Chatbot is an excellent marketing tool for a business to drive customer engagement. Chatbots enable a business to:
- Gather customer insights
- Increase sales
- Be available 24/7
- Save on time and money
- Improve customer satisfaction
How do Chatbots built with Dialogflow work?
In a nutshell, this is how a chatbot normally works:
- User sends a text message through chat window
- The chat app transfers the message to Dialogflow
- The message is matched to as intent (Intents updated manually by developers or admin in Dialogflow console)
- Based on the matching intent, a response is fetched. (Each intent will have its own developer defined response)
- The user gets a response back.
Why Dialogflow?
Dialogflow is a natural language understanding platform that makes it easy to design and integrate a conversational user interface into your mobile app, web application, device, bot, interactive voice response system, and so on. Dialogflow can analyze multiple types of input like text or audio. It can also respond to user in multiple ways, either through text or speech.
Building a Chatbot in Drupal using Dialogflow
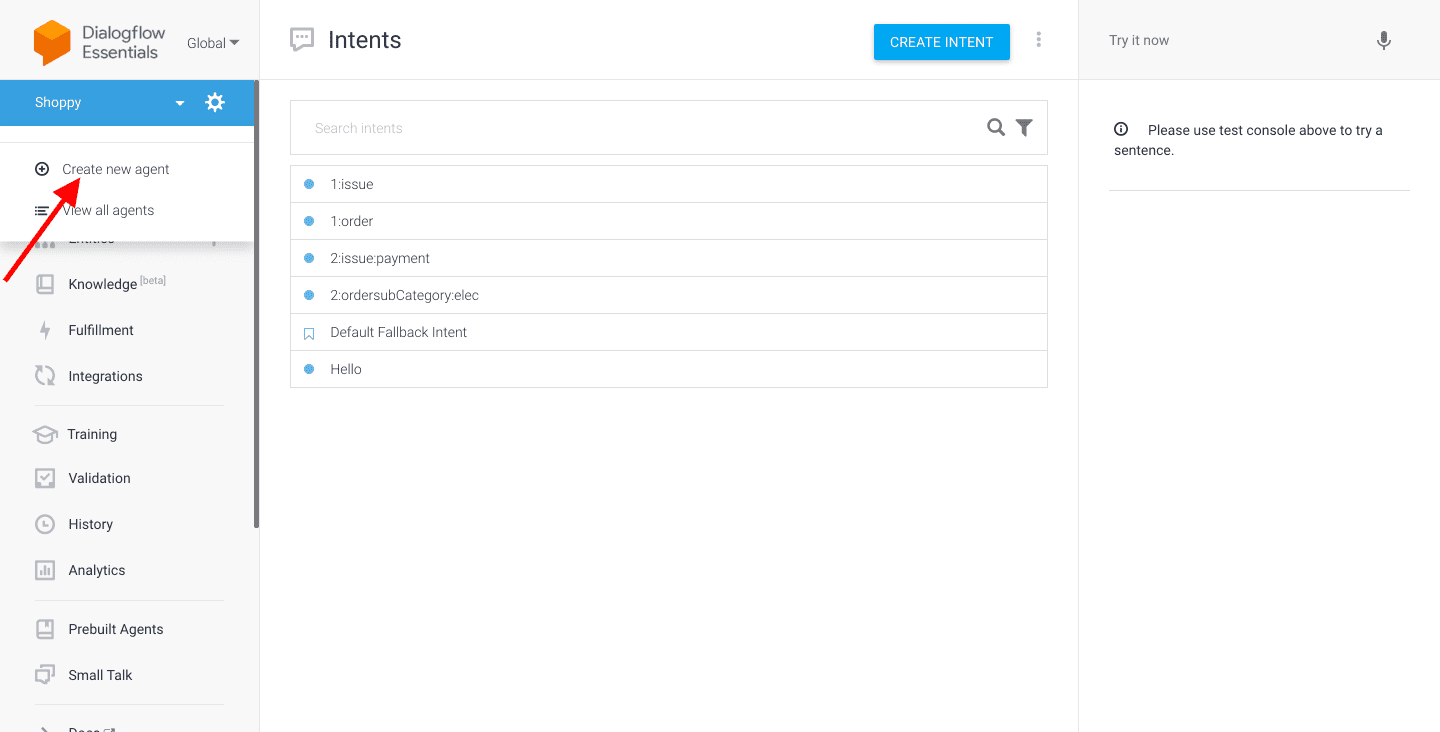
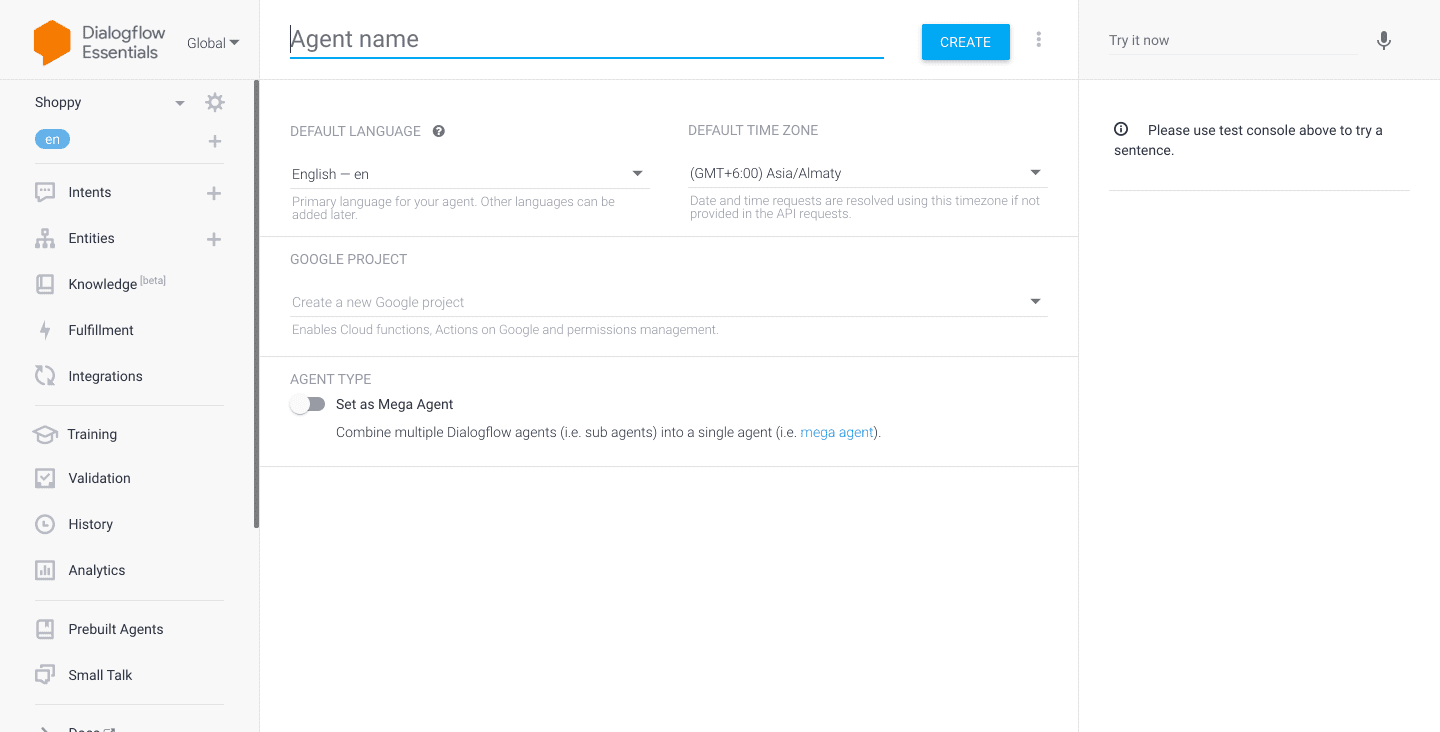
Step 1: Create a New Agent
- Create and sign in to your Dialogflow account
- Click on Create Agent in the navigation bar and fill in the required fields.
- Give a name and select language to your agent. Then, click the Save button.
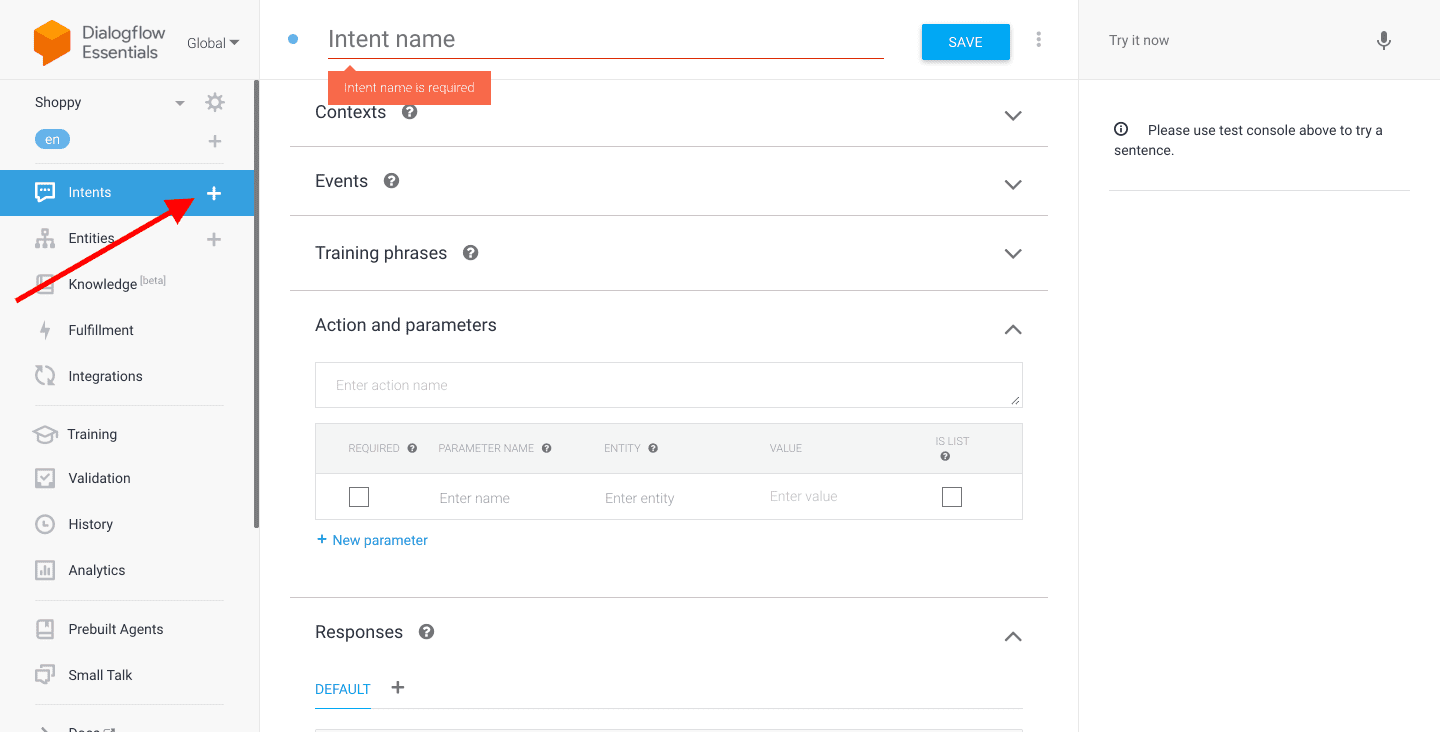
Step 2: Create an Intent
But first, what is an intent? An intent links what a user says with what your agent does. Dialogflow matches the end-user phrase to the best intent in your agent.
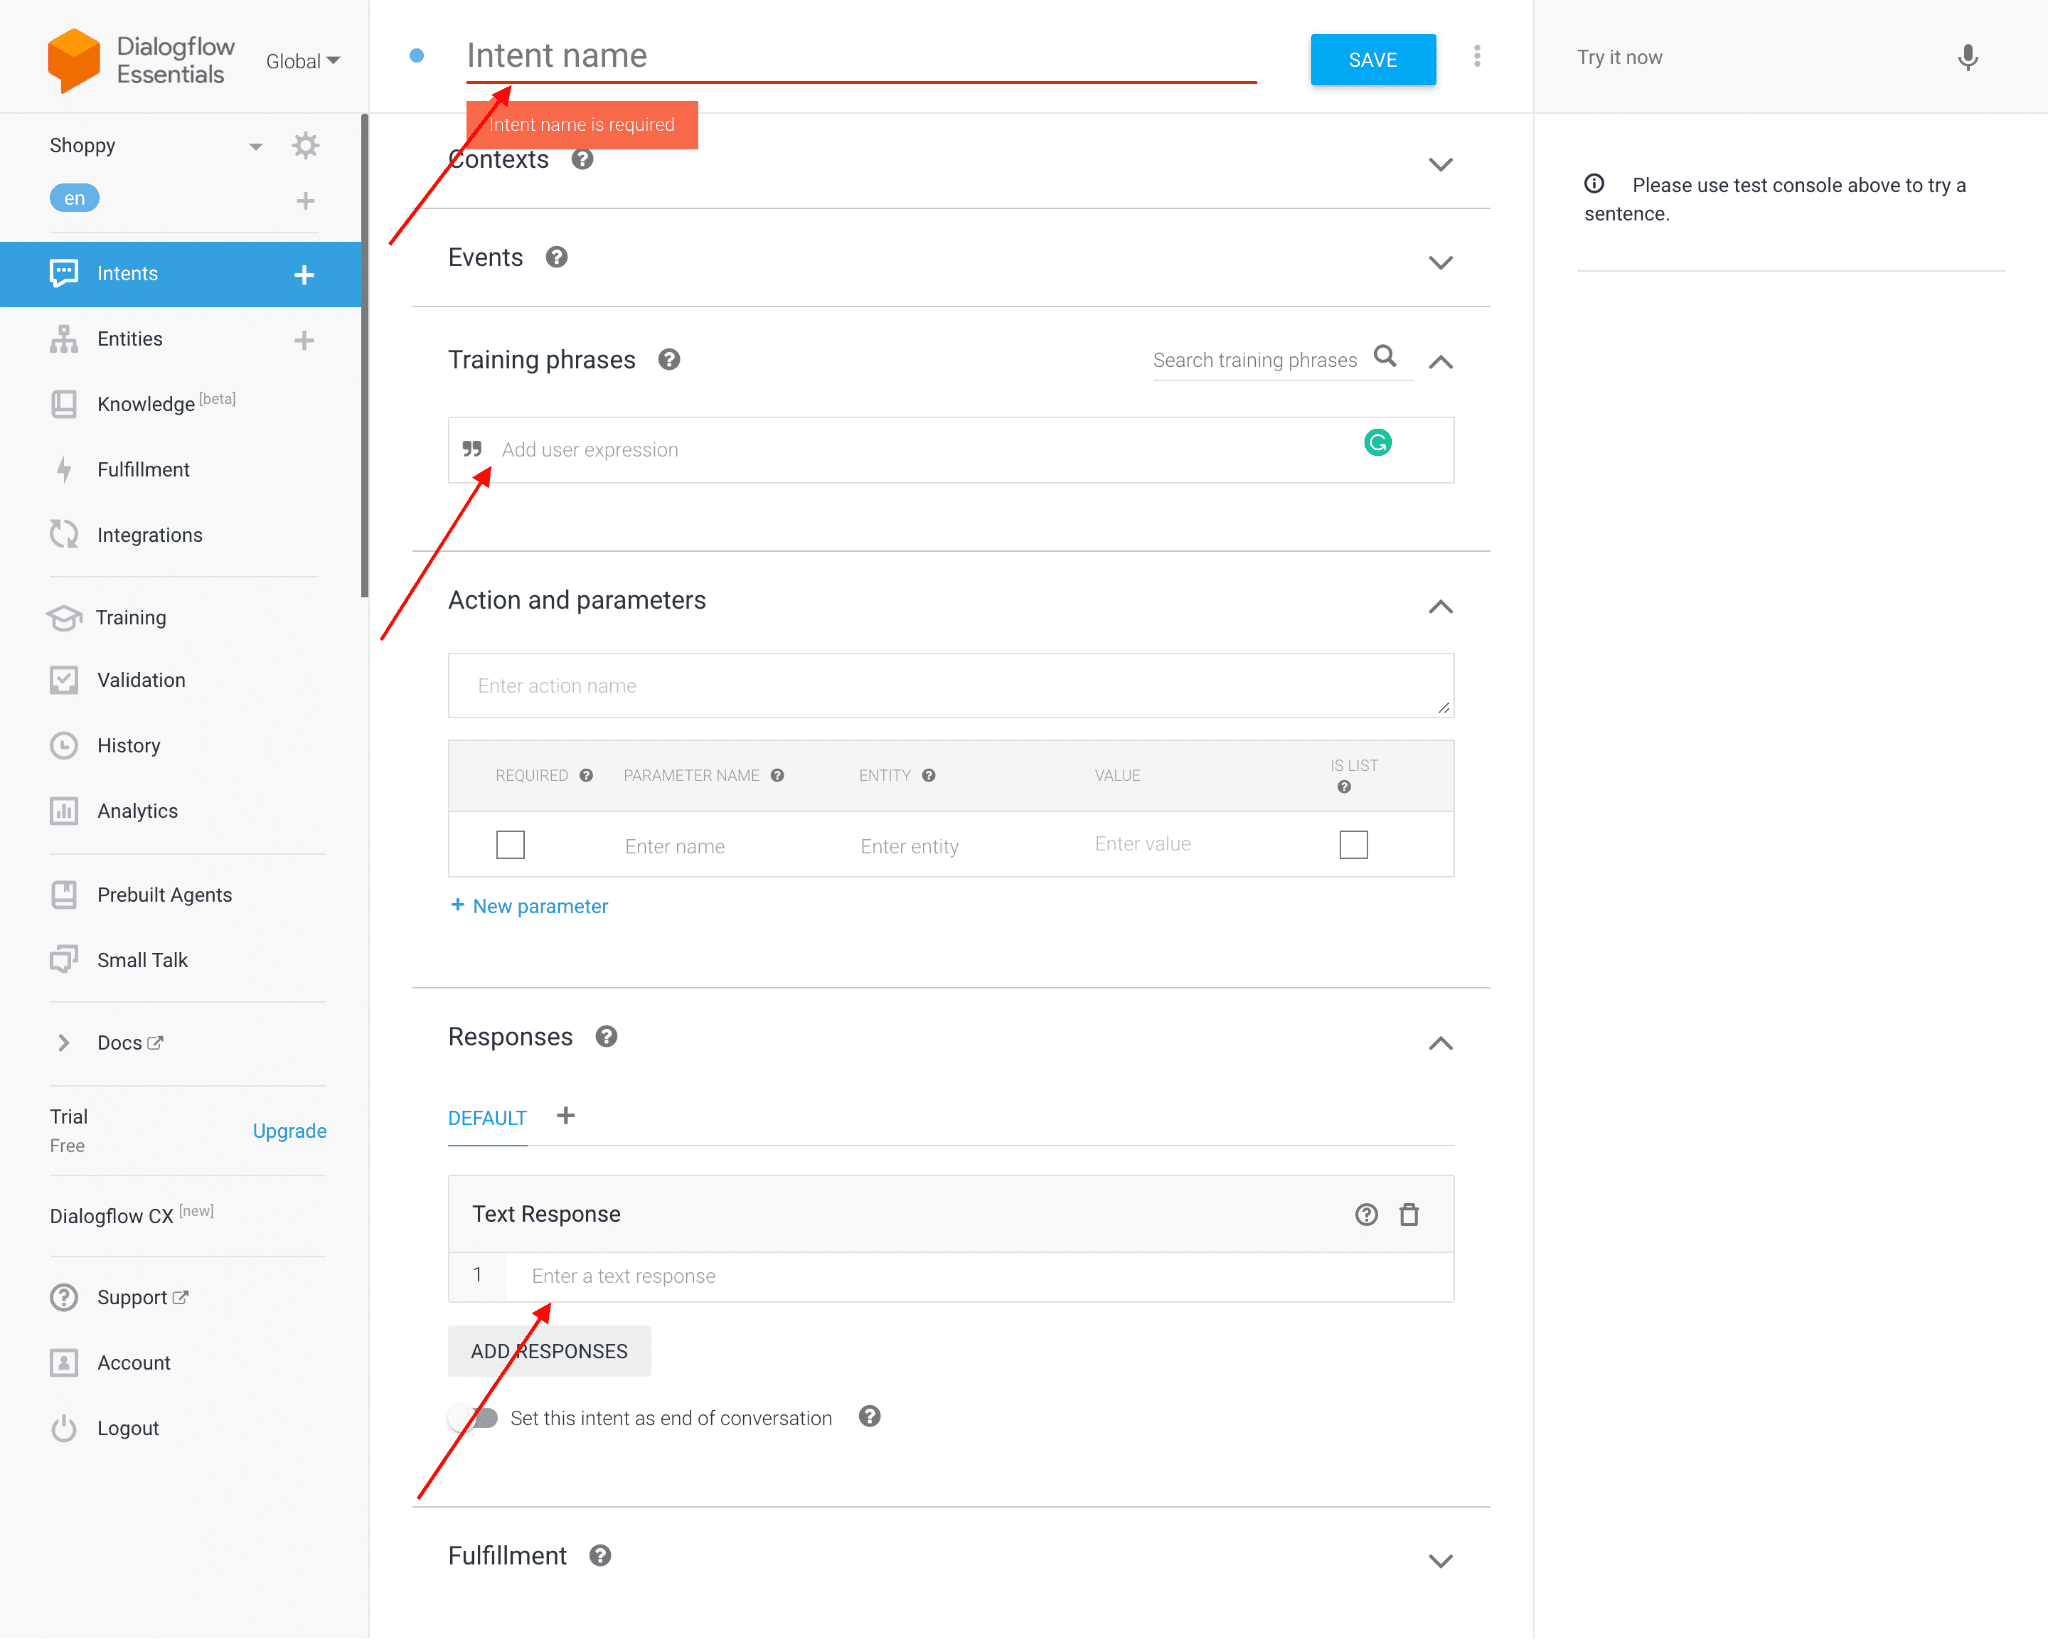
A basic intent contains the following:
- Training phrases: These are example sentences or phrases of what end-users might say. This should be updated in Dialogflow console by developer. When an end-user expression resembles one of these, Dialogflow matches the intent. You don't have to define every possible phrases, Dialogflows built-in ML handles other, similar example phrases.
- Responses: Developer defined text response in return to the end-user. These may provide the end-user with answers or ask the end-user for more selection or terminate the conversation.
To create an intent:
- Select the agent that you created in step 1
- Click on the Add button next to Intents in the menu.
- Enter a name for your intent.
- Enter Training Phrases
- Enter Response Test
- Click Save.
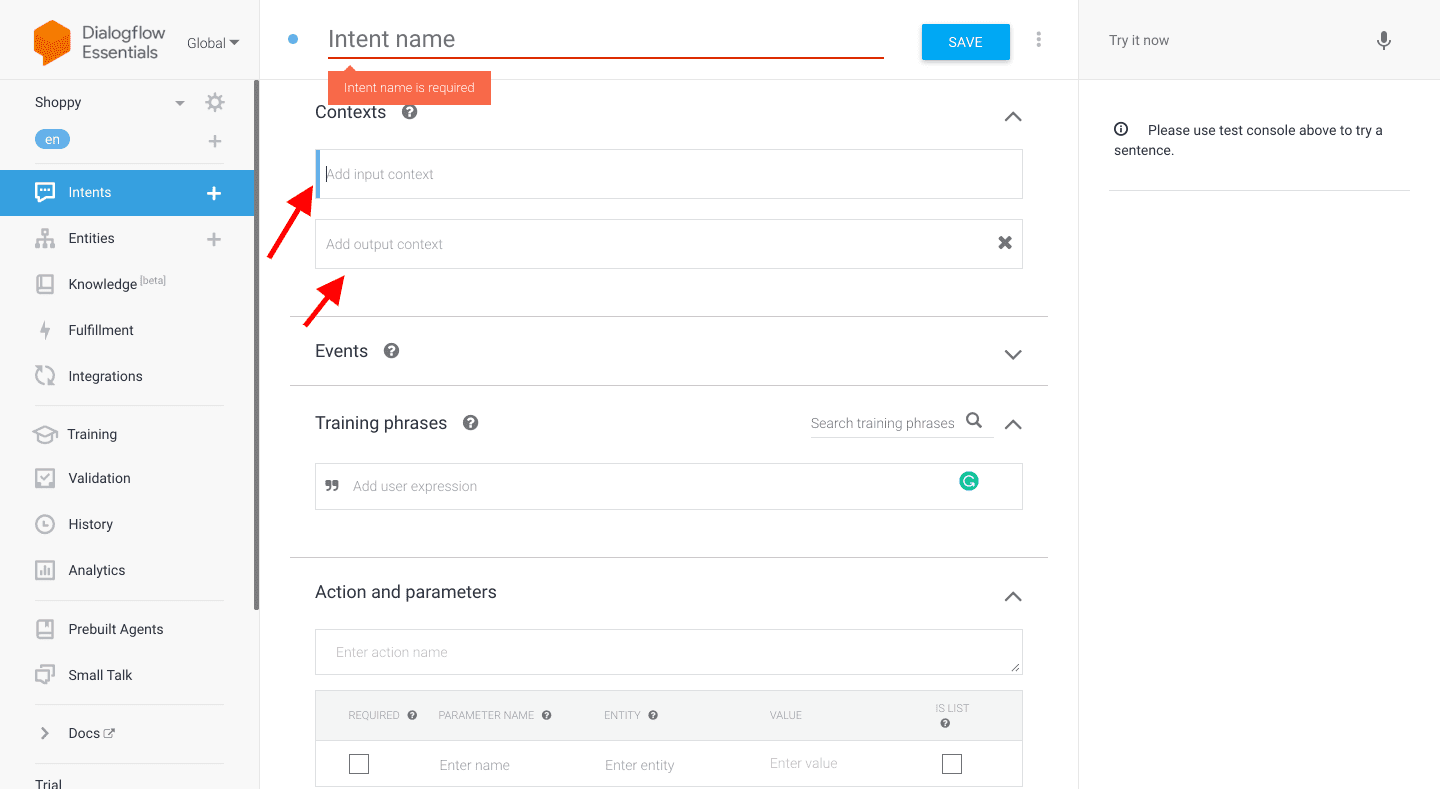
Context:
Dialogflow contexts are similar to natural language context. If a person says to you "they are green", you need context to understand what "they" is referring to. For Dialogflow to handle an end-user phrase like this, it needs to be provided with output or input context to accurately match an intent.
There are 2 types of contexts:
- Output contexts: control active contexts. When an intent is matched, any configured output contexts for that intent become active.
- Input contexts: control intent matching. While contexts are active, Dialogflow is more likely to match intents that are configured with input contexts.
Input and output contexts are applied to intents. They work together to control bot conversation flow.
Step 3: Integrating Drupal with Dialogflow
- Install the Drupal chatbot module from here.
- Enable Webhook for first intent and then click on Fulfillment in the left panel, enable webhook and enter the URL (for example: www.yourURL.com/assist). Click on Save.

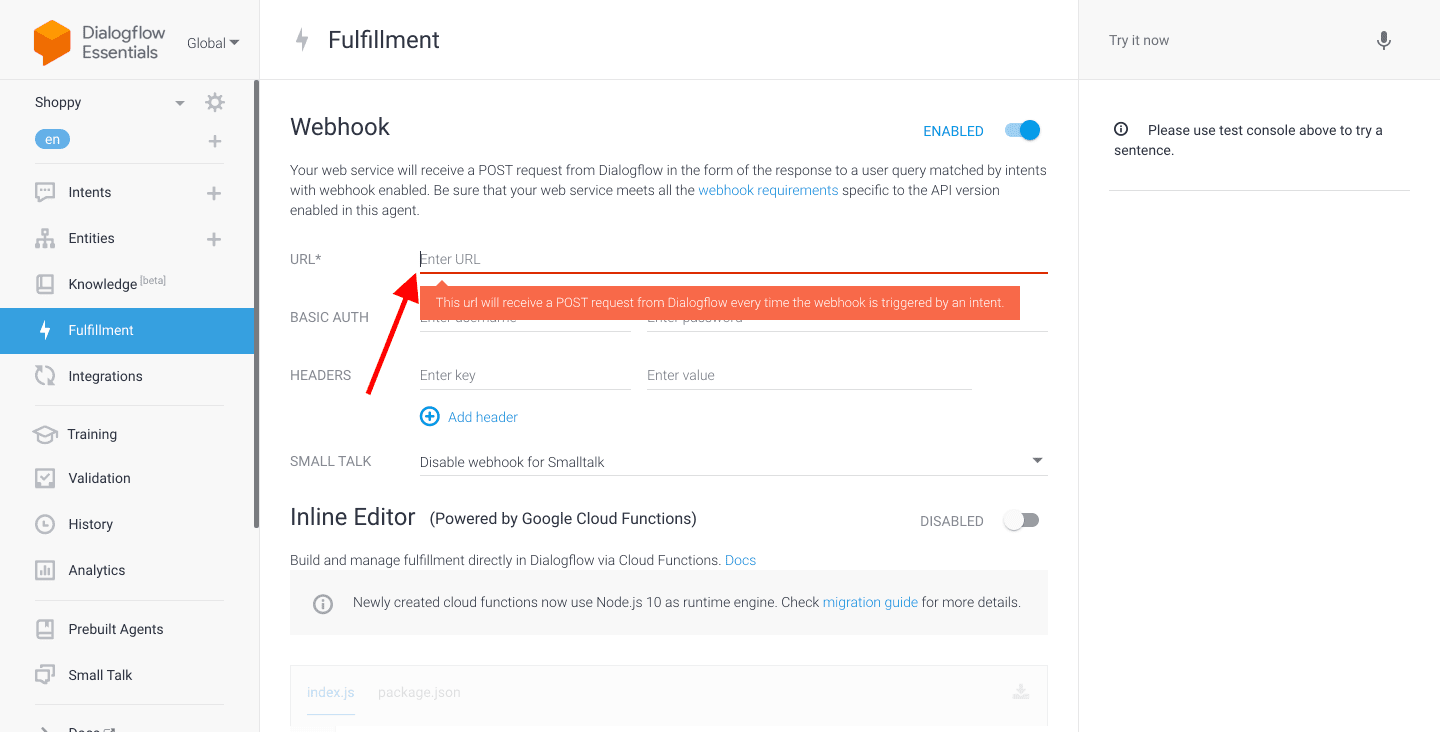
- Click on the settings icon beside the Agent name in the left navigation. Copy the client access token to be used in the Drupal module.
- Go to admin/config/services/chatbot-settings and fill in the client access token and other information required.
- Go to admin/structure/block and look for the "Chat Bot" block. Place the block wherever desired.