There are thousands of Drupal core and contributed modules to choose from, so why would anyone still want to build custom modules? The majority of the time it’s because website builders are looking for customized features to achieve specific functionalities or to stand out from the competition. For components that aren’t commonplace, a contributed or a core module does not always meet exact requirements. That’s when custom module development comes into play.
Thanks to Drupal’s flexibility, you can now create powerful custom modules to add functionality and logic to meet your unique business requirements. Read on to find an easy step-by-step guide on custom module development and also applying CSS assets on your Drupal 9 website.
Drupal 9 Custom Module Development in 5 easy steps
Here are some essential steps you need to follow to get started with creating a custom module in Drupal 9.
Step 1: Create a custom folder for your module

Drupal 9 file structure
Step 2: Choose a short name or machine name for your module
Some important rules to follow before you choose a name for your module:
- It must start with a letter.
- It must contain only lowercase letters, digits, and underscores.
- It must not contain any spaces.
- It must not be longer than 50 characters.
- It must be unique. Your module should not have the same short name as any other module, theme, theme engine, or installation profile you will use on the site.
- It should not be any of the reserved terms: src, lib, vendor, assets, CSS, files, images, js, misc, templates, includes, fixtures, or Drupal.
Let's name it: “hello_module”.
Step 3: Create a .info.yml file
Your .info.yml file holds the module information, compatibility, and dependencies information. The .info.yml file is created to notify Drupal about its existence in the system and provide information for the Drupal Web UI administration pages.
Our file name: hello_module.info.yml
name: Hello Module
type: module
description: 'First custom drupal 9 module'
package: custom
core_version_requirement: ^9 || ^10
The .info.yml file comprises 3 things: key, separator, value.
Where the key is the name, the separator is ‘:’ (colon) and the value is “Hello Module”.
Step 4: Create a Controller
Controllers are responsible for controlling the flow of the application and its logic. Controllers process user requests and determine the appropriate course of action. They can perform one or more actions and return different results to a particular request. The controller in our module is responsible for generating the body and sending it back to the page.
Now let’s create a file in a folder structured as /src/Controller/WelcomeController.php
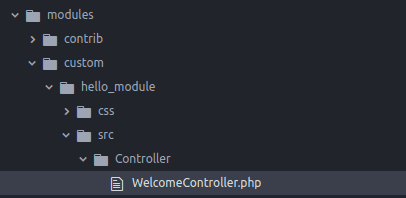
Our file name: WelcomeController.php
<?php

namespace Drupal\hello_module\Controller;

class WelcomeController {

  public function welcome() {

    $body = "Lorem Ipsum has been the industry's standard dummy text ever since the 1500s,
when an unknown printer took a galley of type and scrambled it to make a type specimen book.
It has survived not only five centuries, but also the leap into electronic typesetting,
remaining essentially unchanged. It was popularized in the 1960s with the release of Letraset
sheets containing Lorem Ipsum passages, and more recently with desktop publishing software
like Aldus PageMaker including versions of Lorem Ipsum.";

    return [
      '#markup => $body
    ];
  }
}
Step 5: Create a routing.yml file:
A route specifies the code that should be executed to generate the response when a URI is requested.
The .routing.yml file is created to define routes. Each route is defined as a machine name in the form of my_module_name.route_name (for example hello_module.welcome)
hello_module.welcome:
path: '/welcome'
defaults:
_controller: 'Drupal\hello_module\Controller\WelcomeController::welcome'
_title: 'Welcome to techX session'
requirements:
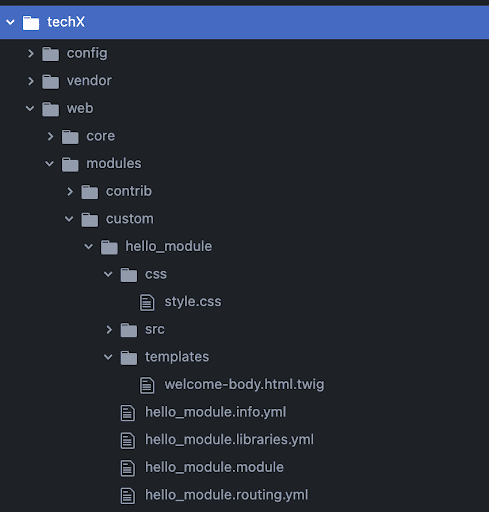
_permission: 'access content'This is how our overall hello_module module structure looks like:

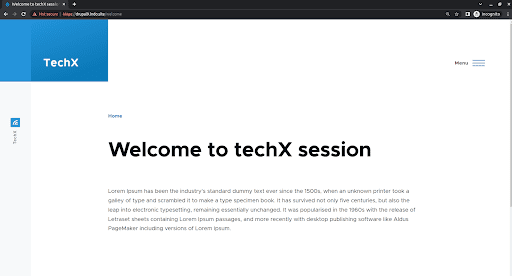
Finally, visiting /welcome will call the Controller that you created and will display the body with the title.
Result:
Attaching libraries to apply CSS
There are multiple ways to apply CSS to a custom module. One way would be to search for the class by inspecting the element and then applying the CSS to it. Another way is to create a template and add your own unique class and target that specific class. The latter is a better way than the former as you’ll have your own unique class and there will be no way that your change will apply to some other pages.
To create a library you need to create a new file as “module_name.libraries.yml” and place it in your custom module folder. You now need a CSS file in which you will write your CSS code. Create a folder called CSS and place “style.css” inside that folder. Now you will also need to create a custom template. Create a custom template as “welcome-body.html.twig” and place it inside the templates folder (as shown below).
Our file: hello_module.libraries.yml
custom:
  version: 1.x
  css:
    theme:
      css/style.css: {}
So now, Drupal doesn’t know that this template exists. To let Drupal know, you need to create a “module_name.module” file for any custom changes and use hook_theme() for the implementation.
Our file name: hello_module.module
function hello_module_theme() {
  return [
    'welcome_body' => [
      'template' => 'welcome-body',
      'variables' => [
        'body' => 'Default body text'
      ]
    ]
  ];
}
Our template file: welcome-body.html.twig
<div class="welcome-body">
<p class="body-text"> {{ body }}</p>
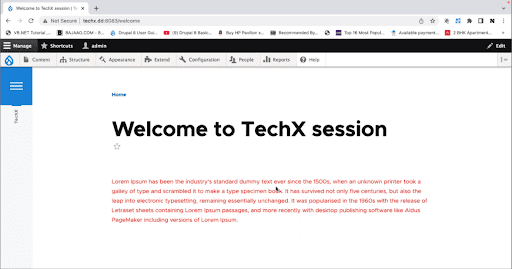
</div>Now, let's add red color to the body text of our template and target the “body-text” class in the template.
Our CSS file: style.css
.body-text {
  color: red
}
Now, you need to attach the library to our controller and call the theme inside it so that the custom template is called.
namespace Drupal\hello_module\Controller;

class WelcomeController {

  public function welcome() {

    $body = "Lorem Ipsum has been the industry's standard dummy text ever since
    the 1500s, when an unknown printer took a galley of type and scrambled it to
    make a type specimen book. It has survived not only five centuries, but also
    the leap into electronic typesetting, remaining essentially unchanged. It
    was popularized in the 1960s with the release of Letraset sheets containing
    Lorem Ipsum passages, and more recently with desktop publishing software
    like Aldus PageMaker including versions of Lorem Ipsum.";

    return [
      '#theme' => 'welcome_body',
      '#body' => $body,
      '#attached' => [
        'library' => [
          'hello_module/custom',
        ],
      ]
    ];

  }
}
Here’s the result after applying the CSS:
Final Thoughts
Flexibility to create custom modules that add specific functionality unique to a business requirement is one of Drupal’s power features. Custom modules allow you to extend Drupal’s core functionality and add new features and logic to a website. We hope this article will help you create your first custom module on Drupal 9. If you found this useful, consider subscribing to our weekly newsletter where we churn out great stuff every week and send it straight to your inbox!
If you’re looking for a Drupal development agency that can help you build custom modules to accommodate your growing business needs, we’d love to talk!