Being an open-source content management system, Drupal encourages contributions from the community of developers and users worldwide in various forms. It could be in the form of code which includes patches to core and contributed projects, in non-code ways including marketing, documenting, event organization or by monetarily supporting the project. This article will walk you through everything you need to know to start your Drupal code contribution journey from scratch.
Why Contribute to Drupal
Of course, giving back to a project that supports the way you work and probably live every day might be a strong enough reason for you to voluntarily contribute and improve the open source project. But if you’re looking for a little more incentive to contribute, here are some of the benefits we’ve seen:
- Your contributions help Drupal stay relevant and up-to-date with the advancements happening in all its dependencies over time
- You can gain more knowledge about Drupal which in turn will enable you to build better applications for your clients
- It gives a competitive edge to the organizations that sponsor time for contribution as their developers are gaining more skill and knowledge and by showcasing themselves as an expert
- Collaborate and meet with people who share the same interests as you
How to Contribute
To begin with, create an account on drupal.org for yourself and update your profile with the required details.
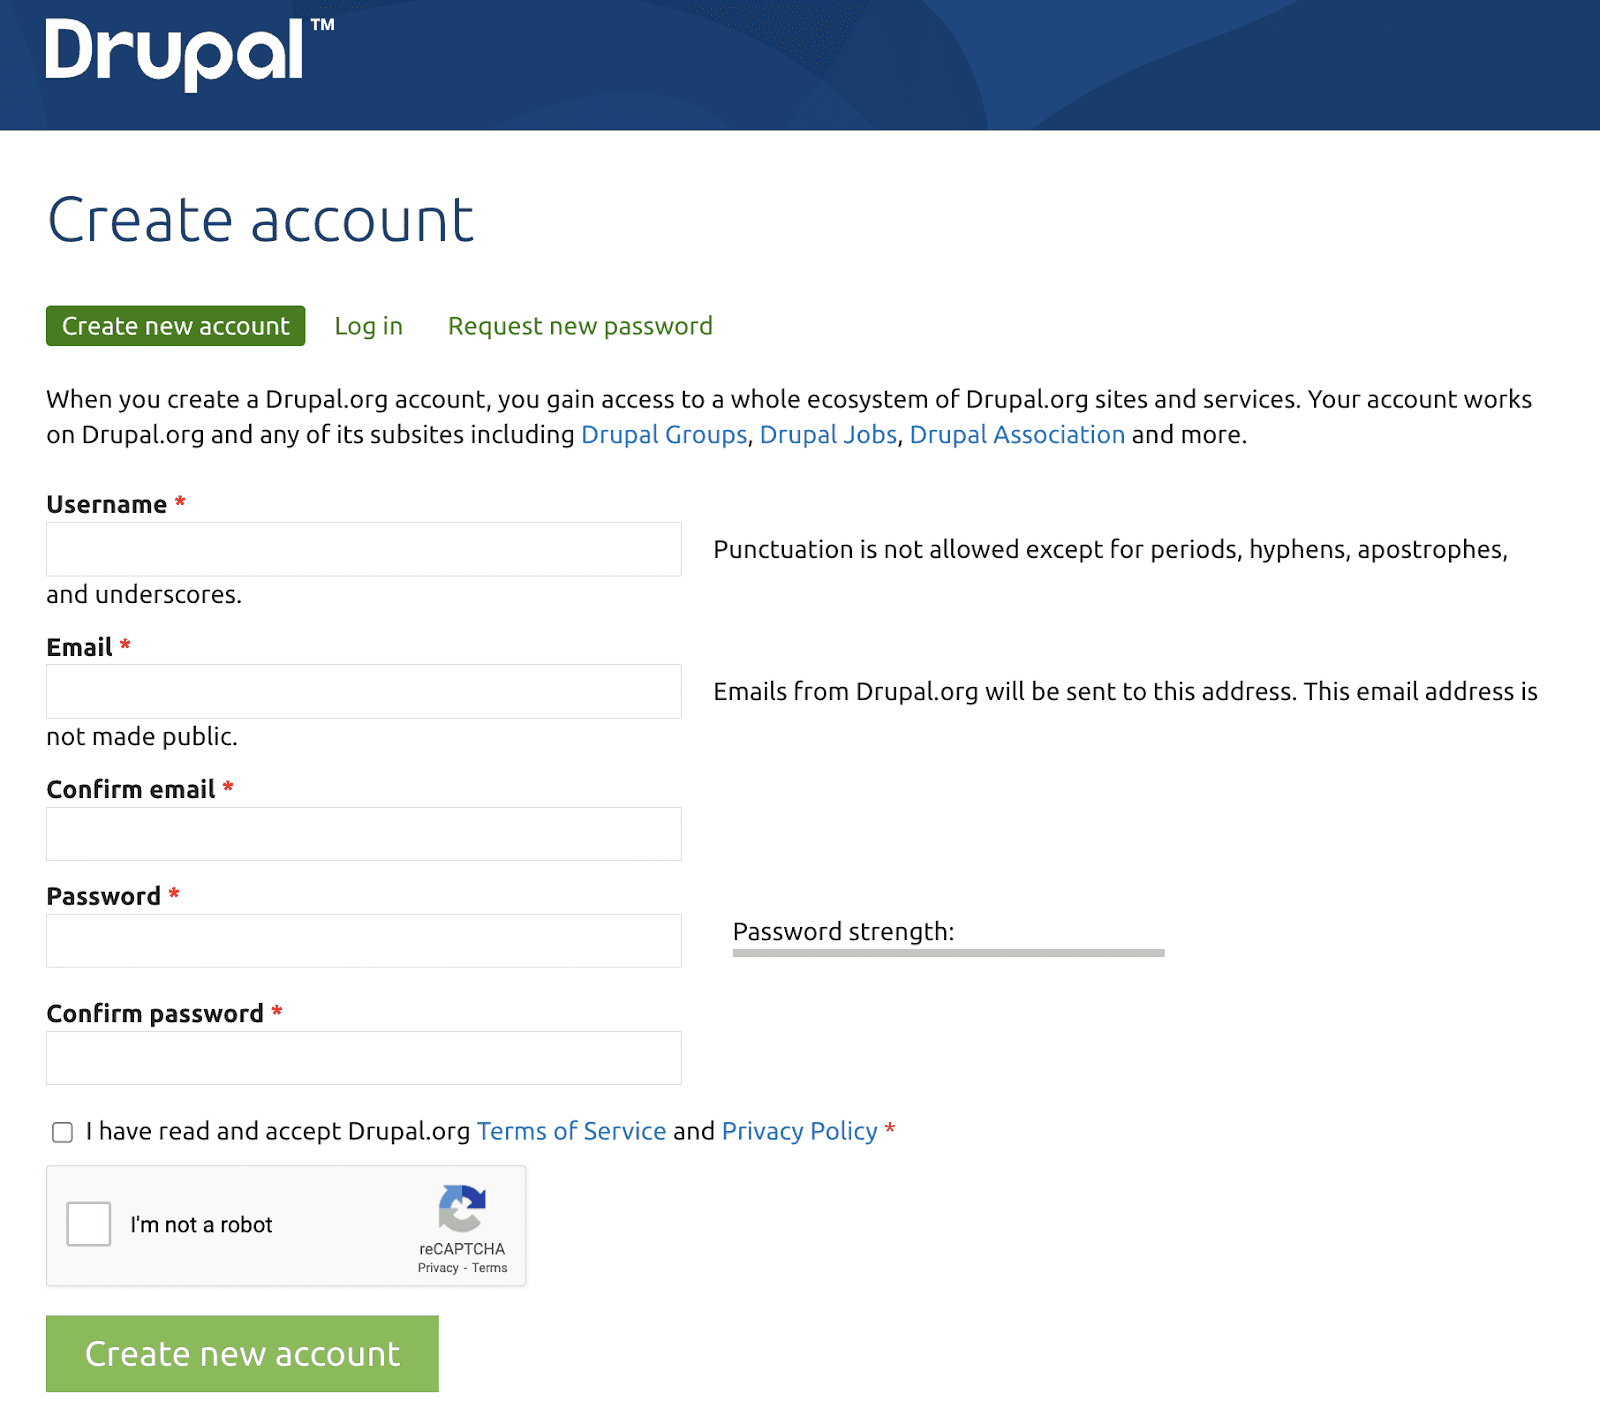
Account creation on Drupal.org
Look for an Issue
Once the account is created, the next step would be to find the right issue. It might vary based on your interest:
1. You could find an issue from the issue queue - https://www.drupal.org/project/issues. For more specific searching, you could click on the ‘Advanced search’ and use the filters.
- Issue tags - Issues are attached with different tags. The “novice” tag indicates that the issue needs a simple fix and any beginner could choose it, the “Needs documentation” tag indicates that this issue needs some documentation change, and so on.
- Issue status - Once the issue is created it goes through different states. Based on the current issue status, you could decide the next steps it needs to move forward.
- Issue priority - It defines the priority of the issue, whether it’s a critical bug or it could be a minor fix.
- Issue category - It indicates the category of the issue, whether it's a bug, or is it a task, or it could be a new feature request to the project.
- Specific project - Here you could directly specify the project that you are interested in.
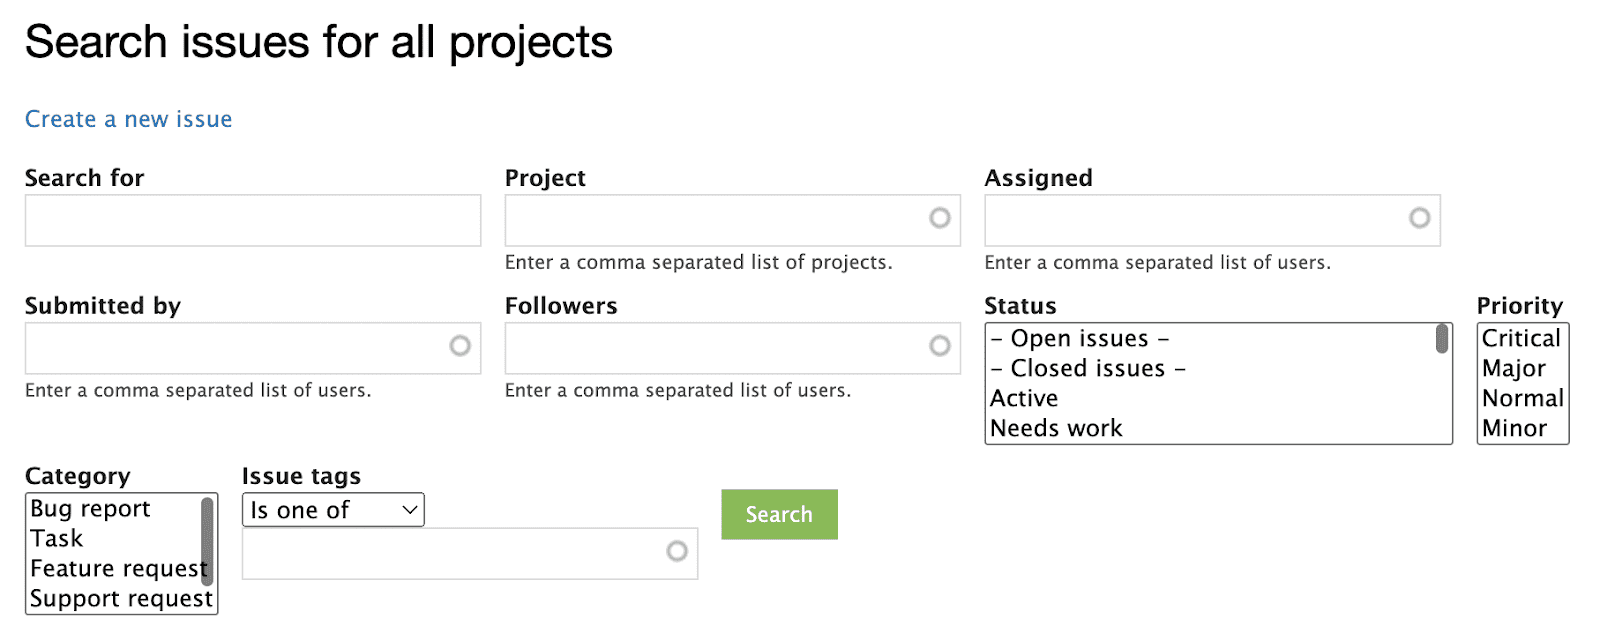
Issue filters
2. Or start from the project you were always interested to work on, by visiting the module/theme/profile page - https://www.drupal.org/project/<project_name>. In the right sidebar, look for “All issues” link - https://www.drupal.org/project/issues/<project_name>?categories=All
3. Or work on a bug that you came across in core, or any contributed modules/themes/profiles while working on a project. It’s also the right way to contribute. One should always practice keeping their “contributor mode” ON even while working on projects, this gives an opportunity to explore and contribute a fix to hidden issues!
Life Cycle of a Drupal Issue
Once an issue is created, it goes through different states. The following are the different issue statuses you will come across:
- Active - When a new issue is created, it is in an Active state.
- Needs review - Once the issue is picked, the patches are successfully submitted and all the test cases are passing, the issue’s state should be changed to Needs Review.
- Needs work - When the issue needs to be worked upon, it is in a Needs Work state.
- Reviewed & tested by the community - Once the issue is reviewed by any contributor, the issue is moved to the “Reviewed & tested by the community” (RTBC) state where one of the members from the core community team reviews the issue.
- Fixed - When an issue passes from the RTBC state, it is moved to the Fixed state.
- Closed (fixed) - After the Fixed state, the issue moves to Closed (fixed) automatically within two weeks. This is the last state of an issue.
- Closed (duplicate) - When any issue gets created which is a duplicate of any earlier one, it directly gets closed as Closed (duplicate).
- Closed (won’t fix) - This state represents that an issue has no solution.
- Closed (works as designed) - This state represents that an issue raised is providing the functionality what it was supposed to and so moved to “works as designed”. In other words, the issue raised is not a bug but a feature.
- Closed (cannot reproduce) - When an issue is not reproducible is moved to this state.
- Closed (outdated) - When an issue is either too old to fix or gets fixed within some other module’s issue, the state can be Closed (outdated) for that issue.
- Patch (to be ported) - When a Patch is to be ported for other versions of the Drupal/Contributed module.
- Postponed - When the Issue/Feature/bug is postponed by the author/community and doesn’t need a fix.
- Postponed (maintainer needs more info) - When an issue is raised but according to the maintainer of the Contributed module, more info is needed about the issue to get it fixed.
Create an Issue
To create an issue for the module. Go to the issue queue of the module https://www.drupal.org/project/issues/<project_name>?categories=All and click on Create a new issue.
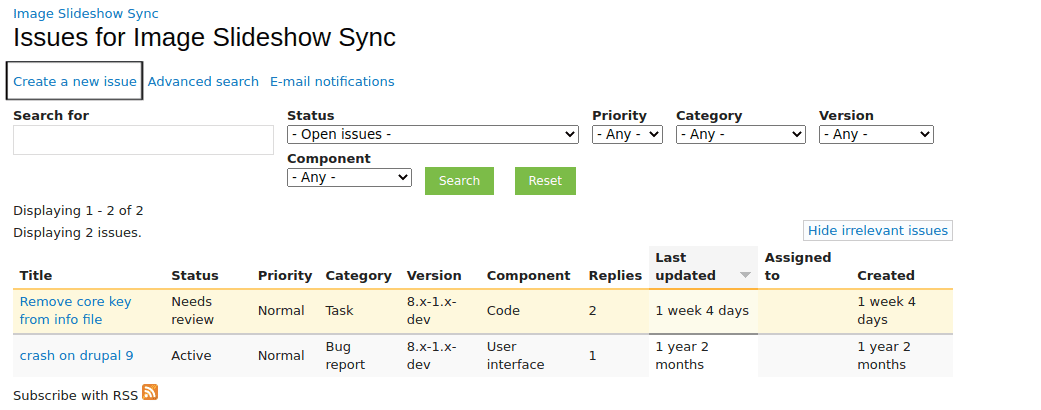
The next step is to give details of the issue that needs to be created.
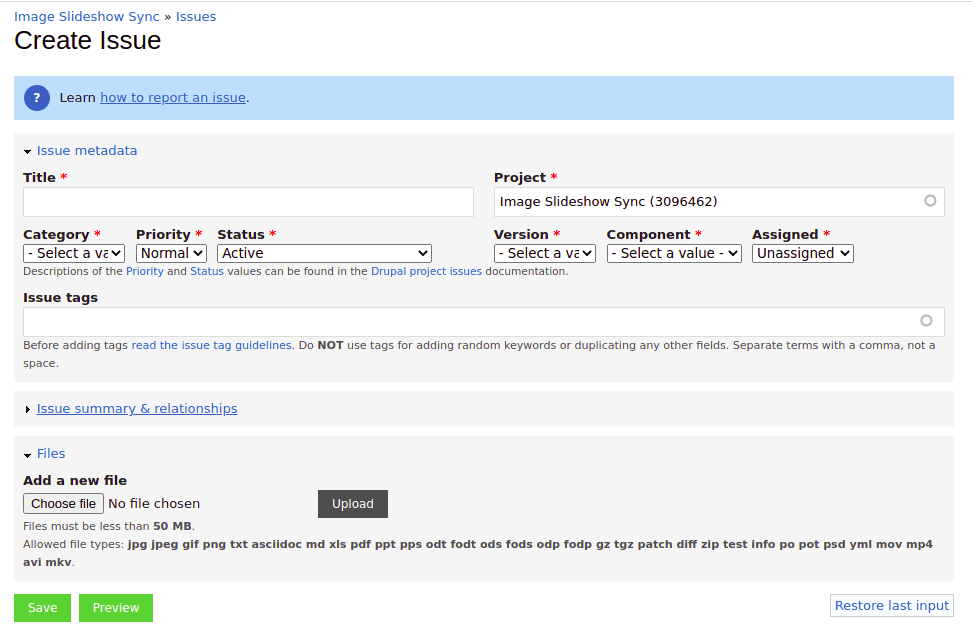
1. Title: Add the title of the issue.
2. Project: The project name will be auto-selected.
3. Category: Select the category of the project. There are 5 category
- Bug: A bug is a functional error in the system. For example, php error, data loss, memory leak, Incorrect or misleading documentation, Incorrect or misleading user interface text etc.
- Task: These are not a functional bug but “needs to be done” before the release. For example Refactoring code to make it more readable, and maintainable, Adding automated tests, Updating code to new APIs, Improving coding standards etc.
- Feature request: This is a request for completely new functionality to be added to the module.
- Support Request: If we need help on any part of the module or want to know about the drupal core functionality. We can tag support requests and add the question.
- Plan: This tag is used when you have a problem that can not be resolved using one issue. Plan issues will often have multiple sub-steps related to "child" issues.
4. Priority: Select the priority of the issue. Here we have Critical, Major, Normal and Minor. Choose normal unless it's really serious. Or you can select it as normal and let the maintainer or reviewer can change it as required.
5. Status: Select Active for new issues.
6. Version: Select the version of the project in which the issue has to be fixed.
7. Component: Select the nearest match to the issue. These can be changed later. The components here are based on the module. The options defers from module to module.
8. Assigned: The issue can be assigned to anyone. It is not mandatory and can be assigned later.
9. Tags: Tag the issue with appropriate tags. This can be left empty if we don't have knowledge of issue tags. This is not mandatory and can be tagged later.
10. Issue summary and Relationships: Expand the field and we have the editor add the details of the issue. There are some predefined headings in the editor and we can replace them if we don't want them in the issue details.
- Parent issue: To tag the parent issue.
- Related issue: To tag the related issue.
11. Files: We can add the files related to the issues or we can upload the patch to the issue while creating under files. And save the issue.
After saving the issue. The created issue will be added to the issue queue of the respective module.
To create an issue for the drupal core https://www.drupal.org/node/add/project-issue/drupal is the link. And the steps will same as creating the issue in the module. But there are some guidelines to create a core issue which will be displayed on the above link.
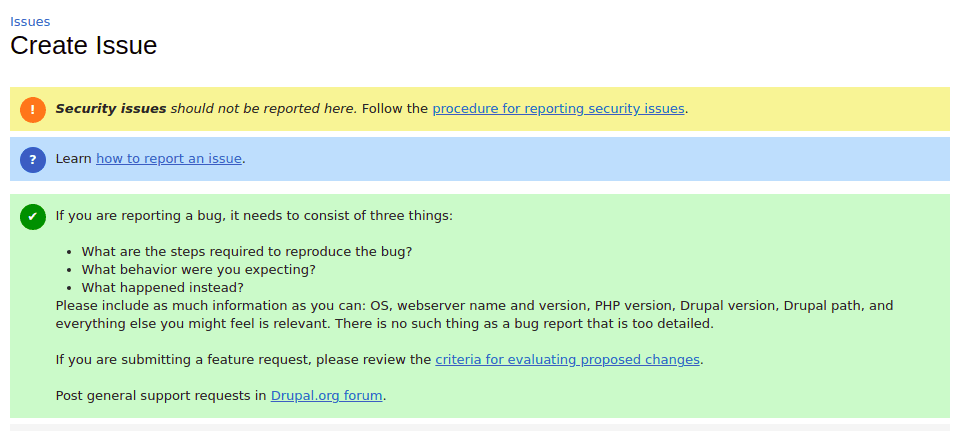
These are the guidelines to be followed while creating the core issue.
Create a Patch
There are 2 cases here
- Create a new patch
- Update the existing patch.
To create a new patch
- Go to the version control tab of the module. https://www.drupal.org/project/ <project_name>/git-instructions is the link to the page.
- Select the branch to work and click on the Show button.
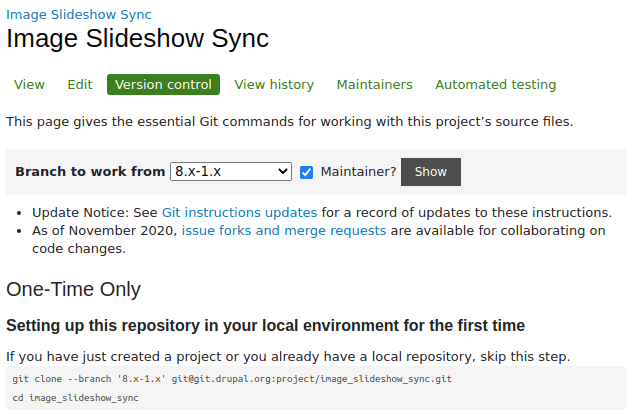
Clicking on the show button will get you the git command, copy and run the command in your terminal and change the directory to the cloned module.
- Do the changes to fix the issue.
- The command to create the patch is:
git diff > <issue-description (optional)>-<issue-number>-<comment-number>.patch
- Issue description will be the title of the issue, where all the letters should be lowercase and space must be filled with underscores. This is optional.
- The issue number will be in the URL of the issue. This will be unique for the issues this will be mandatory in naming the patch file.
- The comment number is the latest comment id in which the patch will be uploaded.
Consider you need to add a new file to the patch. The new file will be untracked and the command git diff will not track the file.
To add a new file to the patch
- Add the new file using the git add command
- Run
git diff HEAD > <issue-description (optional)>-<issue-number>-<comment-number>.patchTo update an existing patch
1. Clone the project to which you need to add the patch.
2. Goto the issue page right click on the patch link and click on Copy address link.
3. Download the patch to your local using the curl or wget command.
To download the patch using the curl command:
curl -O <paste the address link of the patch>
4. To apply the patch run the command:
git apply <patch name>
5. After applying the patch you will get the changes of the patch in your local. Add the further changes required to the patch and create a new patch.
When we are updating the existing patch we need to create an interdiff file. Interdiff file is nothing but a difference between the old patch and the new patch. This will help the reviewer to know the changes done in the new patch.
The following is the command to create an interdiff:
interdiff <old-patch> <new patch> > interdiff_<old-patch-comment-number>-<new-patch-comment-number>.txtConsider you have an old download patch 3302030-2.patch and a new updated patch you have created 3302030-3.patch. To create the interdiff between these two files, the command would be:
interdiff 3302030-2.patch 3302030-3.patch > interdiff_2-3.txtSubmit a Patch
After creating a patch we need to submit the patch.
To submit the patch go to the issue page.
1. Issue metadata
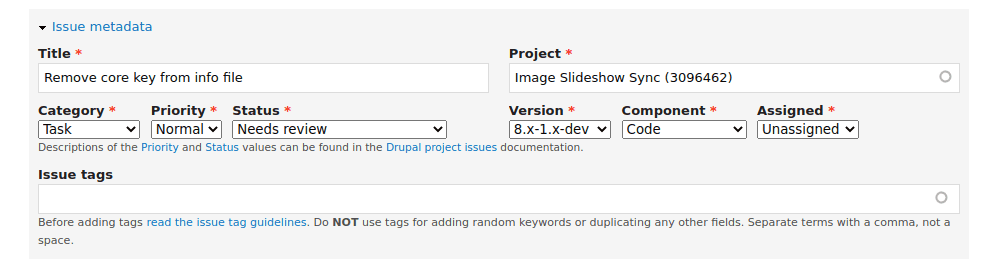
In the issue metadata, change the status to the needs review. Unassign the issue if the issue is assigned to you and add or remove the tags as needed.
2. Attribute this contribution

Check the relevant options and add the organization if you are working for any organization. Adding this the credits will be given to the organization along with you when the issue gets fixed.
3. Add a description of the changes done in the patch under the comment section.
4. Choose the patch file, interdiff file and upload it under files.
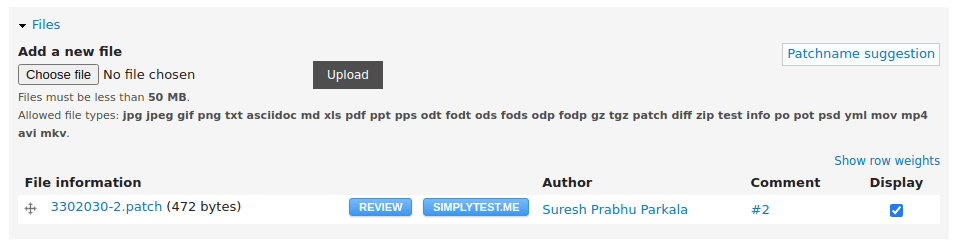
Here we have added the files one by one and hit on upload after choosing the file. Clicking on upload the file will be uploaded and gets added to the list below.
NOTE: Interdiff is not required while adding a new patch.
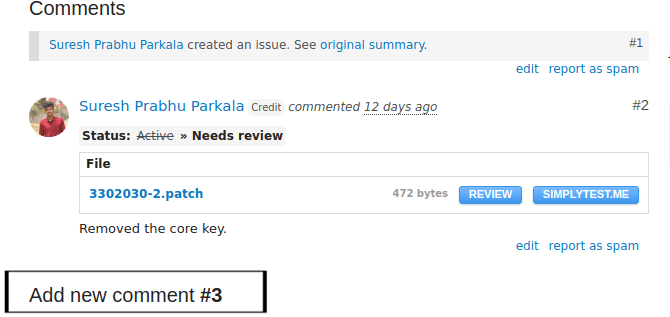
5. After uploading the file click on the save button. This will update the issue page and we can see the patch uploaded with a new comment number.
Patches for core issues should be submitted using the same procedure.
Review a Patch
Now you know how to look for an issue, create a patch and upload it. What’s next? How can we make sure that the right patch gets committed ASAP? Reviewing a patch is an equally important step in moving the issue forward. If you feel that writing lines of code aren't your thing, then why not try reviewing the existing patches?
Before we begin, would highly recommend adding Dreditor extension to your browser.
Dreditor extension
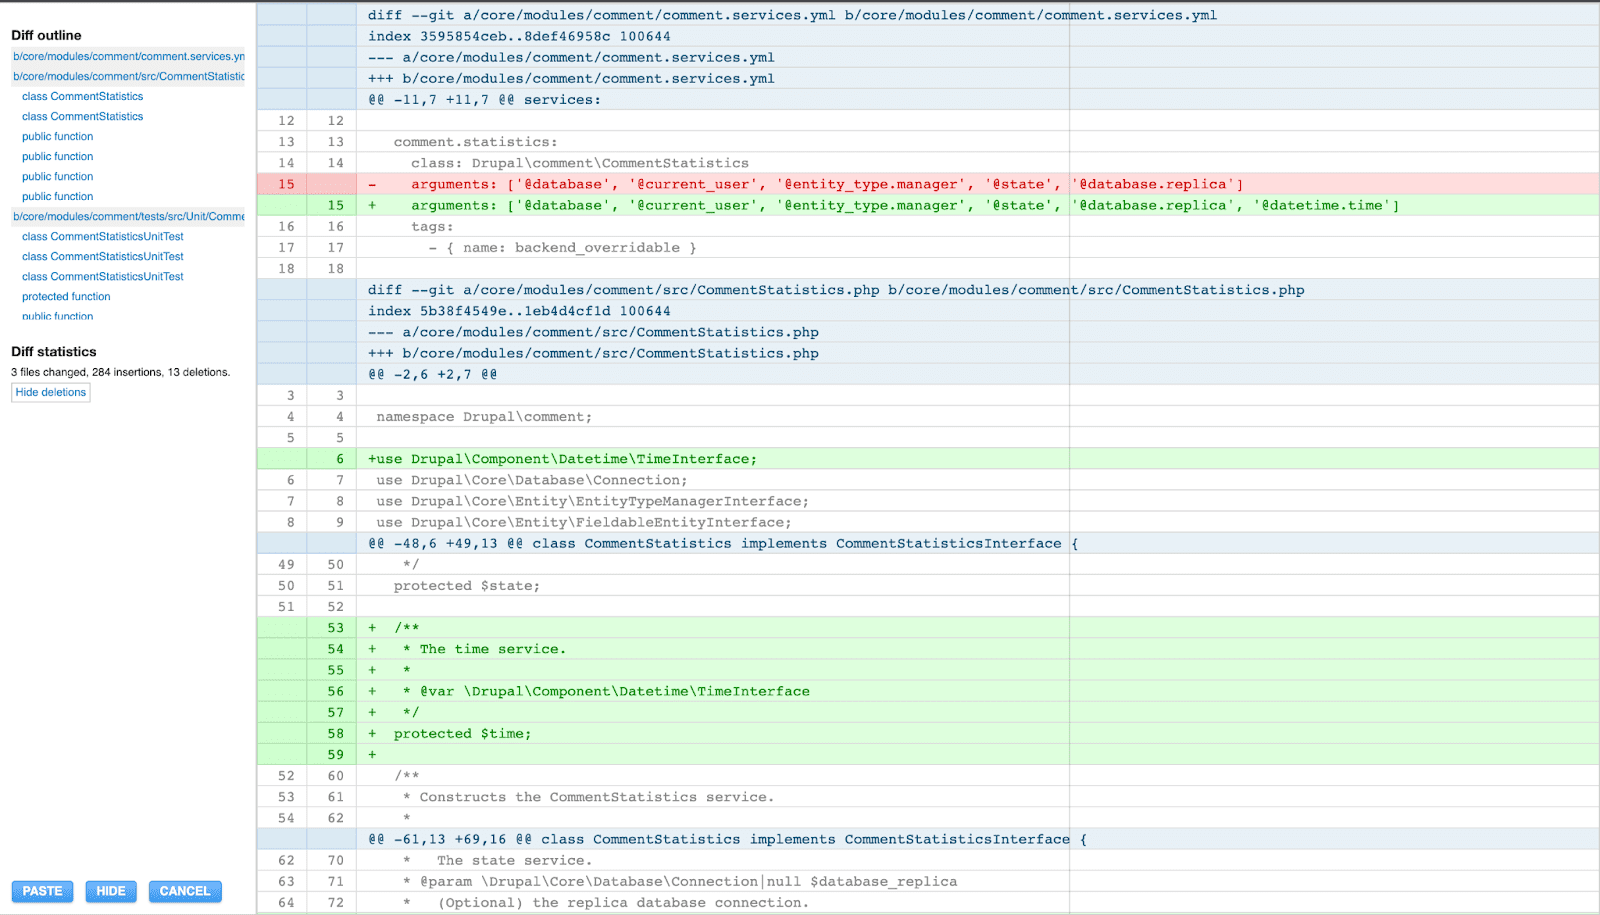
It provides you with a ‘Review’ button for the patch/interdiff files. On click, it displays the changes in an easy-to-read format.
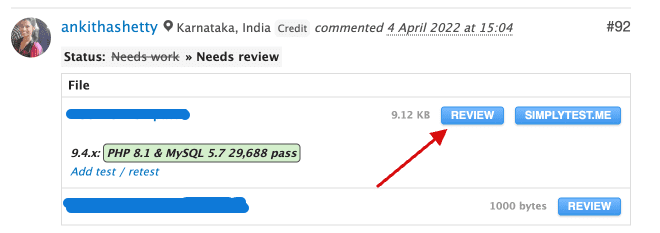
‘Review’ button from Dreditor
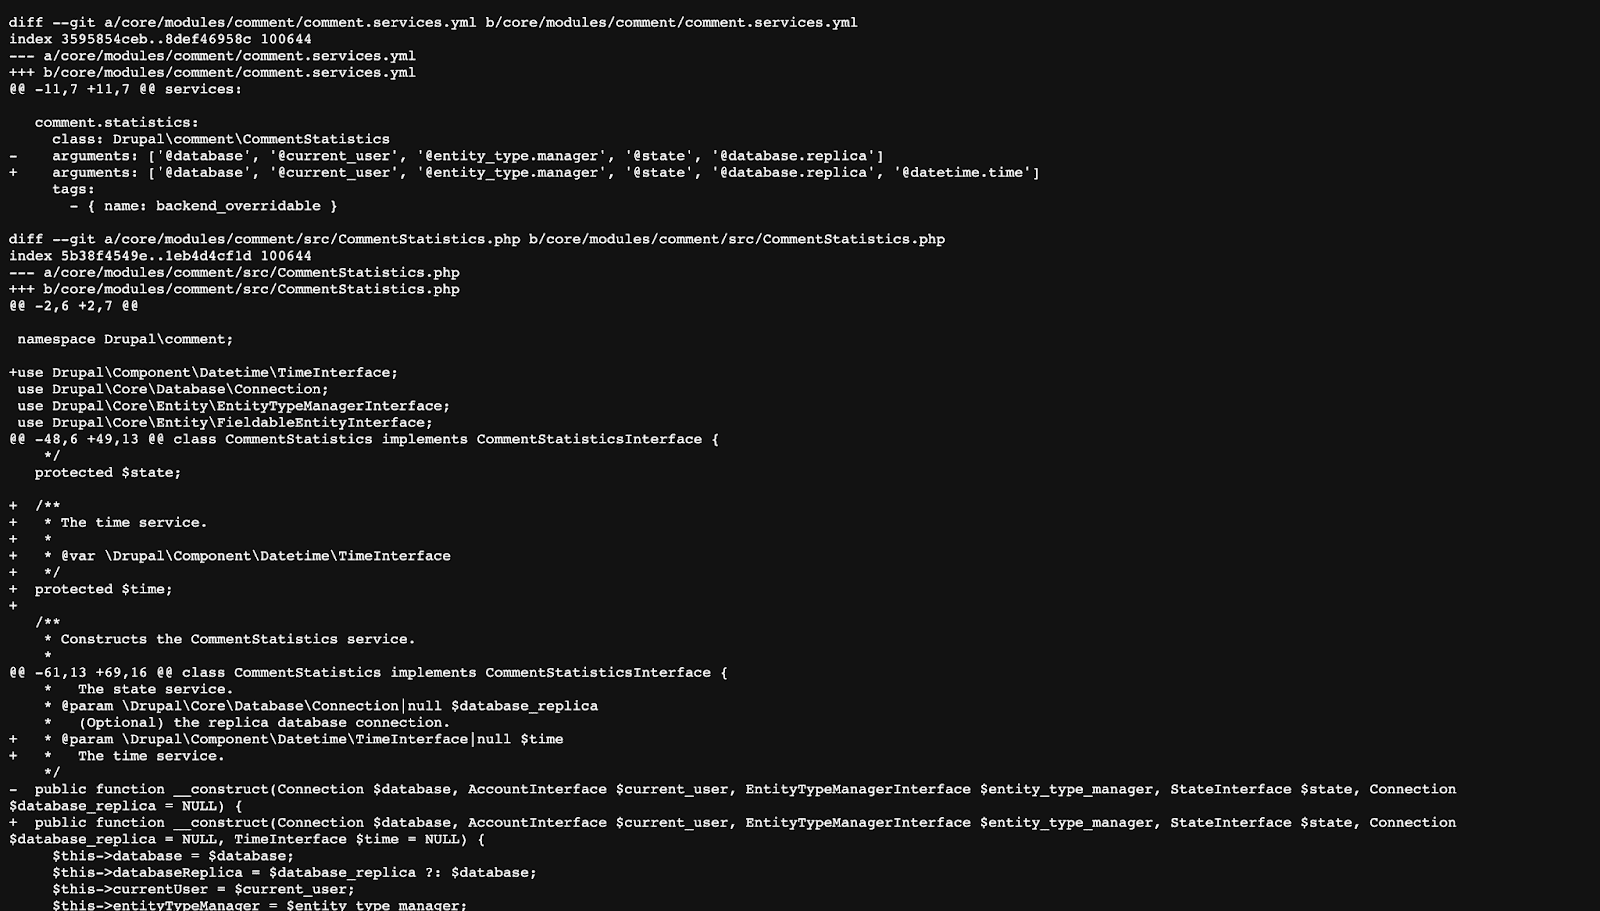
Patch file changes without Dreditor
Now we are all set to find an issue for reviewing!
- Filter the issues with the status ‘Needs Review’.
- Take your pick from the list.
- Read through the comments & pick the latest patch uploaded in the issue.
- Make sure the patch has passed the test cases and has turned green.
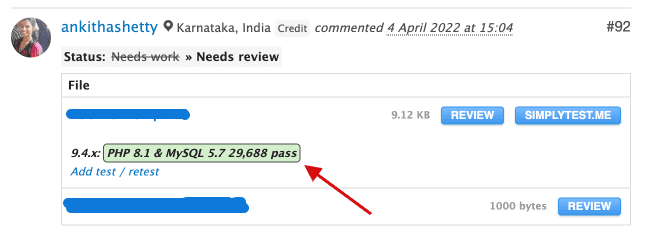
Patch that passed the tests
- Download the patch file and apply the patch on your local into your core/module/theme/profile by running:
git apply <patch-file-downloaded> -v- Test if it’s working as per expectation/needs some work.
- Change the issue status and add comments with images/videos supporting your points. Your comment should have details like, whether the patch applied to the latest version, what steps were followed to reproduce the issue, issue behavior before & after applying the patch etc.
- If all looks good, change the status to ‘RTBC’.
- If there is any scope for some extra work/changes, update the status to ‘Needs Work’.
Other ways to Contribute
Other than code contributions, the Drupal project has many areas that you can contribute to including improving its quality and reach. You can choose your method of contribution to this community based on your interests. Some of the contribution areas::
- By Mentoring - If you have some experience contributing, you can help others get started by becoming a mentor, either online or in person.
- To Documentation - All of the documentation for the Drupal Project is freely contributed by people all around the World, just like you.
- Knowledge Sharing - An important way to contribute to the Drupal project is by sharing your knowledge about Drupal by writing blog posts, giving a presentation at your local Drupal Group meetup, a DrupalCamp, or a DrupalCon, becoming a trainer, etc.
- Event Planning - By organizing or volunteering in virtual or in-person Drupal events like meetups, sprints etc.
- By Marketing - You can work with other marketing teams around the globe to create Drupal-branded marketing and sales materials that can be shared and used by everyone selling Drupal services.
- By contributing Modules/Themes - Collaboration on Drupal projects including modules, distributions, and themes is an integral way to contribute to the Drupal community.
Stay Connected & Updated!
• Slack
- The Drupal community has a primary Slack workspace known simply as ‘Drupal’ - - http://drupal.slack.com/
- You will find a variety of channels for different topics, like #support, #bugsmash, #contribute, #drupal10rediness, etc.
• Blogs
- Members of the Drupal community write blog posts about Drupal.
- Even YOU can be one of them!
• Social Media - Twitter, LinkedIn, etc
- Following any Drupal-related profiles can keep you updated with all ongoing changes/events happening around Drupal.
Drupal Code of Conduct
As Drupal is a open source and our community is growing, it is imperative that we preserve the things that got us here. Here are some of the points with respect to conduct.
- Be collaborative
As Drupal have a larger community, collaboration is the key. By working as a team, we can bring the best in the drupal platform.
- Be respectful
As everyone makes a valuable contribution to Drupal, the community and its members treat each other with respect.
- When we are unsure, ask for help
Nobody is perfect in Drupal, and nobody is expected to know everything in the Drupal community. Asking questions may fix many problems, so questions are encouraged.
- Please contact your peers/slack admin if you are a victim of, or witness to, harassment, or need help with the administration of Slack.
https://www.drupal.org/dcoc is the link to the doc where you can find the code of conduct in depth.
Final Thoughts
As an organization who lives and breathes Drupal, we are always committed to giving back to the project in any way we can. If you’re looking for a trusted Drupal agency for your next project, our experts would be happy to help. Talk to us today!

Ankitha Shetty and Suresh Prabhu
Related Insights


Don't Miss Out!


