It's not uncommon to believe that if you need a high quality image, it has to be large - you cannot compromise on its size. But this isn’t always true. Drupal’s very own ImageMagick module not only integrates with the fantastic ImageMagick tool that can help you create, compose or edit digital images but also lets you convert images to reduce size without jeopardizing their quality.
The plain truth is, you can't have an interactive and engaging website without including high quality digital images. However, many organizations run into problems because quality images usually add a lot of file size, which can lead to a slow performing website. But with tools like ImageMagick and image formats like WebP that can be leveraged in Drupal, you can get a faster and better performing (not to mention great looking) website. In this article you will learn about using the ImageMagick Drupal module, WebP image format and how you can implement them in your Drupal 8/9 website.
What is the ImageMagick Drupal Module
ImageMagick is an image toolkit for image API in Drupal 7, 8 and 9. It uses Imagick PHP Extension to create and edit images using the Imagemagick API. With ImageMagick, you can compress the image sizes with better quality. Using ImageMagick you can customize the quality of images from 0 to 100. A higher value means better image quality but bigger files. The Drupal module supports both ImageMagick and GraphicsMagick image processing systems.
Why use ImageMagick
- Page Optimization
- Faster website speed
- Helps increase the number of pages Google can crawl and index
- Reduce server load
- The faster your site loads, the lower the bounce rate
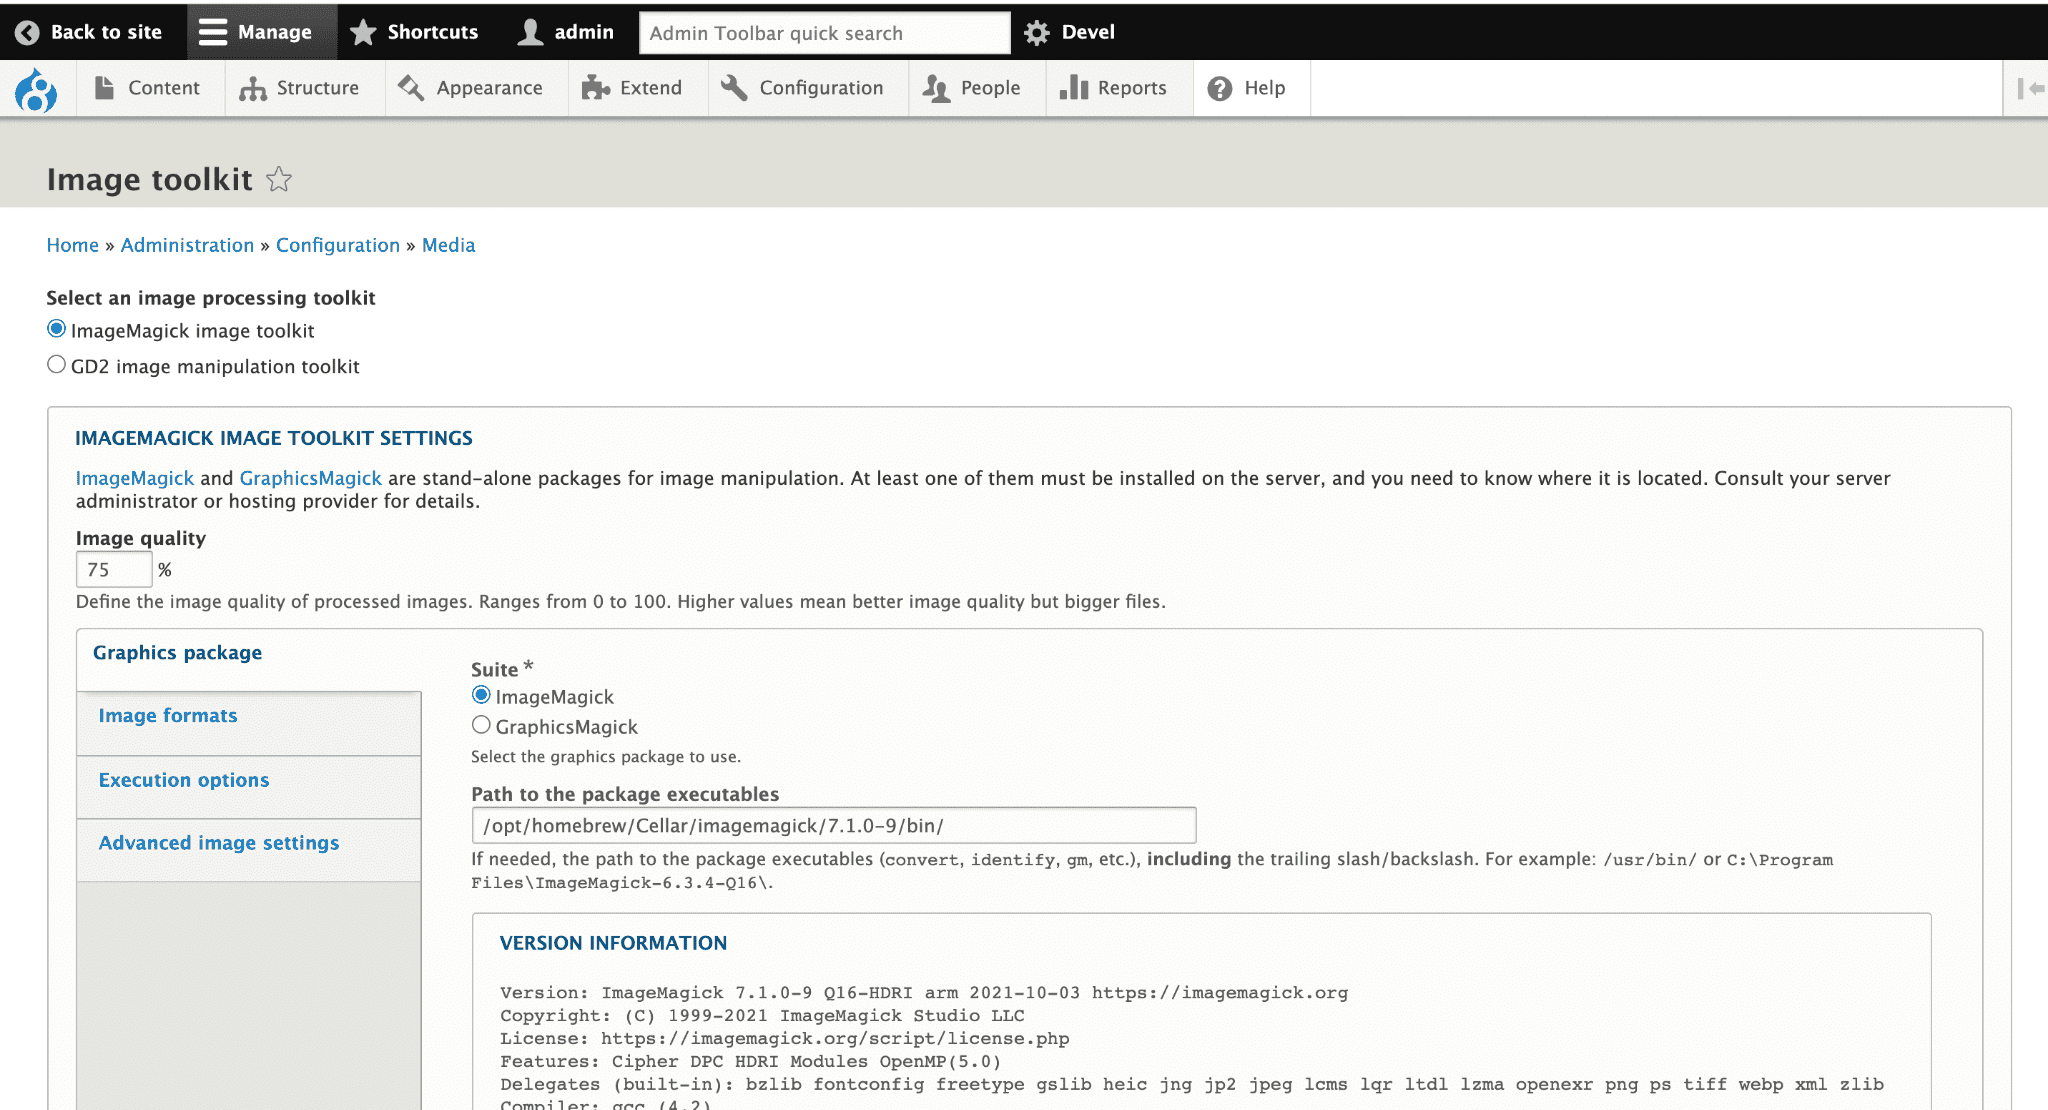
ImageMagick Toolkit
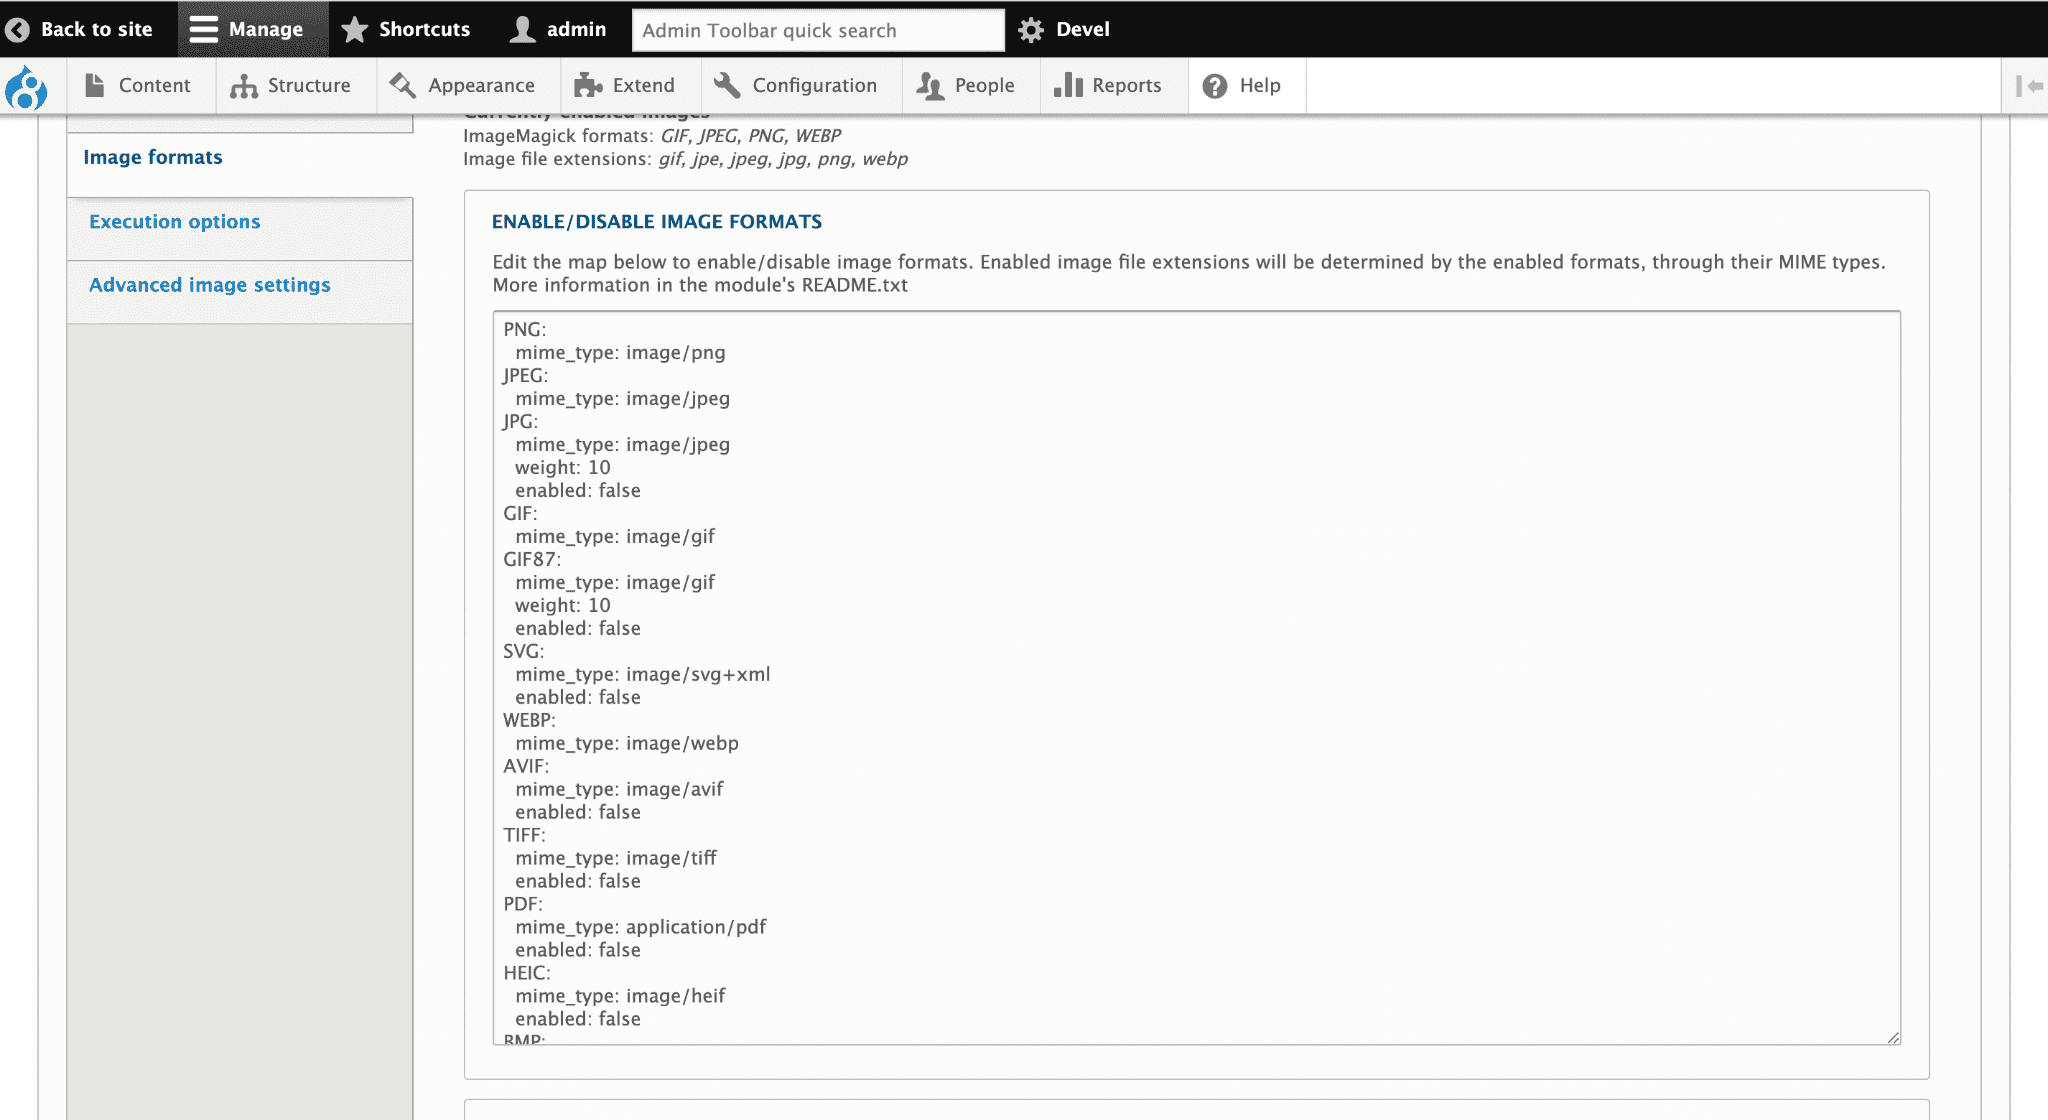
ImageMagick supports multiple image formats which can be enabled and disabled as required
Installing the ImageMagick Module
Before installing the ImageMagick Drupal module, make sure you have installed ImageMagick on your server and the convert binary needs to be accessible and executable with php.
Configuration
Navigate to Administration > Configuration > Media > Image Toolkit and change the Image toolkit to ImageMagick.
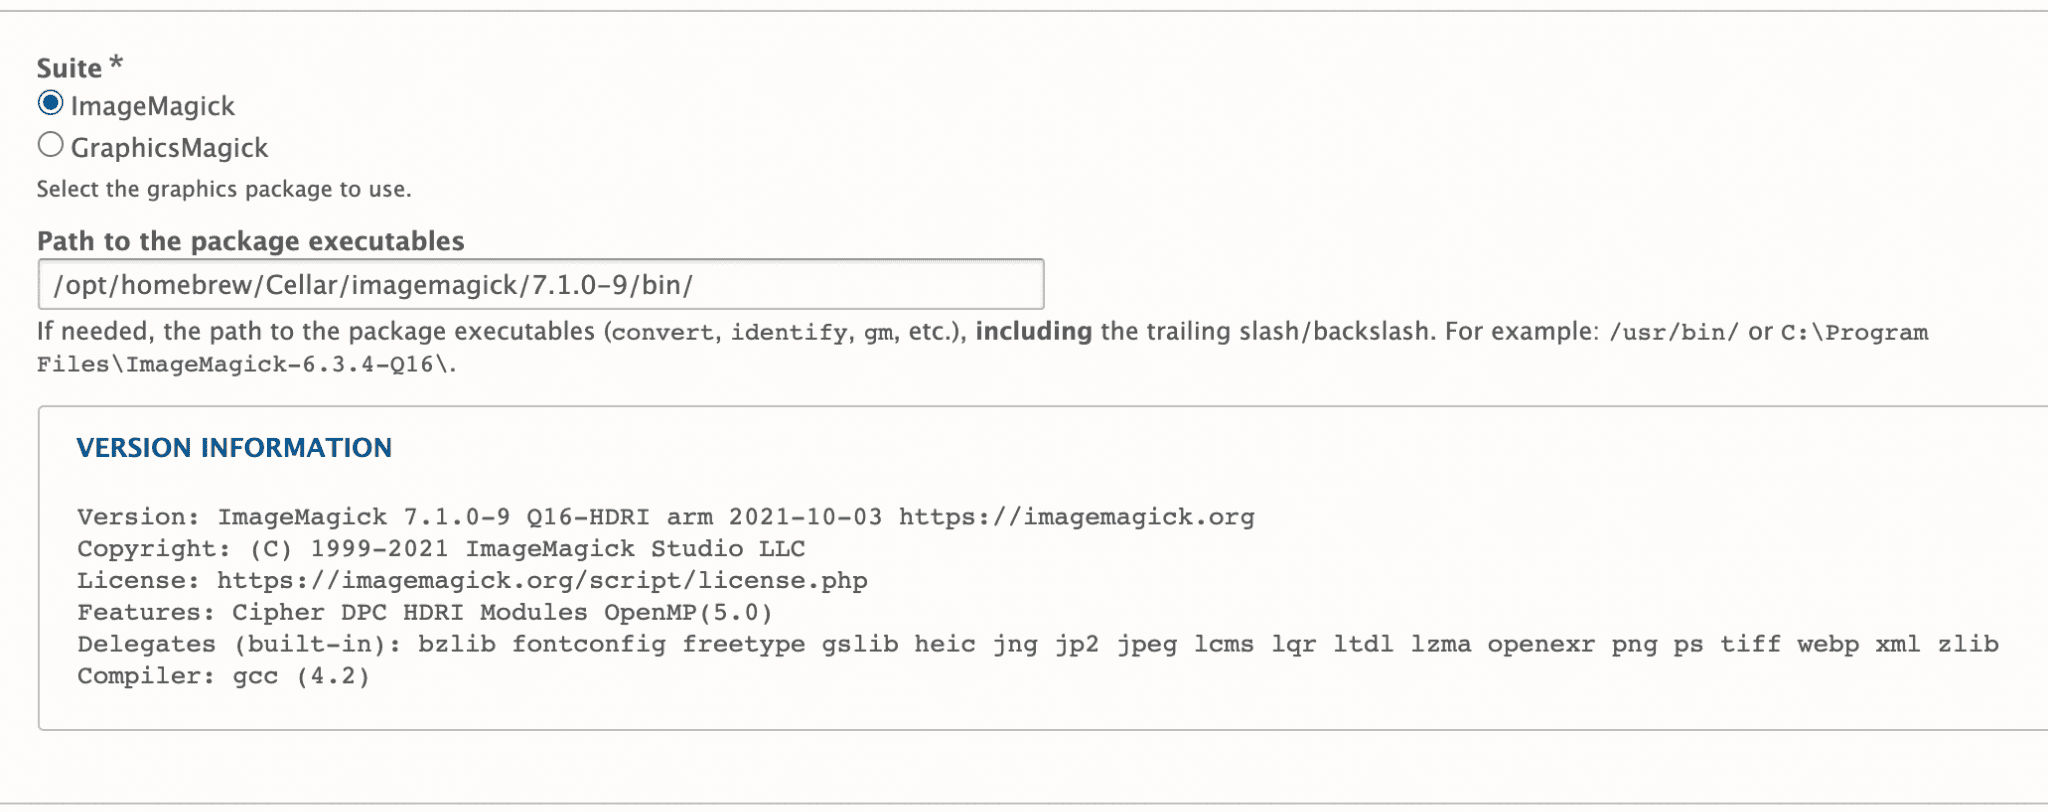
If you are not able to find convert binary command in the default shell path then you need to enter the full path of ImageMagick’s convert executable.
For example:
How to install ImageMagick on your server
- Install ImageMagick using homebrew.
- Or based on your operating system you can download it from here.
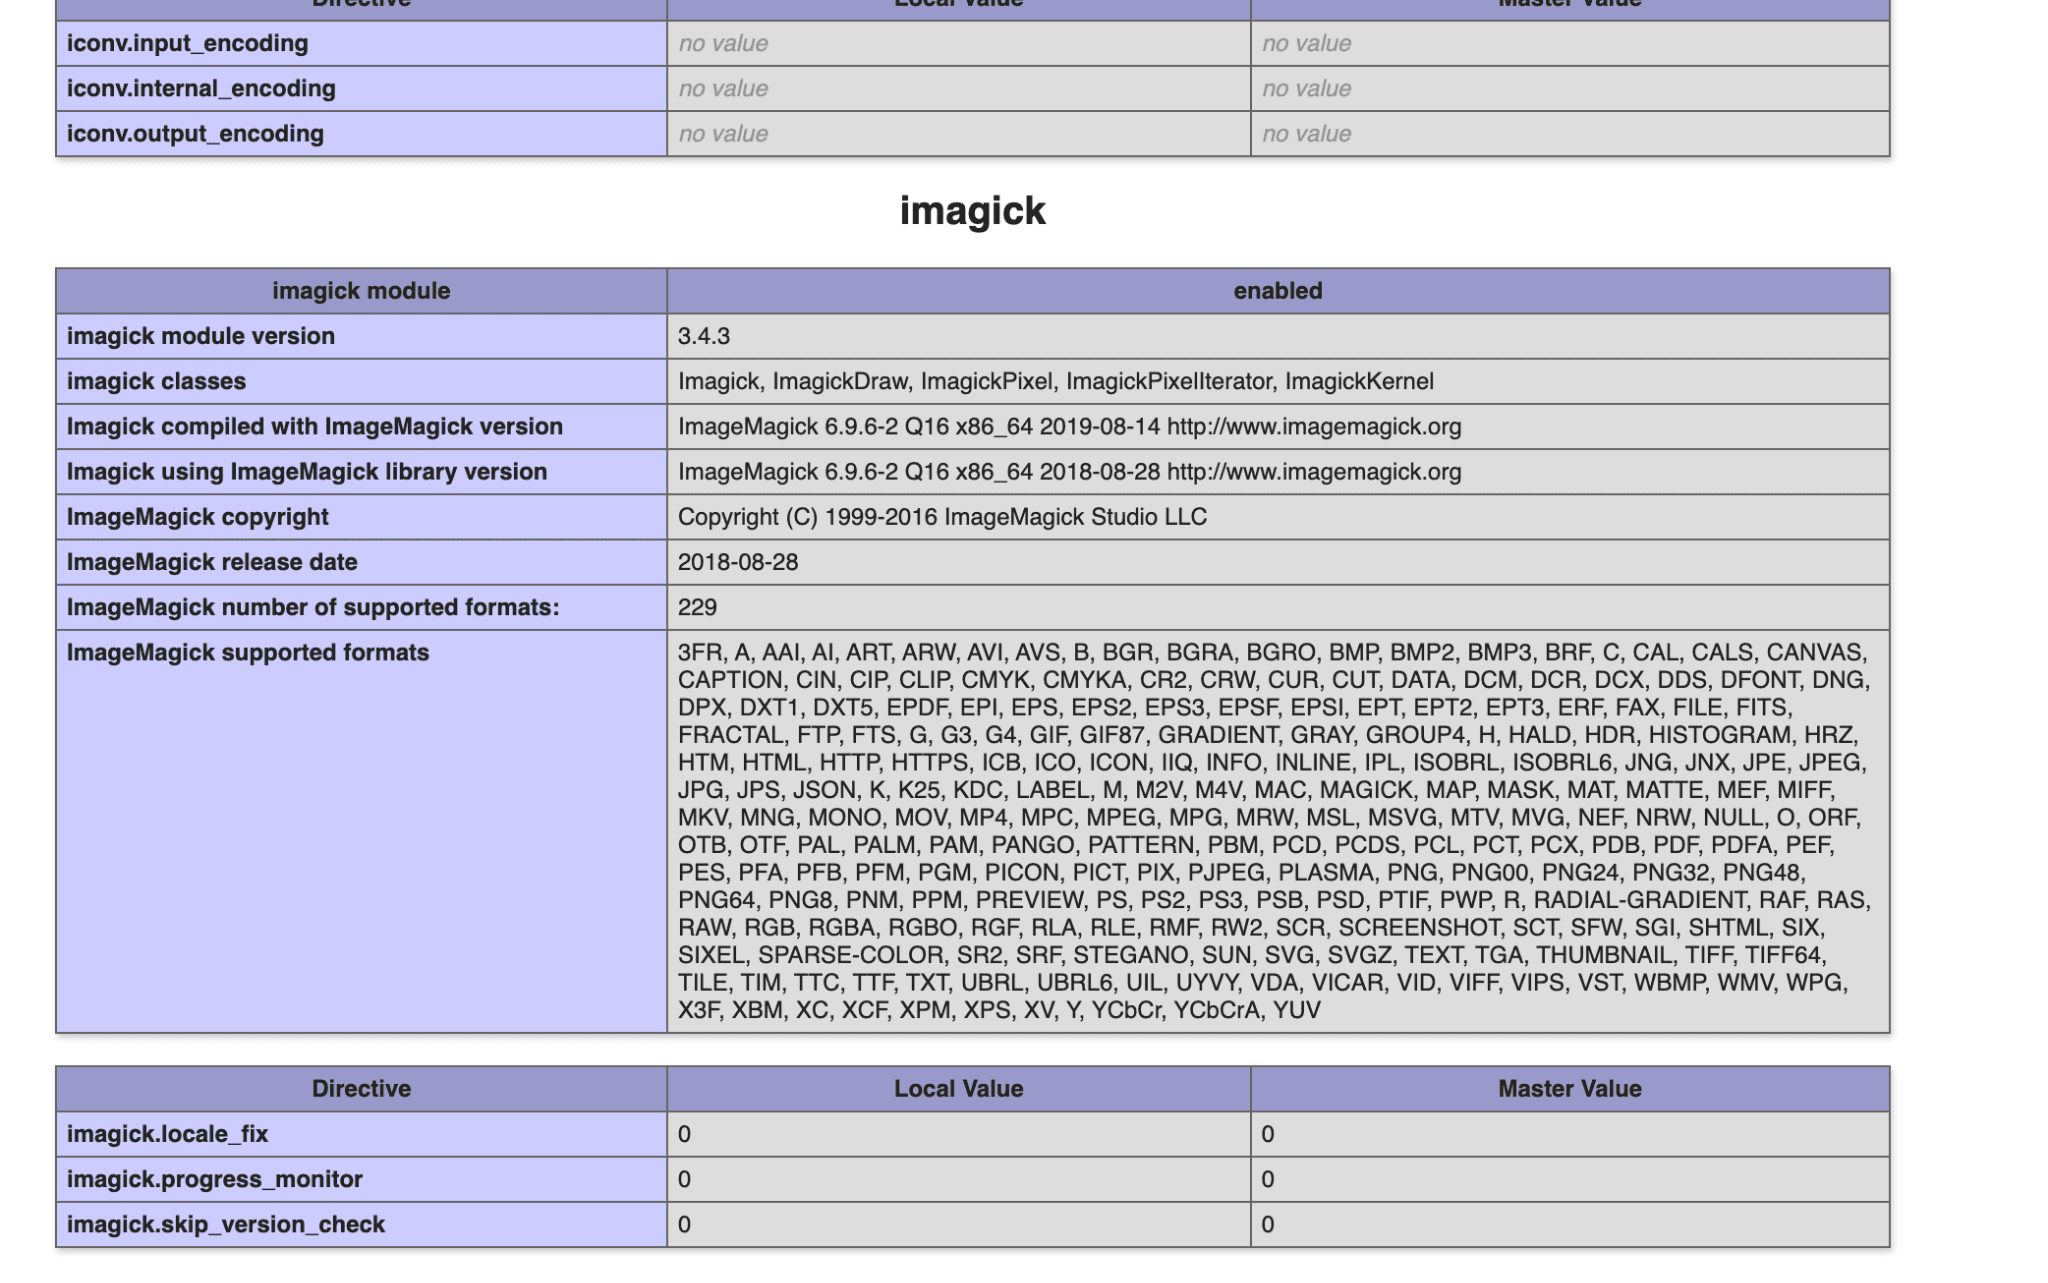
- On successful installation, your php output should look like this (see below image):
What is WebP
WebP is an image format employing both lossy and lossless compression. In a lossless compression, the file size is reduced but not the quality of the image. A lossless compressed image can also be decompressed to its original size. But a lossy compression removes data for good, which means you cannot decompress it back.
WebP is designed to create files that are smaller for the same quality, or of higher quality for the same size, than JPEG, PNG, and GIF formats. It also supports animation and alpha transparency.
Implementing WebP with ImageMagick
Step 1: Enable WebP formats from Image Toolkit format options, which was explained previously.
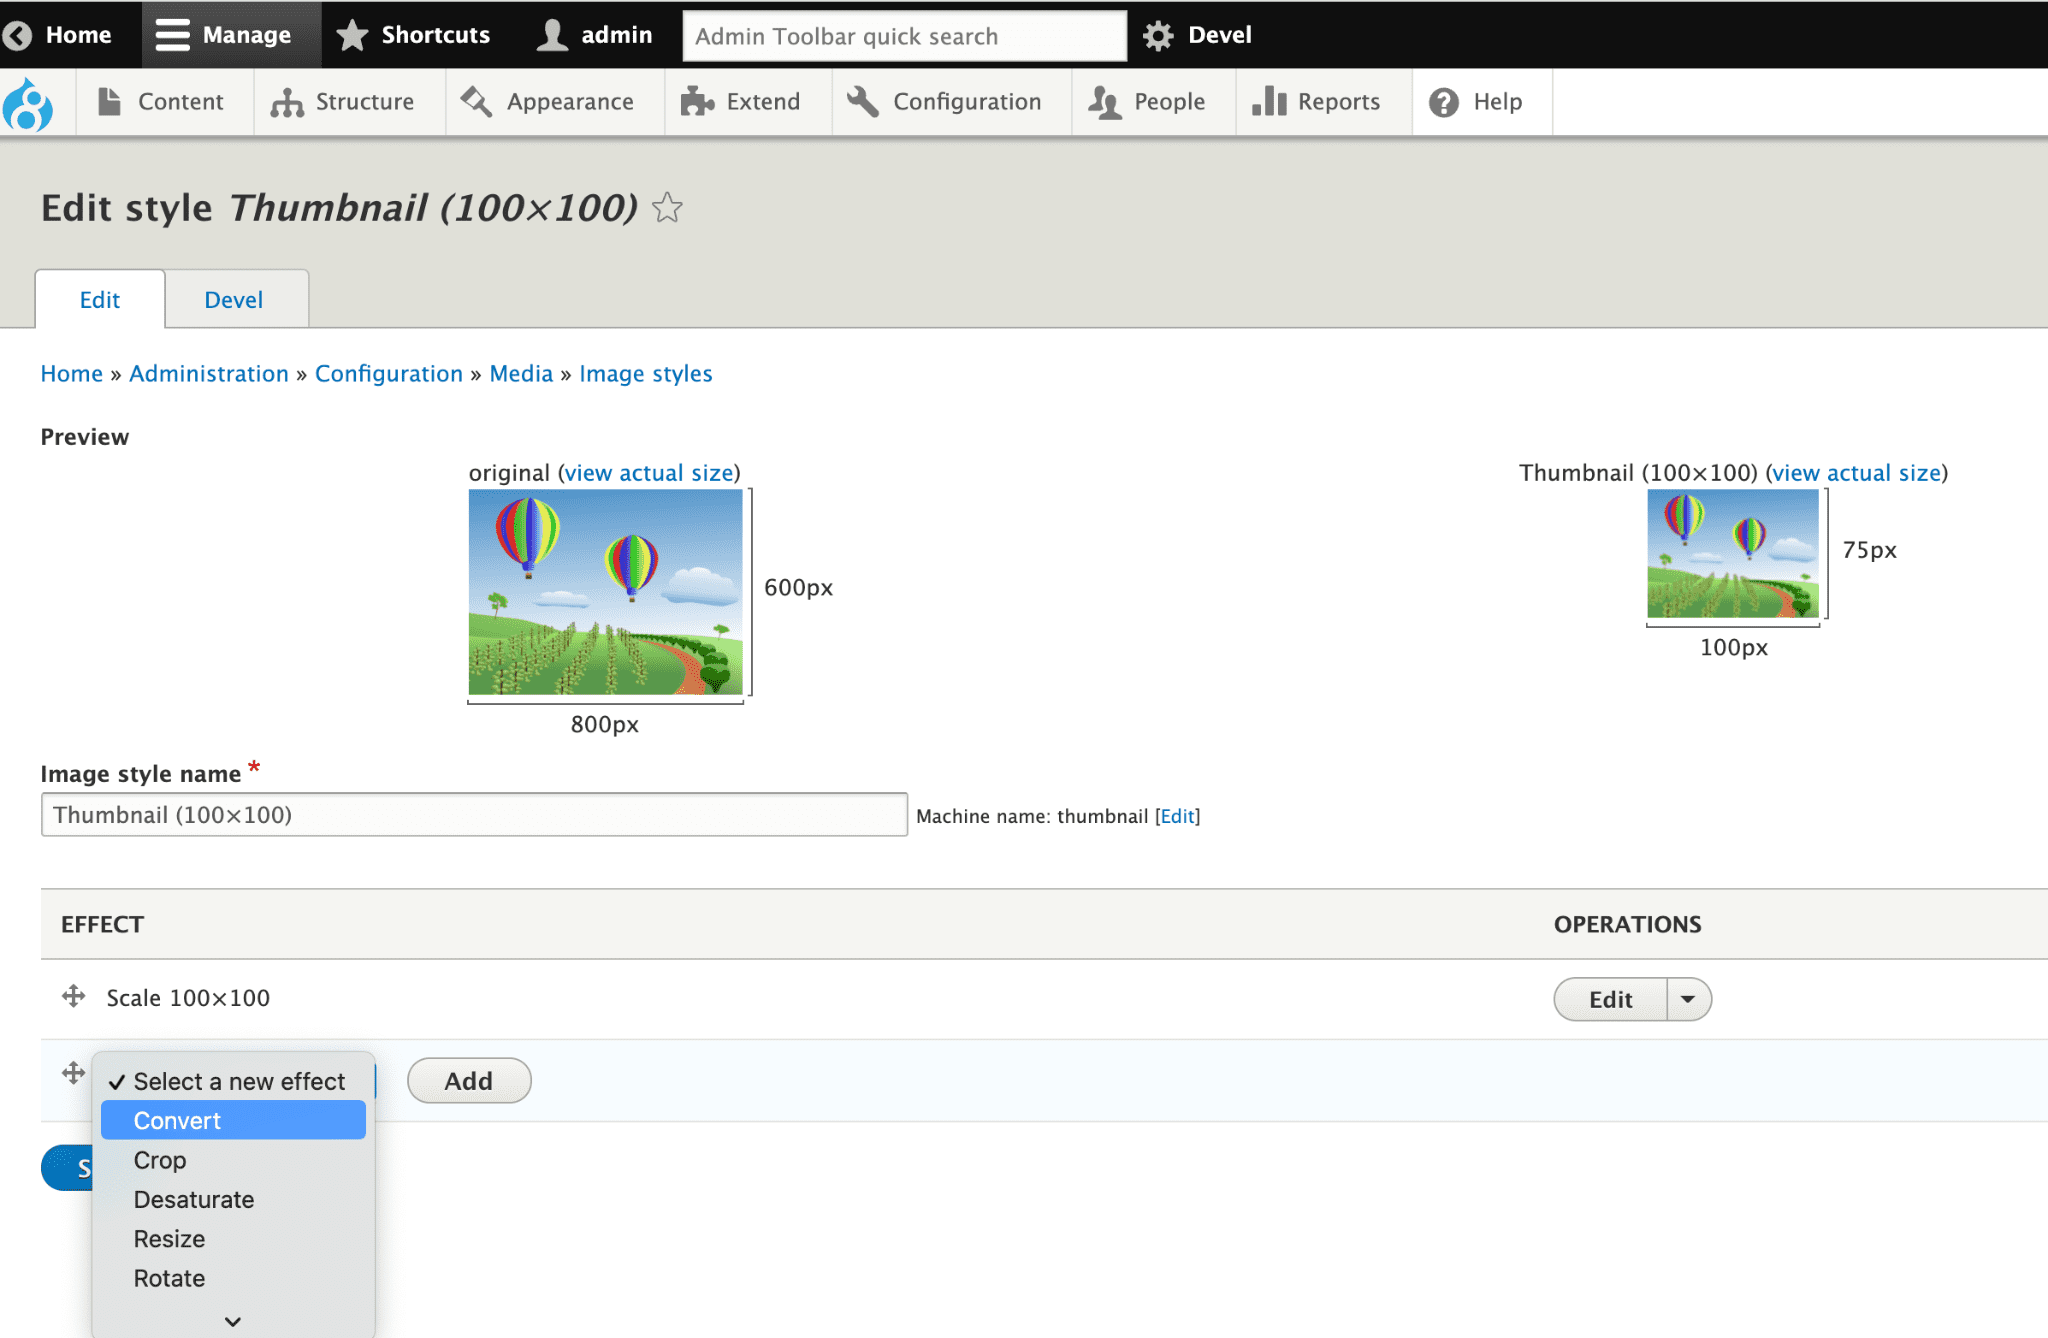
Step 2: Now, create a new image style or update any old one with a convert effect. For example:
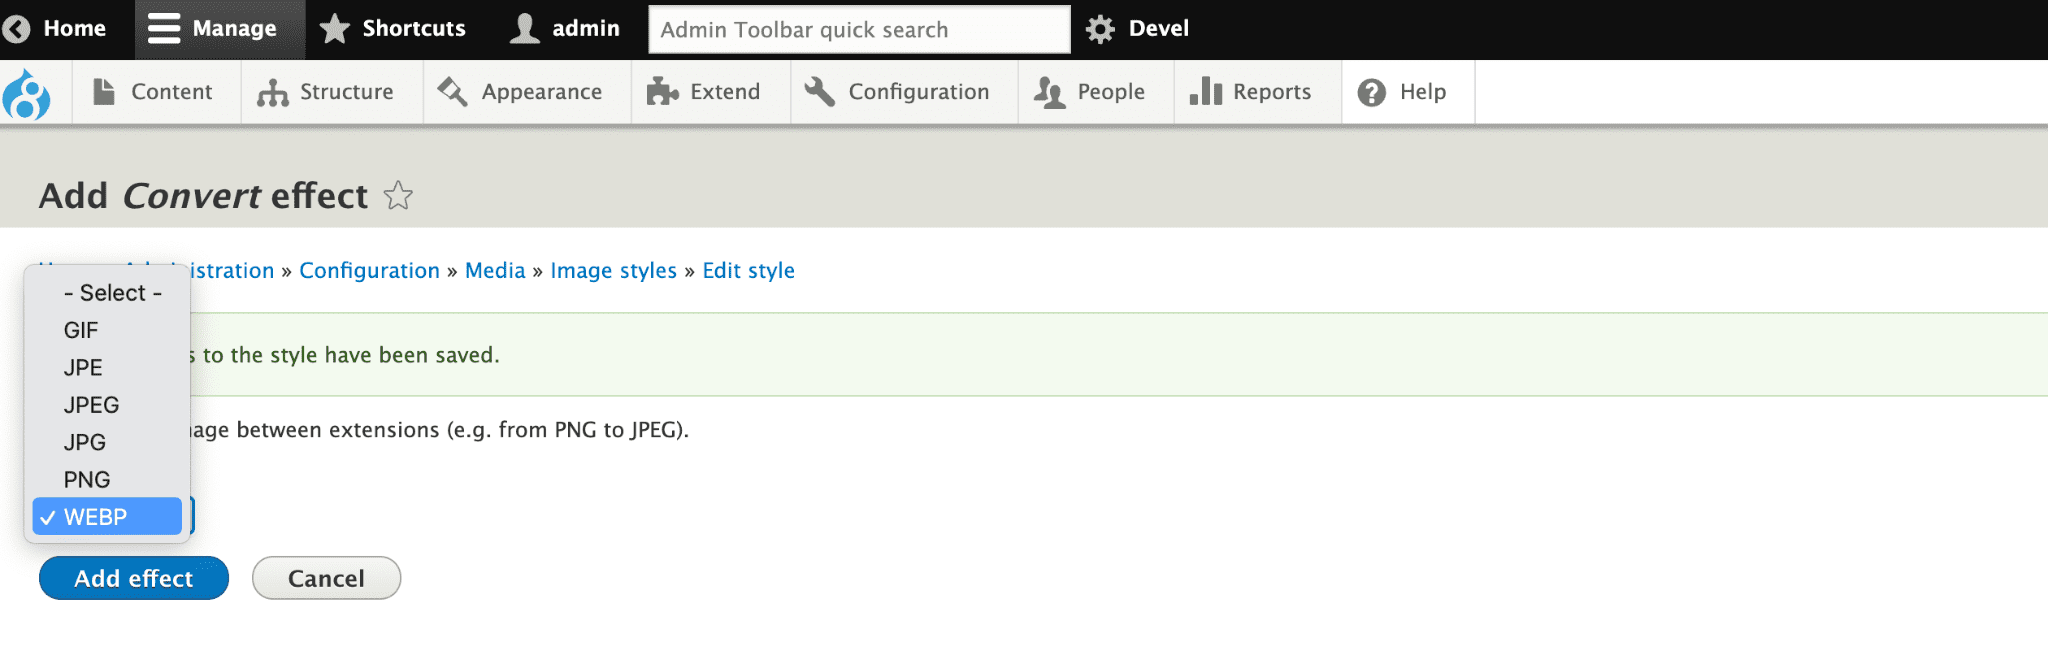
Step 3: After adding the convert effect, use the same image style to display images and you will see the result.
Let’s take an example of an image with size 1.2 MB (see below image):

Now check out the results after converting the image:

You can see that the file size is now reduced to 8.6 KB from 1.2 MB, which is a very good reduction.

Manish Saharan
Related Insights

Don't Miss Out!


