Images play a significant role in improving the user experience of a website. A study shows that 90% of the information we pass on to our brains is visual. Many websites work around this theory alone and bombard users with tons of rich media like images and video files. Most of them overlook the presentation aspect of these media files and end up with a disappointing user experience. What they need is a tool like ColorBox that is an extremely lightweight jQuery plugin which allows you to display images elegantly and intuitively. The styles and functionalities are highly customizable via CSS and Javascript. The Drupal ColorBox module is compatible with Drupal 6, 7, 8, and now Drupal 9 too! In this article, you will learn how to configure, implement and further extend the ColorBox module for Drupal 9.
ColorBox for Drupal
The ColorBox module integrates with ColorBox jQuery plugin into Drupal. The plugin is a lightweight customizable lightbox for jQuery. Among the other competitor “box” modules that are used for similar purposes (Thickbox, Lightbox2, Shadowbox, Greybox, etc.), the ColorBox module is the most popular and has the highest number of installs. The usage of Drupal ColorBox doesn't just end with displaying uploaded images beautifully. It also supports styling for like videos, pdfs, node, taxonomy, webforms, iframed content and more. The styling can be controlled through the CSS so the appearance is highly customizable. Functionality is also easily customizable via the JS file without having the need to touch the HTML. It supports photo grouping as well and preloads upcoming images
Steps to Install the ColorBox Module
1.Install the ColorBox module with composer.
composer require 'drupal/colorbox:^1.6'
2. Download the ColorBox plugin 1.x.
1. Using the Drush command
(Note: If you are using the drush command to install the ColorBox plugin, you must enable the module and then run the below command)
drush colorbox-plugin
2. Manually download ColorBox plugin
Download the Colorbox plugin and unpack in /libraries. Make sure that path to the plugin file looks like:
“/libraries/colorbox/jquery.colorbox-min.js”
3. Enable the Drupal ColorBox module.
drush en -y colorbox
Congratulations! You are now ready to use the features of the ColorBox module.
Configuring the ColorBox Module
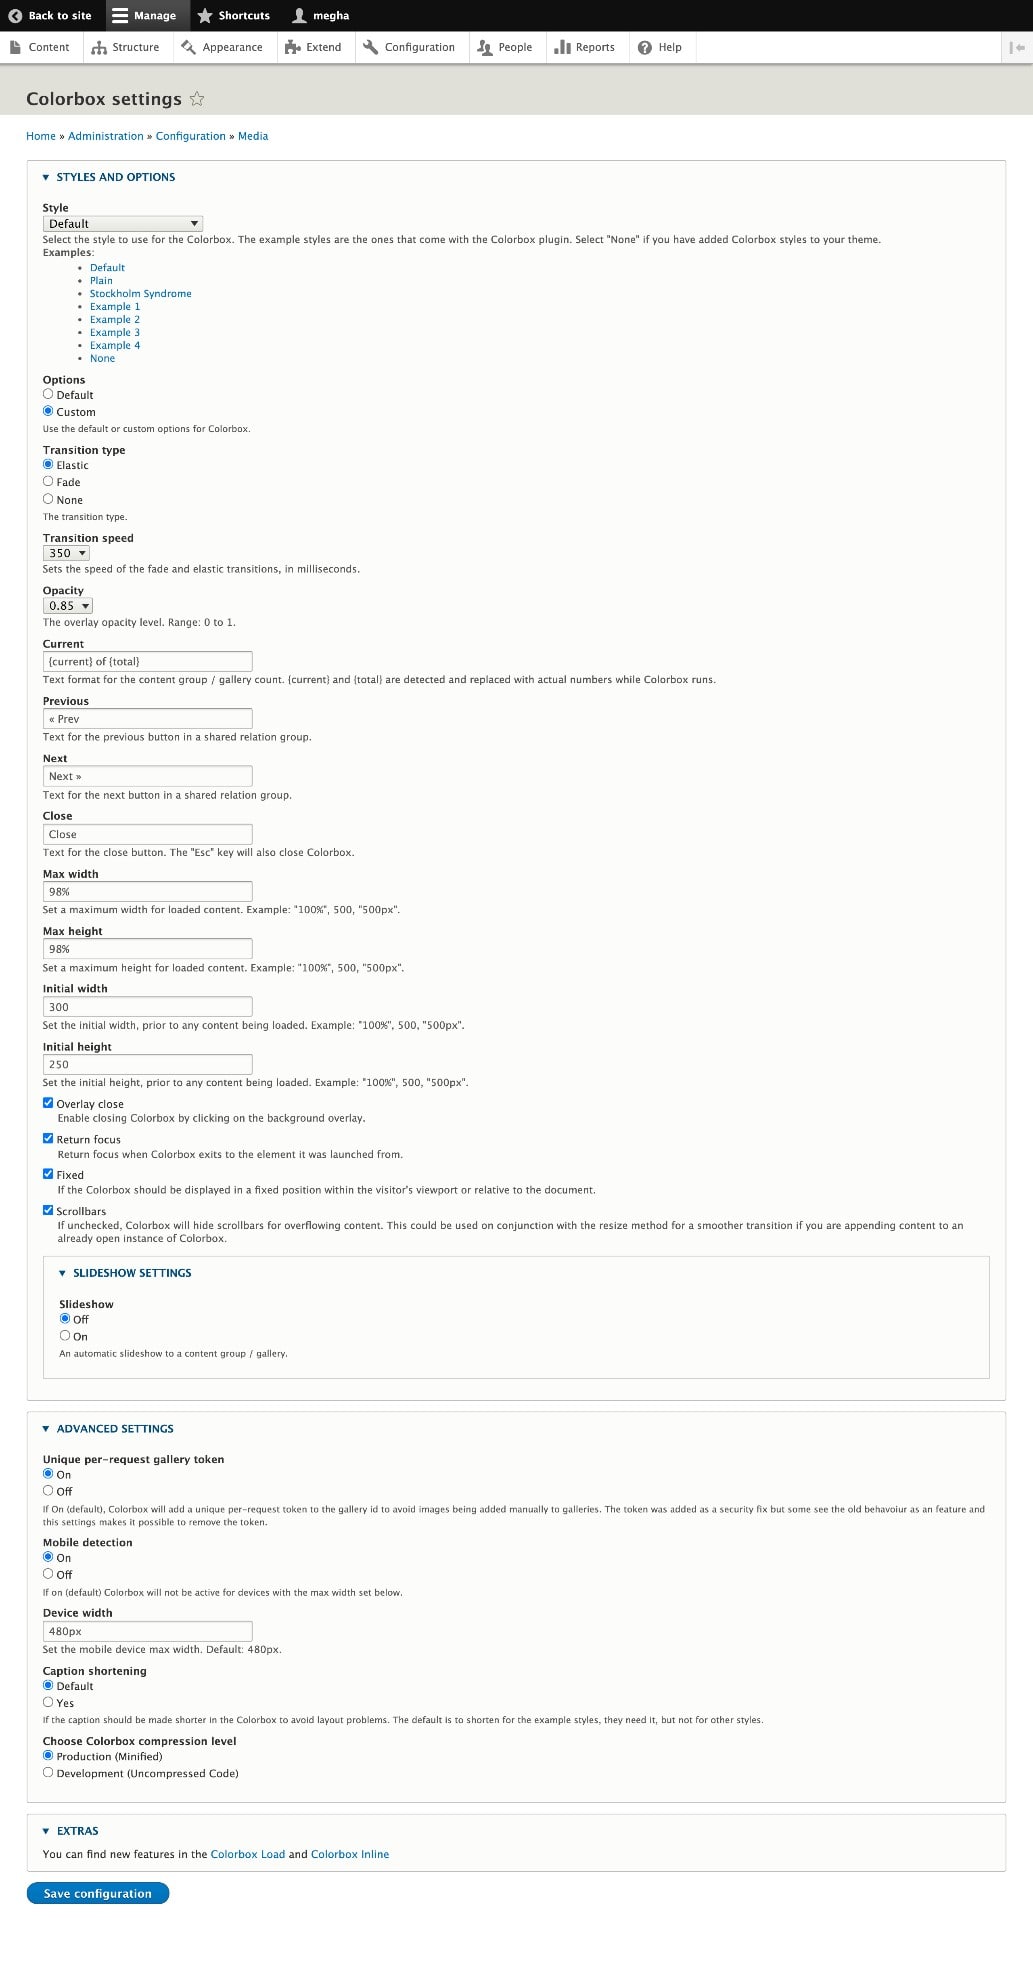
Configure the Drupal ColorBox module by navigating to Configuration -> Media -> Colorbox settings.
How to Create an Image Gallery Using ColorBox
1. To make an image gallery, we first need to add an image field for one of the content types. Choose the label name and then click on the save and continue button.

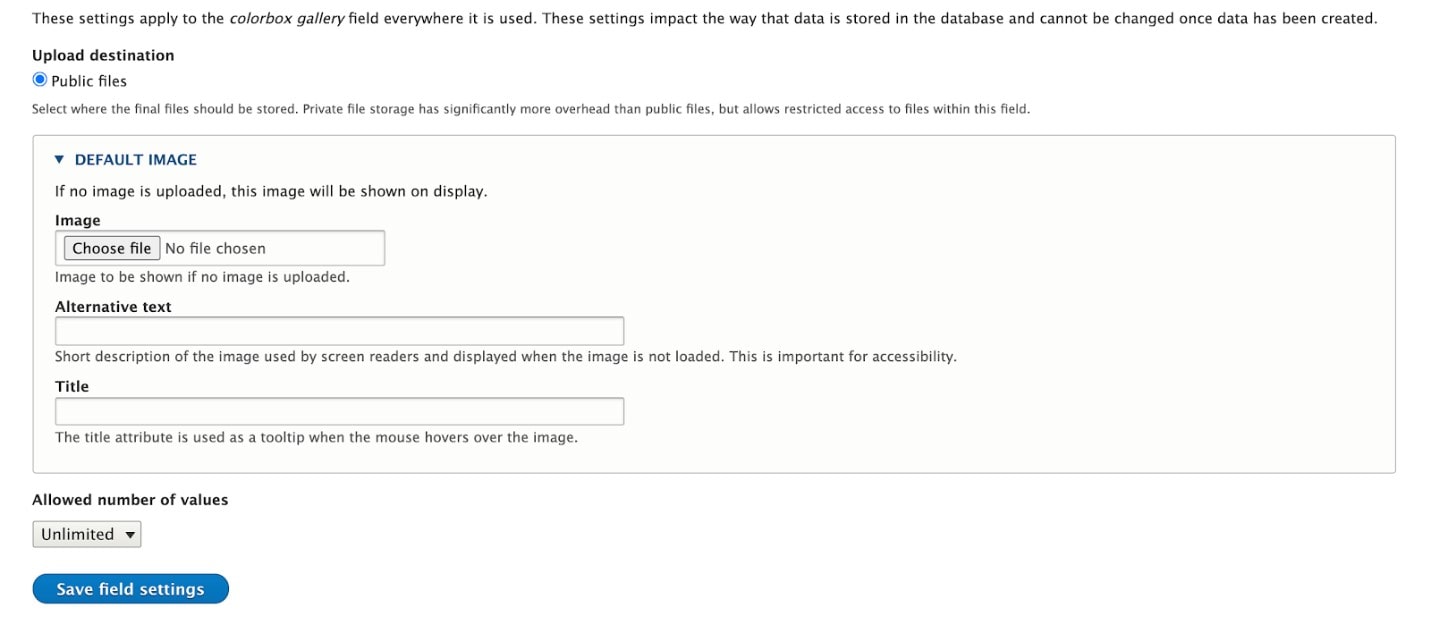
2. Next step is to configure the field settings. We can add the default image when there are no images uploaded. An alternative text for accessibility purpose and a title. The allowed number of values settings says maximum upload limit for a field. Select the desired option and then click on the save field settings button.
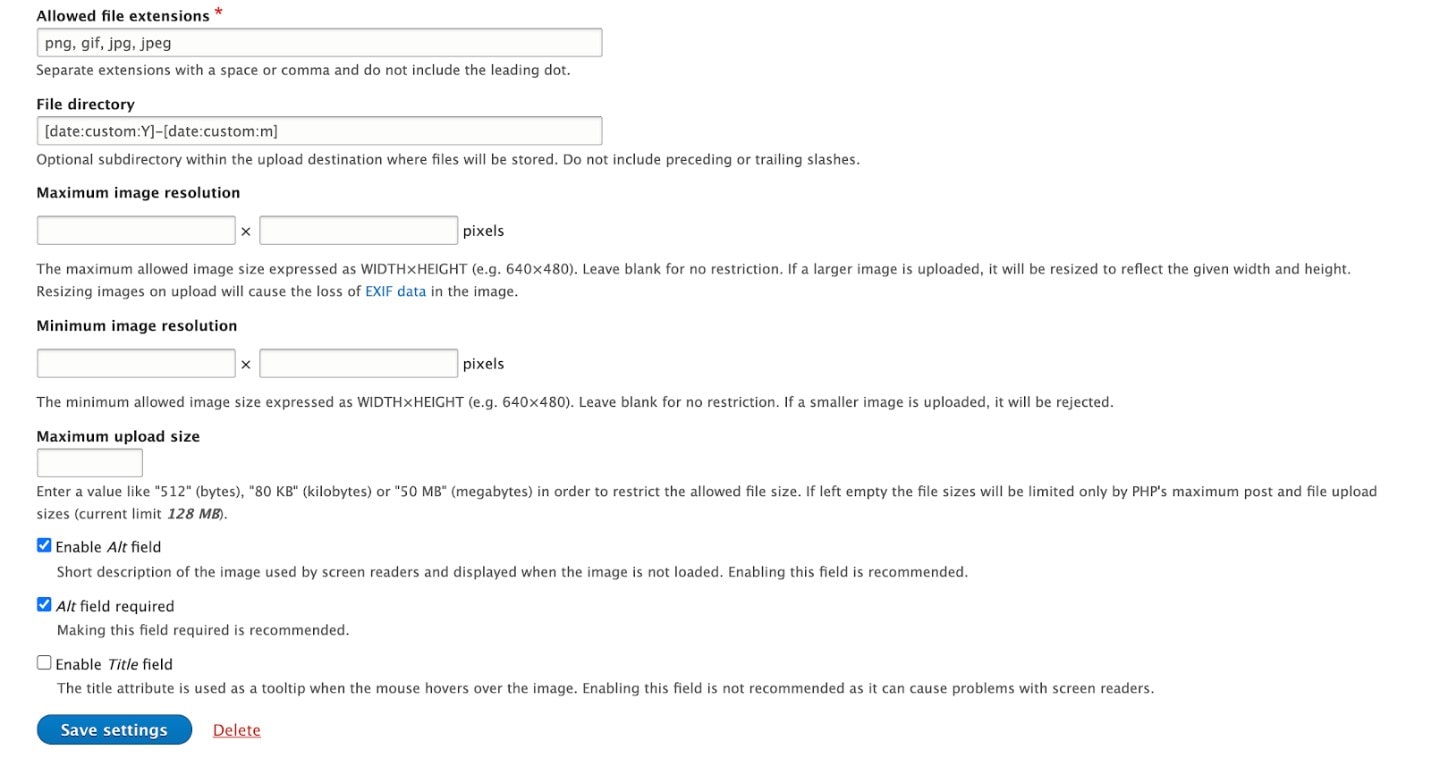
3. Then we will set the other configurations for this image fields like Allowed file extensions, File directory, Maximum and Minimum image resolution, Maximum upload size, alt and title for the image and then click on save settings.
4. Now, we are done image field configuration. Let’s set the formatting option for the image field created for ColorBox. Navigate to Manage display of the content type and then set the format option from the dropdown as ColorBox. Clicking on the gear next to the format option allows us to customize the image displayed. Once all the options are updated, click on the update button and then click on save option.
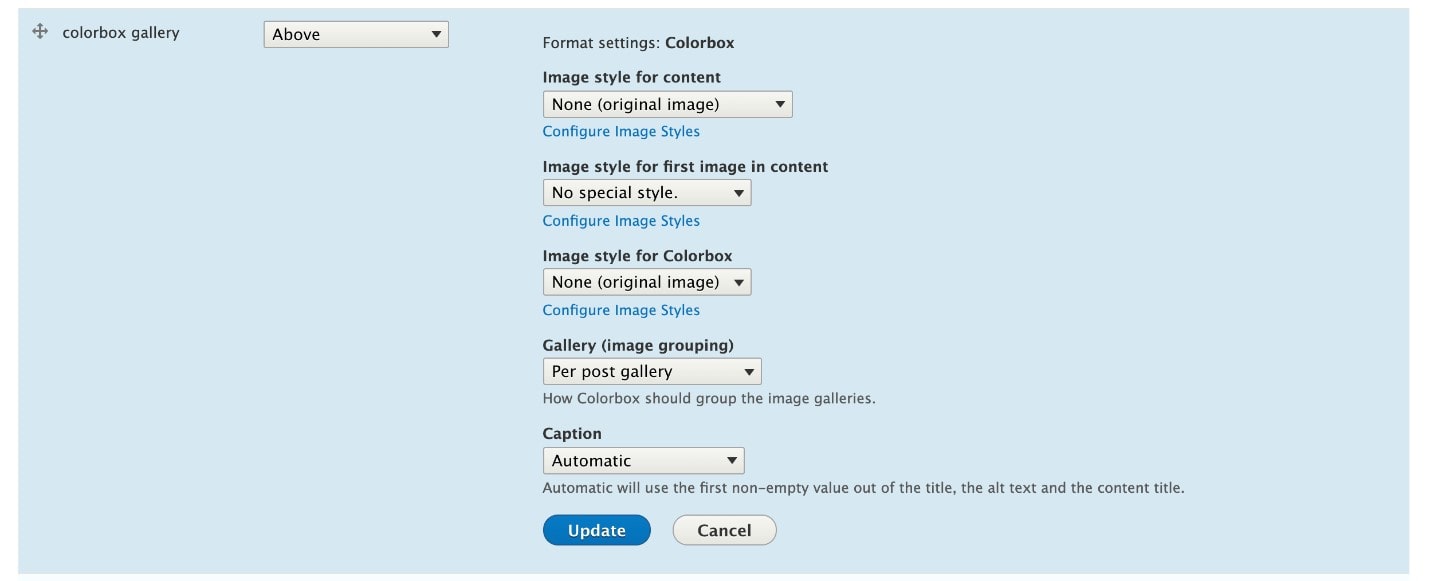
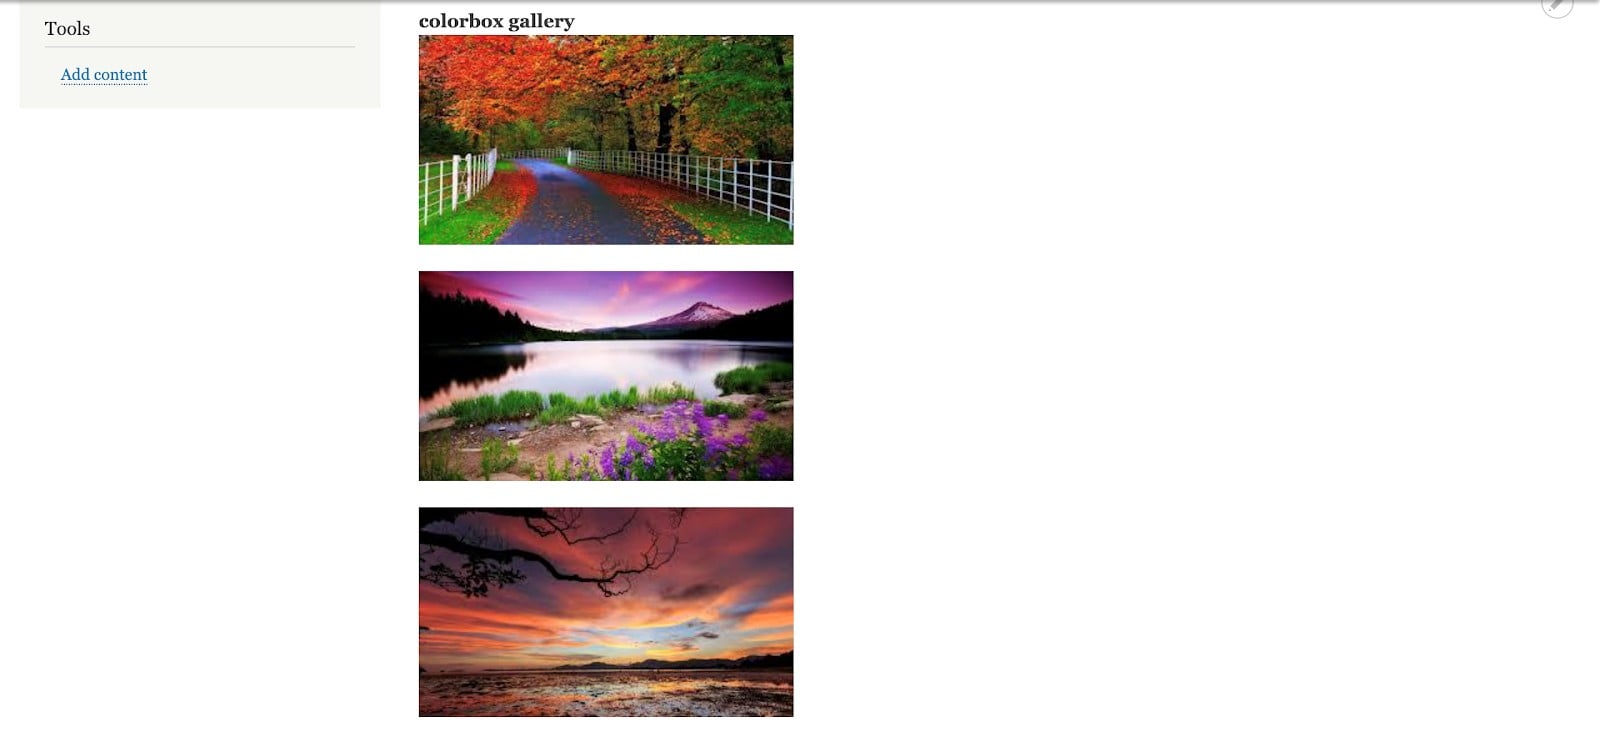
5. Now Let’s add some content into our ColorBox image gallery by clicking on Add content. We can change the order of images uploaded based on image weights. And then click on the save button. The display of the content will look as below.
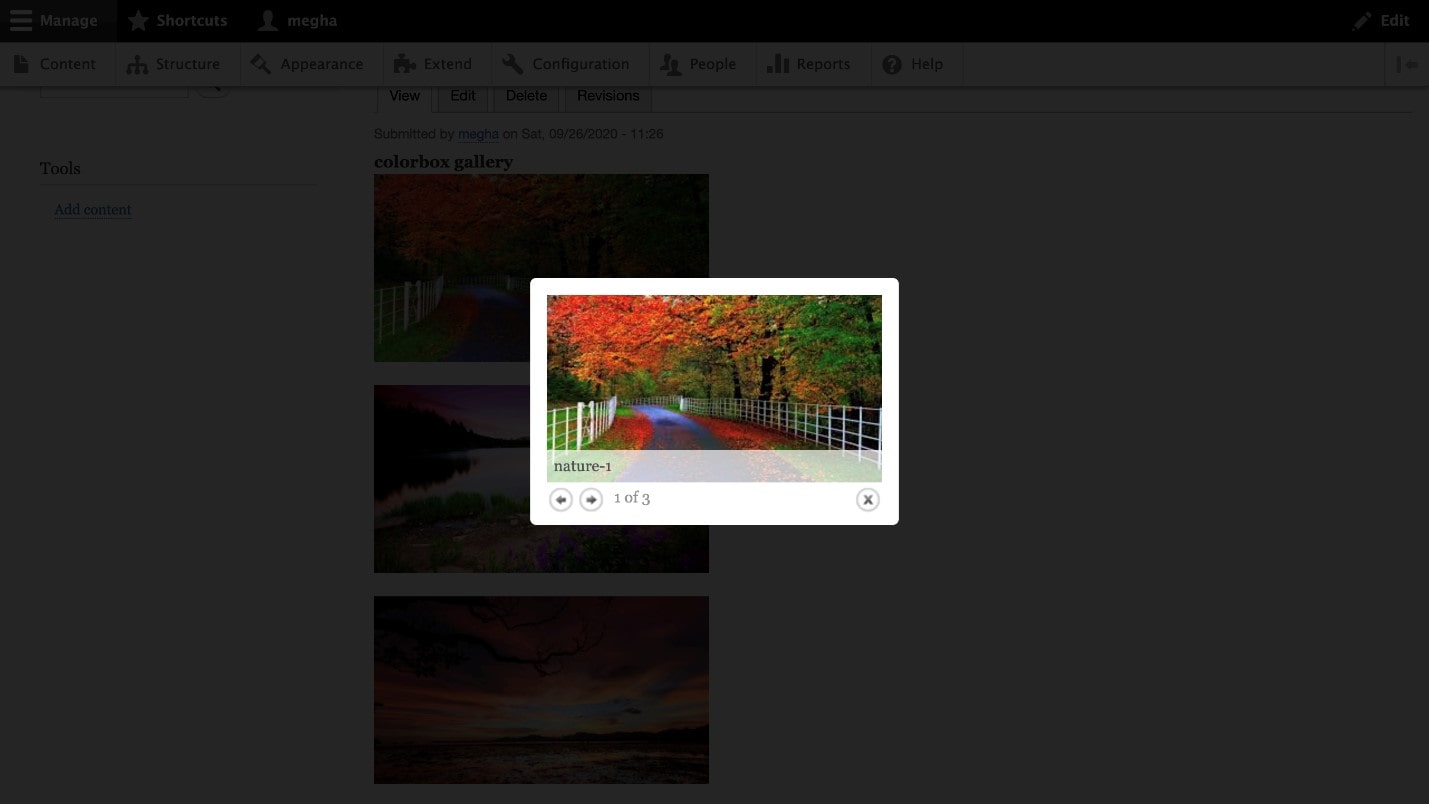
6. Finally, clicking on any of the images displays the image within the ColorBox modal as shown below.
You can also do the same with video embedded field.
How to Integrate with the ColorBox Inline Module
The Colorbox Inline module allows the user to open the content that is already on the page within the ColorBox.
1. Install the colorbox inline module
composer require 'drupal/colorbox_inline:^1.2'
2. Enable the module using drush command / Manually enable through drupal UI
drush en -y colorbox_inline
3. Open image in ColorBox modal which is on the page using a link
4. Navigate to add content -> Any content type which has body field
Change the text formatter from basic html to full html
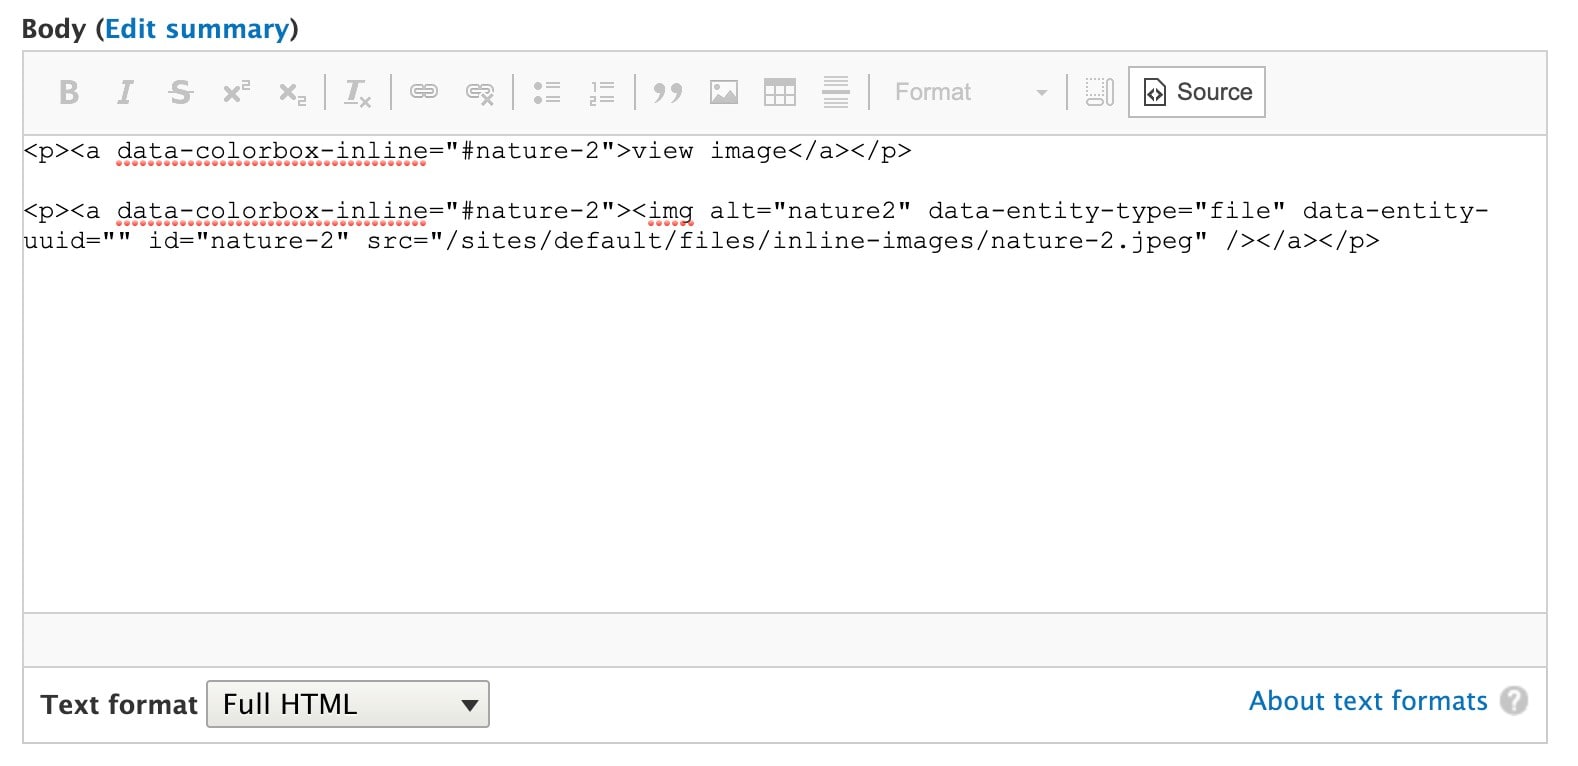
6. Then click on the save button.
Here in above example, data-colorbox-inline attribute of anchor tag can also contain class name instead of id. view image is a link where it opens an already existing image in a page (modify the changes according to your project requirements). We can use this module to render any content - video, webform, etc., in a similar manner.
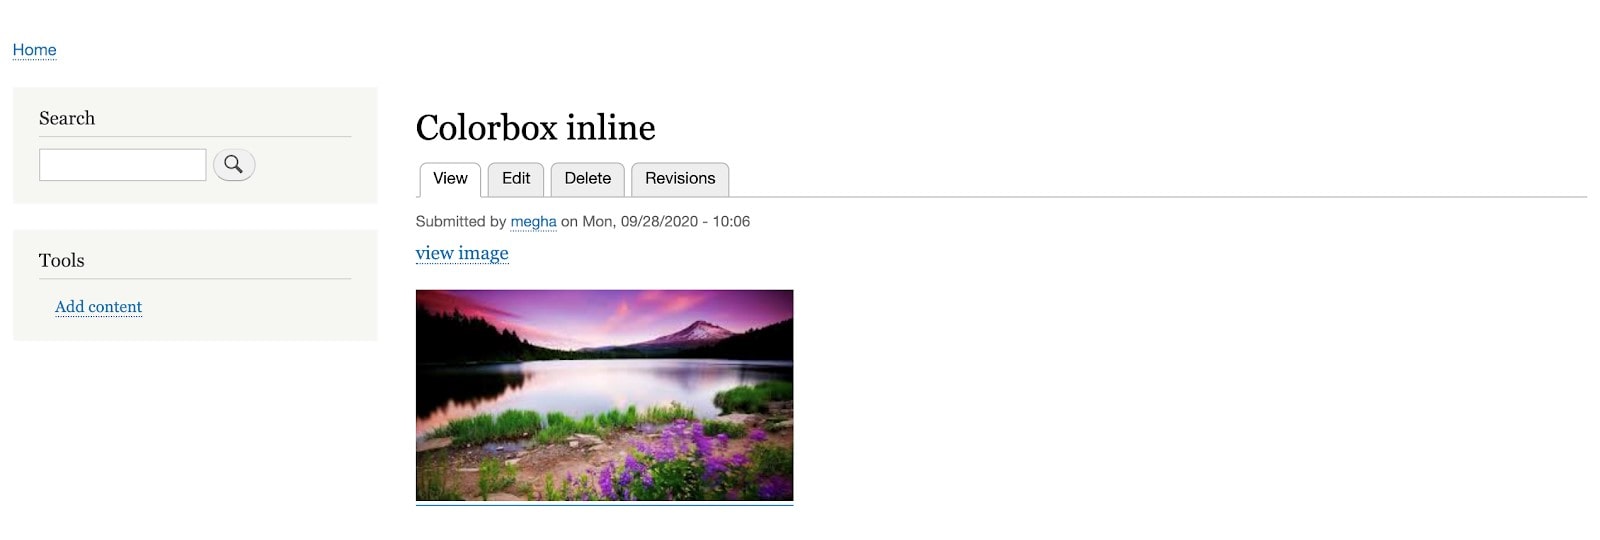
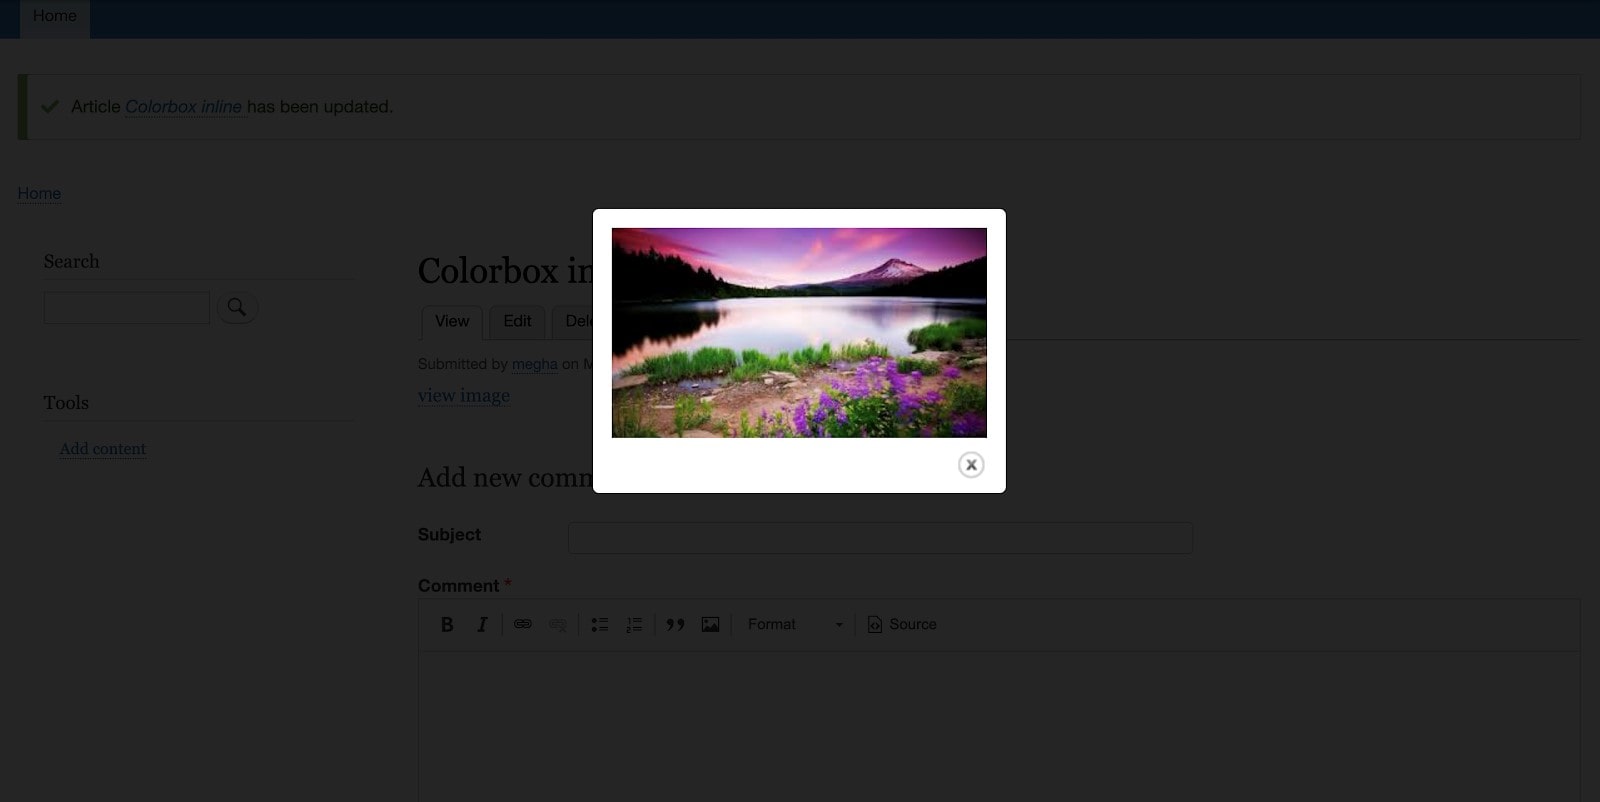
On viewing this page, you can see a link with the image. And on click of the view image link, a ColorBox popup will appear as shown in below image.
How to Integrate ColorBox With ColorBox Load Module
The ColorBox Load module allows users to load the content into ColorBox using Ajax. With this module, users can specify a series of paths which when rendered will open a ColorBox with the content. It depends on the NG Lightbox module for paths admin interface. This method can be used to render nodes, pages, web forms and more.
Install the colorbox load module
composer require 'drupal/colorbox_load:^1.2'
Enable the module using drush command / Manually enable through drupal UI
drush en -y colorbox_load
Implementing a login popup using ColorBox Load module.
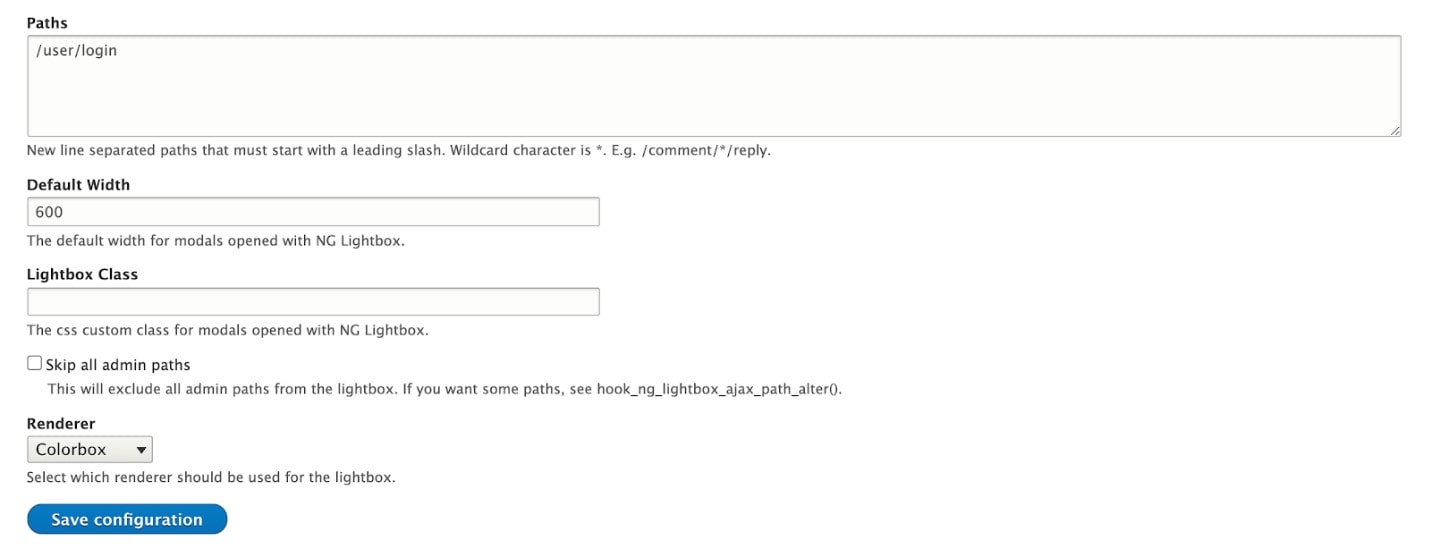
1. Configure the ColorBox Load module by navigating to Configuration -> Ng Lightbox (Under Media). We can configure the paths for which we want to provide the ColorBox modal display, width of the ColorBox modal, class for the lightbox modal and renderer options. (Choose your option as desired).
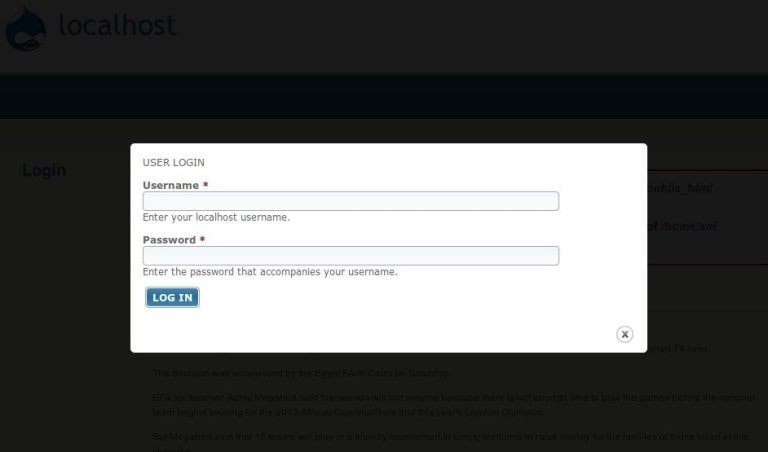
2. Now we can see the Drupal ColorBox modal implemented for the login page by clicking on the login button on the homepage.
How to Integrate ColorBox with Drupal Views
For some websites, we might need a feature that can display a ColorBox modal for a list of images. This can be done with the help of the Views module.
1. Go to structure -> views -> add view.
2. Add the image field to view and configure the formatter to ColorBox and other settings accordingly and then save the view.
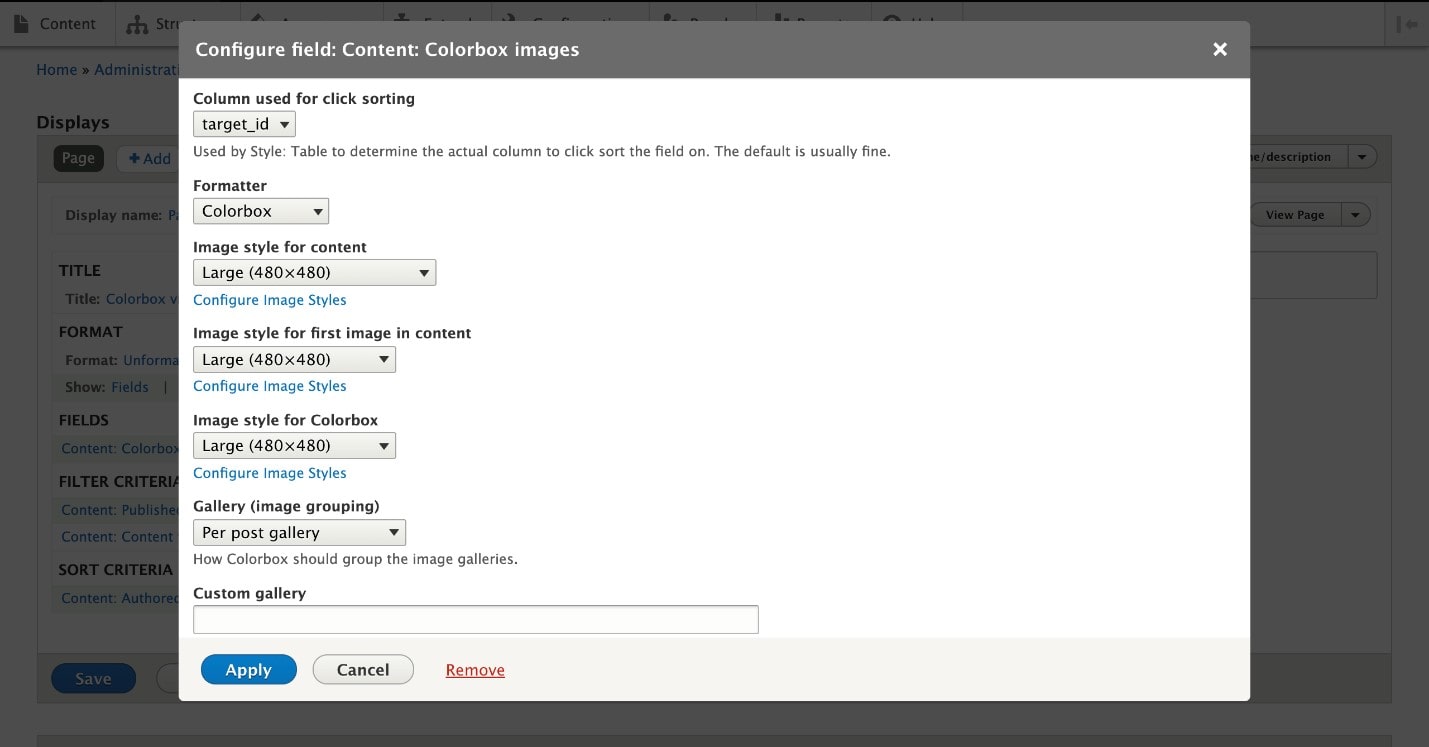
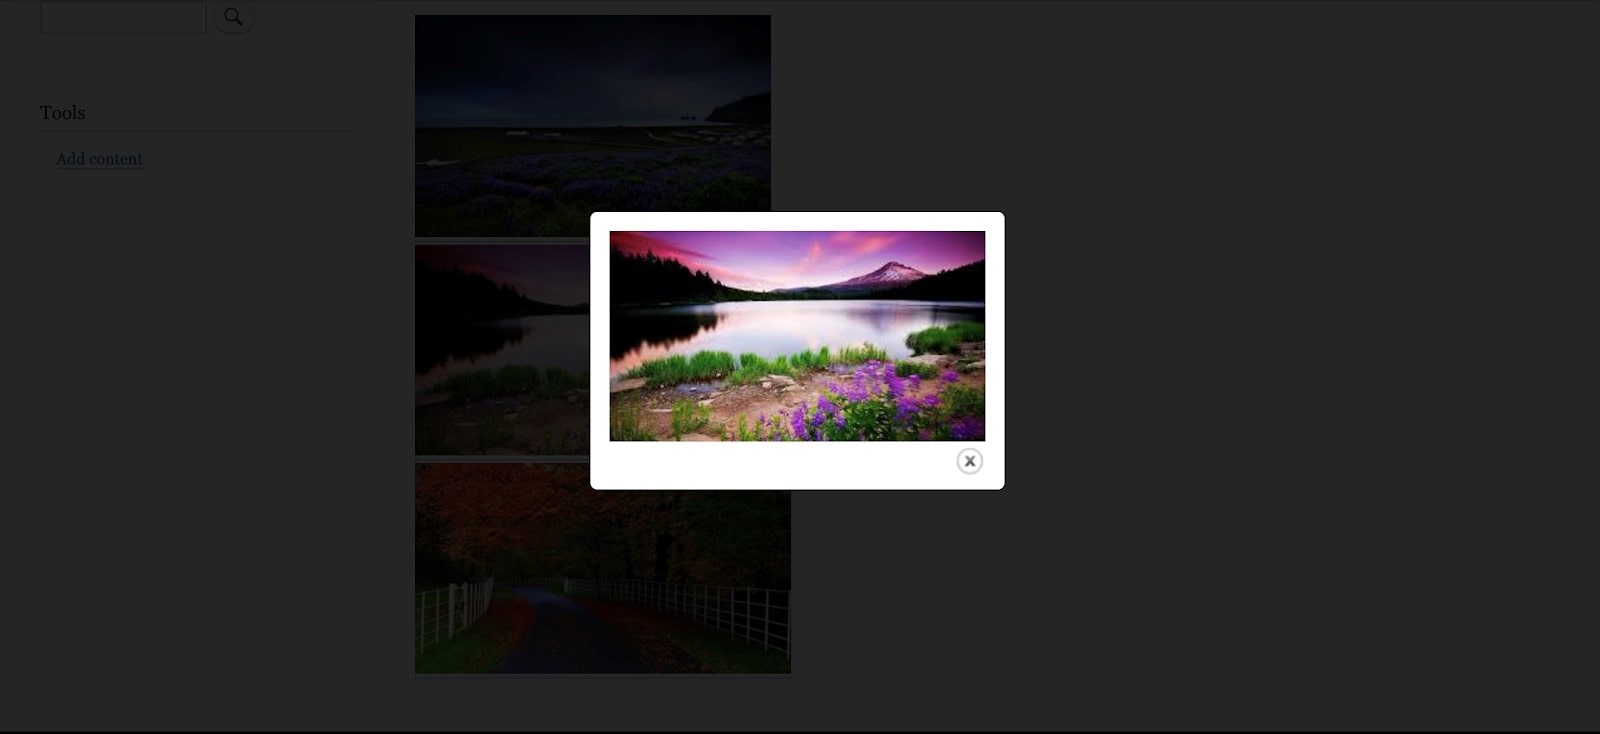
3. Now take a look at the view that you have just created (In my case I have created a view as a page). You can see a list of images and when you click on one of them, the individual image is shown in the ColorBox popup window.
The need for more interactive and user-friendly websites have given birth to various tools that improve user experiences. With images and other rich media being one of the vital factors for a successful website design, ColorBox does an amazing job at esthetically presenting images and other media. Drupal integrates seamlessly with this jQuery plugin with the ColorBox Drupal module. We hope this tutorial on the Drupal ColorBox module has helped you get a deeper understanding of this beneficial module. Want to know how our Drupal experts leverage powerful modules like these in their projects? Contact us now, we’d love to hear from you.


