Imagine you are responsible for managing the content on your Drupal website. Now your task today is to create a “Related Blogs” section for your Blog pages that will display 5 blog posts that are related to the current blog post. How would you do that?
Easy! With the help of the Drupal Views module! All you need to do is access the views interface, create a new view, configure it, add the view block in whichever page you want, preview, and save!
But the Drupal Views module gives you so much flexibility and customization options that we had to write a full article about it. Explore the amazing module in depth in this article dedicated to the power of Drupal Views.
What does the Drupal Views module do
The Views module is a versatile and powerful tool that allows you to query your content. This means you don’t need to know how to frame an SQL query and execute it. You can simply get and display the data you want by creating a view! After executing the query, the content can be displayed in a flexible and customizable manner, as a page or block that can be themed according to the design. It simplifies the process of creating dynamic lists, grids, and displays of content without requiring any coding expertise. It is a part of Drupal core in the latest Drupal versions and is enabled by default.
How to create a Basic page using Views
Creating a Basic page using Views in Drupal is a straightforward process that allows you to display content in a structured and customizable format.
Creating a new view
1. Hover on Structure on the admin toolbar then on “Views” and click “Add view”.
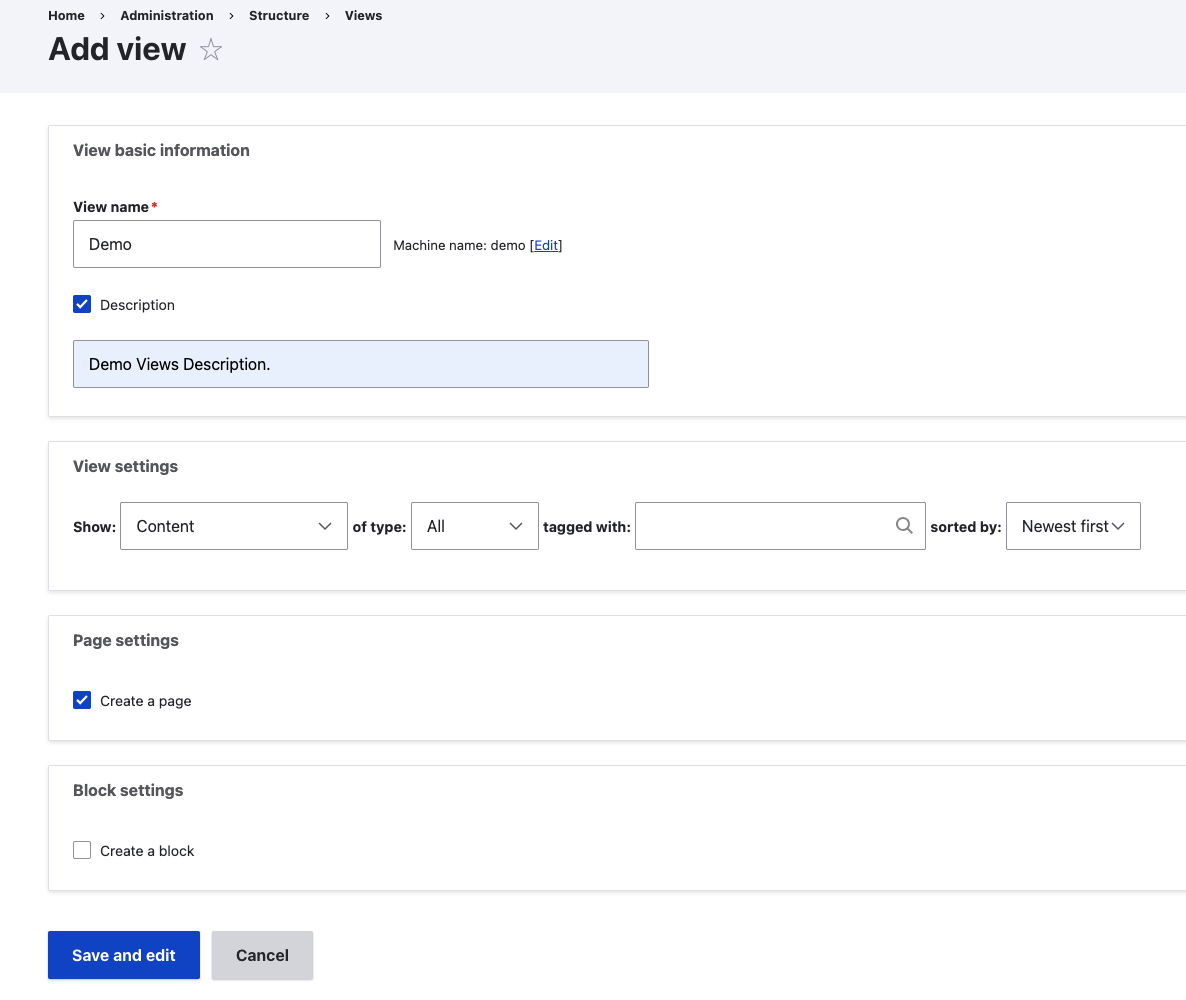
2. Now a views creation page will open with 4 sections.
- View basic information - Add name and description
- View settings - Choose the content show type. By default it is “Content”. Now choose the type of content (Content type). You can also choose tagged with and sorted by but these are not mandatory.
- Page Setting - A view page can be created by adding a name, path, format, display to item, menu link, and an RSS feed.
- Block Setting - A block can be created with a block title, block display setting, item per page, and pager
3. After filling in details according to step-2, Click on the Save and Edit button. Now the View display page will open. The display page has a lot of other options so it is divided into 3 columns (as shown in the screengrab below).
Configuring the View display
Once you create a view, it is now time to configure it. In the Views editing interface, you'll see several sections to customize your view's settings.
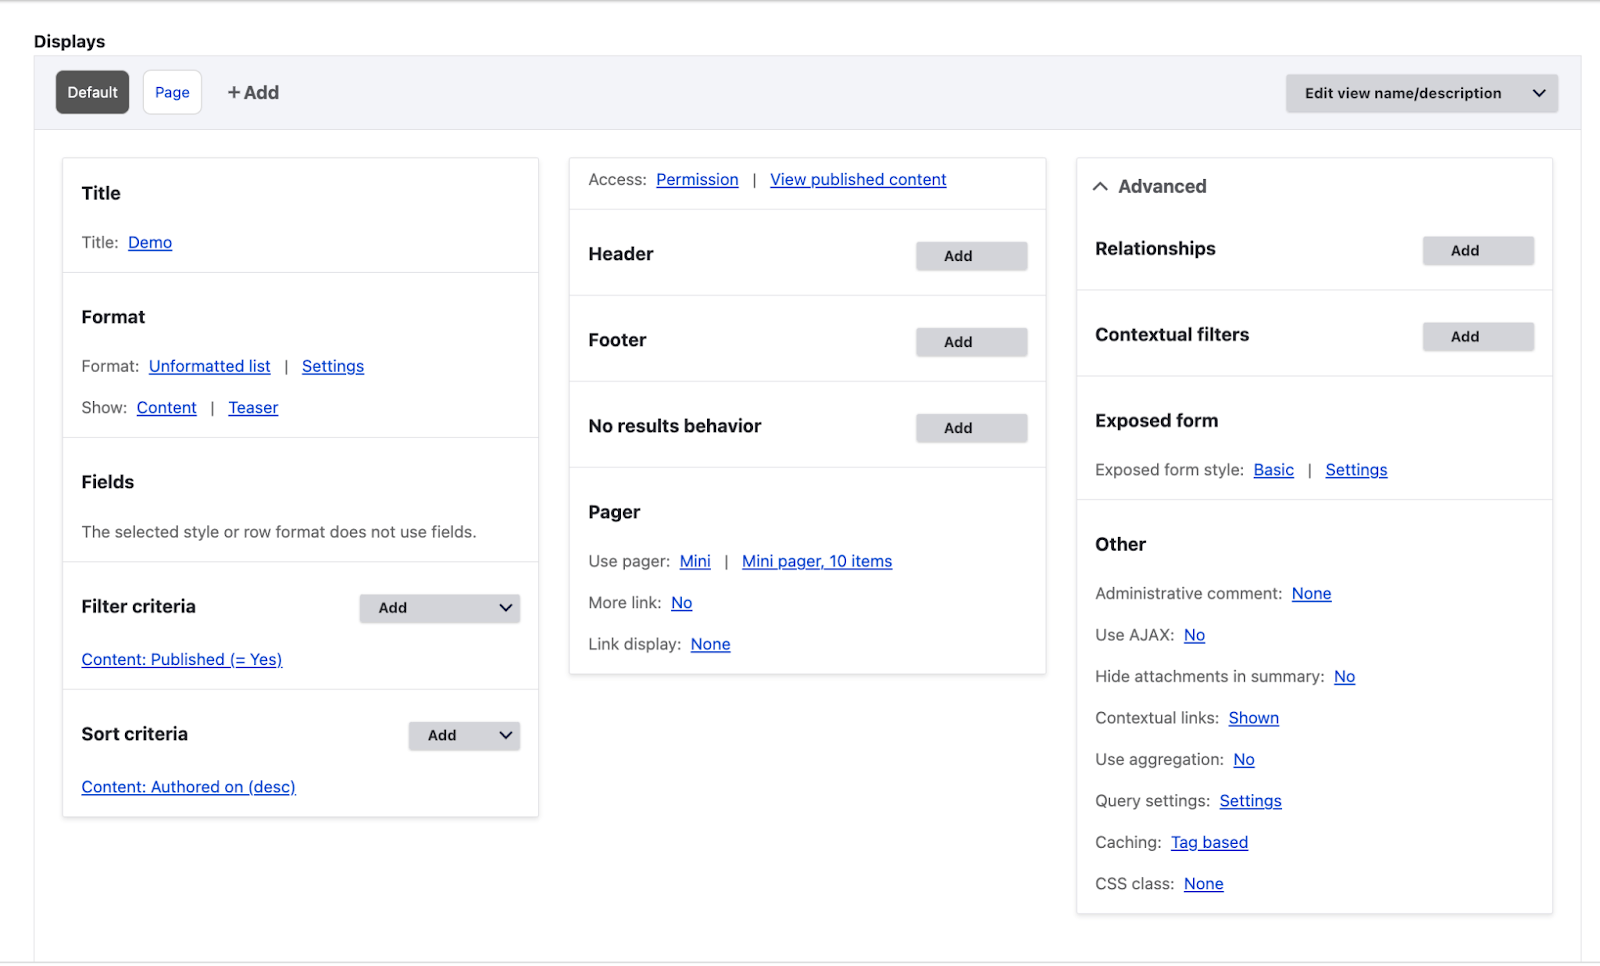
1. Title - Title of the View
2. Format - Select how you want the basic page content to be displayed
A. Format: View provides 4 type formats - Grid, HTML List, Table, and Unformatted list.
B. Show: The default show type are Content, fields and Search result. Each show type provides its own settings. These settings are very useful for managing content with views.
The format and format show type may add more according to the available contributed module.
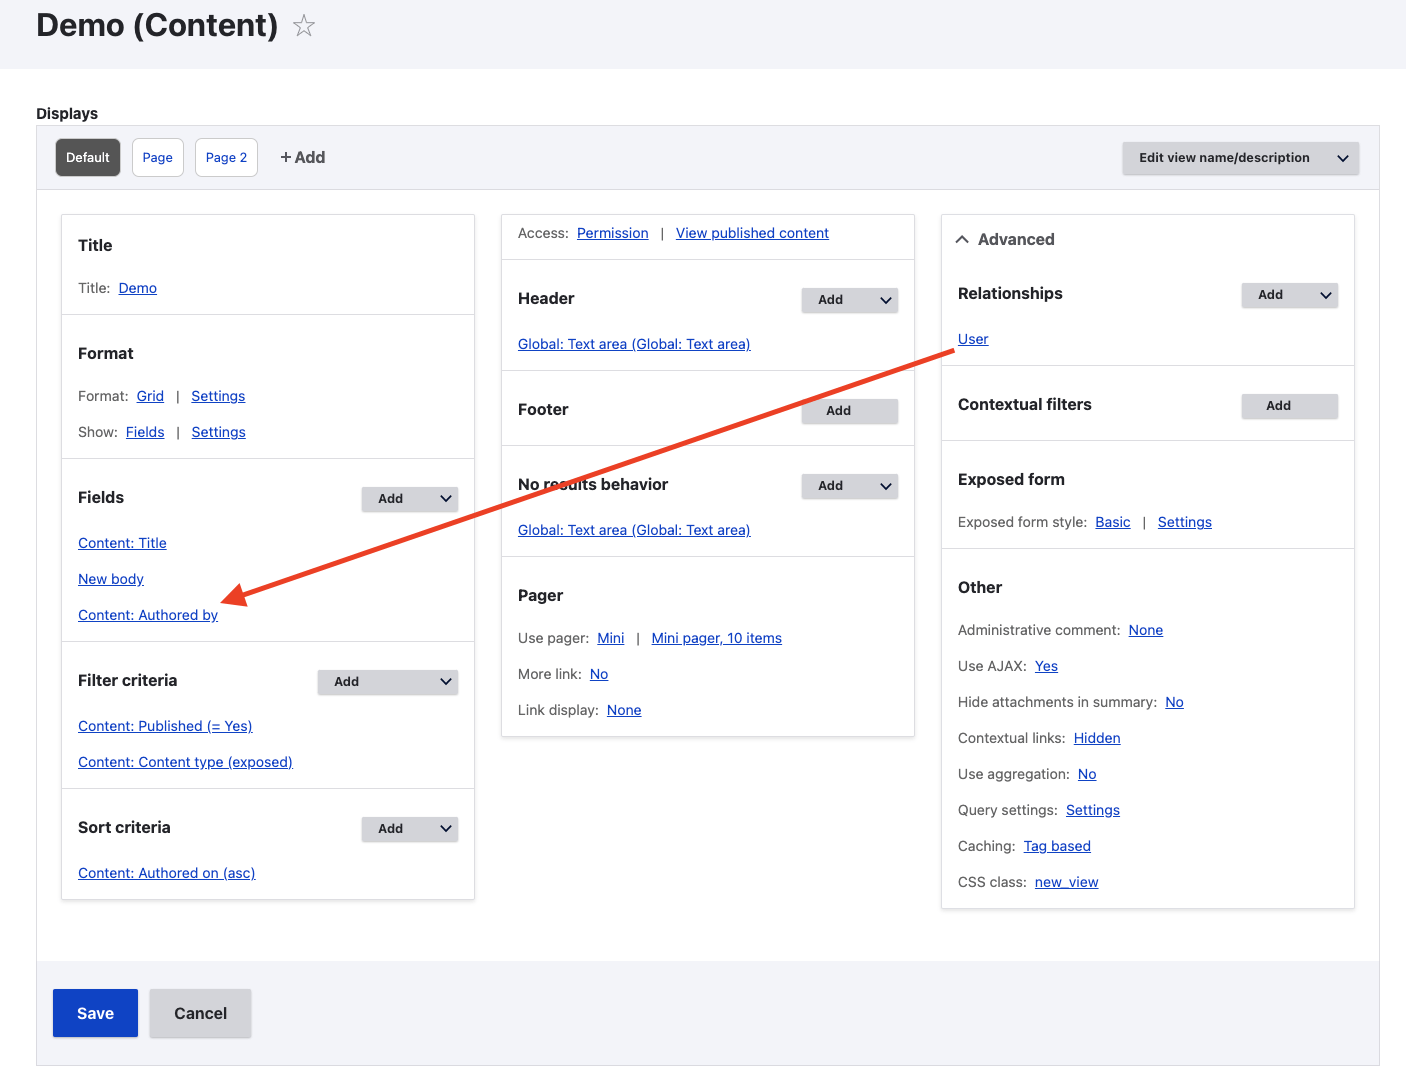
3. Fields - The section will be active when we choose the format as a field from the format section. The fields can be added by clicking on “Add field”. When clicking on “Add field”, a popup will open and the required field can be searched and added. After adding a field you can configure it. When clicking on the field name, a popup will open with the following options:
- Create a label: If you want to add a label then check it and write a label
- Exclude from display: If you do not need to render on the view page or block.
- Formatter: You can set a formatter for this field. A list of formatters are provided by default and it can extend with a contributed module.
- Link to text - A link will get added to this field when it renders.
- Style Settings - HTML Markup and style classes can change.
- Rewrite Results - This section provides a lot of features to manipulate the view output:
i) Override the output of this field with custom text
ii) Output this field as a custom link
ii) Trim this field to a maximum number of characters
iv) Strip HTML tags
v) Remove whitespace
vi) Convert newlines to HTML <br> tags - No results behavior: When the field does not have any value then you can show a custom message or hide the field.
- Administrative title - The title which will show only to admin users.
4. Filtered Criteria - You can add fields in the Filtered criteria which will be used to filter content. Each field provides tons of configurations that help manage conditional filters. For example, two content types
5. Sort Criteria - You can show the content in ascending and descending order using this file.
6. Page Setting - This section helps add a path, add this page to the menu, and a menu tab.
7. Header Section - Add fields in the Header of the views page/block. The most common field is “Text area” which is used to add static makeup content.
8. Footer Section - Just like the header section, you can add a field here as well.
9. No Result Behavior - If the views do not have any content then a custom message can be displayed by adding a markup field.
10. Pager - The Pager and ‘more link’ can be added or removed. Also, different type pager options are provided by default view. You will also find many contributed modules to change the looks and features of the pager.
Pager options:
- Display a specified number of items
- Display all items
- Paged output, full pager
- Paged output, mini pager
11. Advanced
1. Relationships: allows you to create connections between different entities (content types, users, taxonomy terms, etc.) and access their fields in a view. To set up a relationship in Drupal Views, follow these steps:
- Create a new view or edit an existing view in the Views interface.
- In the view's configuration, locate the "Advanced" section and click on it to expand the options.
- Click on the "Add" button next to the "Relationships" fieldset.
- A dialog box will appear with a list of available relationships based on the selected base table (content type). You can choose a relationship based on the entity you want to establish a connection with. For example, if you want to display a field from a referenced entity, you would select the appropriate relationship related to that entity.
- After selecting a relationship, click on the "Apply" button to save it.
- Once the relationship is added, you can now add fields, filters, or contextual filters that use the newly established relationship.
- To add a field related to the relationship, go to the "Fields" section, click on the "Add" button, and you will see new field options available under the relationship's heading. Choose the desired field and configure its settings.
- To add a filter using the relationship, go to the "Filters" section, click on the "Add" button, and select the filter criteria from the available options under the relationship's heading. Configure the filter settings as needed.
- Similarly, you can add contextual filters that use the relationship to dynamically filter the view results based on the context provided.
- Save the view and preview it to see the results of the relationship-based configuration.
2. Contextual filters (previously known as "Arguments") are used to filter view results dynamically based on contextual information, such as the value in the URL or other contextual inputs. Contextual filters allow you to create more personalized and targeted views by leveraging the provided context.
- Click on the “Add” button of the Contextual filter
- A dialog box will appear with a list of available contextual filters based on the selected base table (content type). You can choose a contextual filter based on the field or taxonomy term you want to use for filtering.
- Select the desired contextual filter and click on the "Apply" button to add it.
- After adding the contextual filter, you can configure its settings.
- Save
Contextual filters are particularly useful when you want to create dynamic and personalized views that change based on the context provided. They enable you to build powerful views that respond to user interactions and provide tailored content.
3. Exposed Form: An exposed form allows users to interactively filter and modify the results of a view directly from the front end of your website. It provides a user-friendly interface that enables visitors to refine the displayed content based on their preferences.
4. Other
- Machine Name: Views machine
- Administrative comment: A comment can be written for other developers to better understand the functionality.
Use AJAX: Turn on/off Ajax - Contextual links: Show or hide contextual links on the view
- Use aggregation: When you have a duplicate entry in views, it can aggregate.
- CSS class: A custom class can be added on the wrapper div of view.
Creating a Views block display
Now circling back to my first example of creating a view for a Related blogs section where you can add this as a block to any page. Usually used in the Articles section.
Drupal Views block display is one of the available output formats for your content listing or data display. A block display allows you to create a reusable content block that can be placed in various regions of your website's layout, such as sidebars, headers, footers, or any other block region supported by your theme. Let’s now look at how you can create a view block display.
Step 1: Create a View block
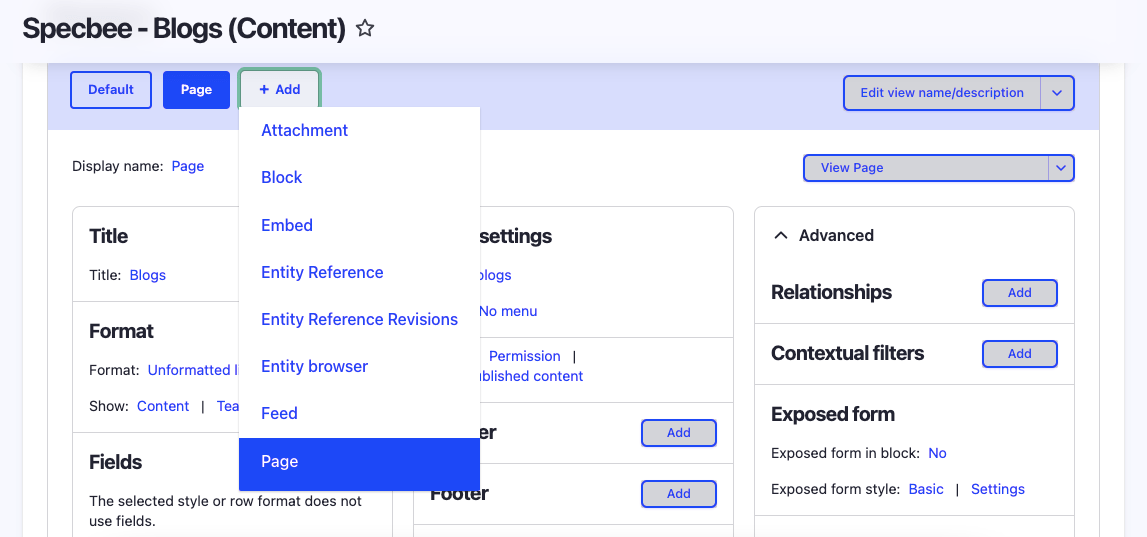
If you are creating a new view, click the "+ Add" button next to "Displays" to add a new display. Select "Block" as the display type from the options presented.
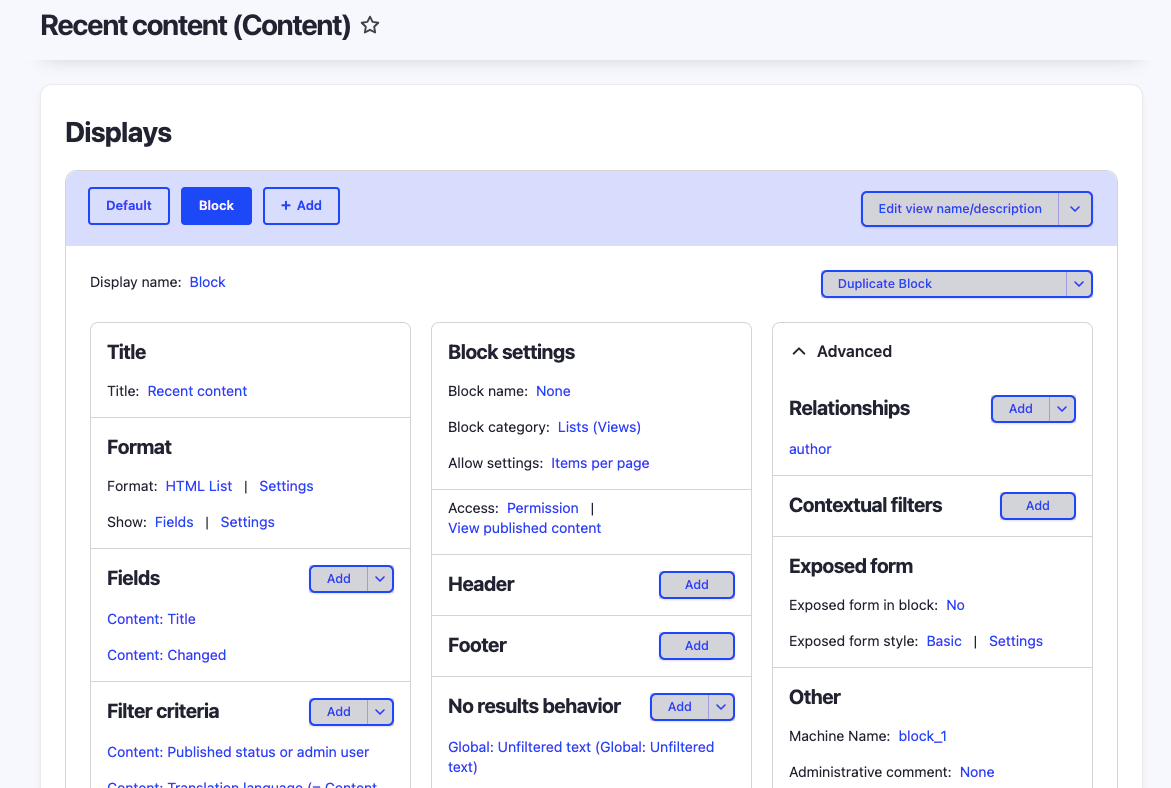
Step 2: Configure the view
Similar to what we did while creating a page view, you can configure the view block too. Give your block display a name and adjust other settings specific to the block format, such as the block title, number of items to display, and more. Set up your filters, sorts, and any field formatting specific to the block display and save the block.
Step 3: Add the block
To be able to view the block in all pages (Global) or a specific page/path, you will need to add it in the Block Layout. After saving the view, the block display will now be available.
Go to Structure > Block layout (admin/structure/block) to manage your blocks.
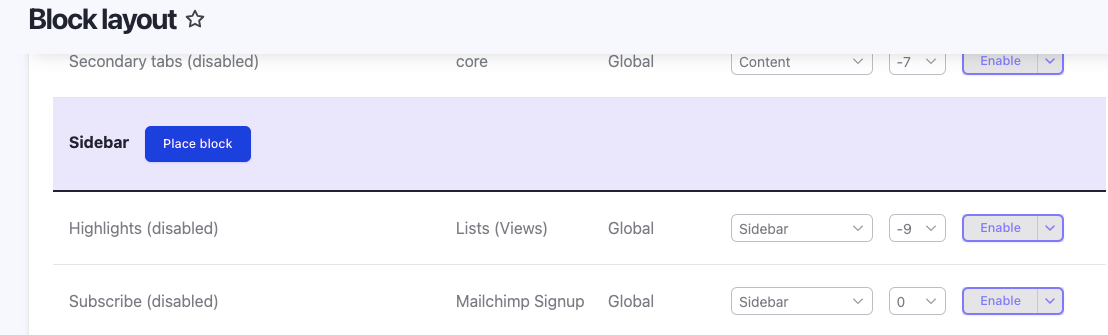
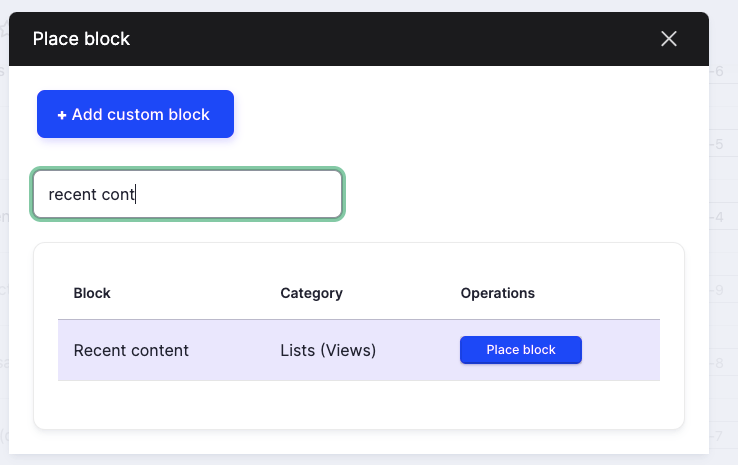
Step 4: Place the block
When you click on the place block button, a popup will open. Now, find the view block you just created in the list of available blocks, and then place it in the desired region of your website's layout. You can further control the visibility of the block by using the "Visibility settings" provided in the block configuration.
Once you have placed the block in the desired region and adjusted its visibility settings, click the "Save blocks" button to apply the changes
Now, the Drupal Views block display will be visible in the specified region of your website, presenting the content you configured in the view. As you make changes to the view configuration, the block display will automatically reflect those changes, making it a powerful and flexible way to present dynamic content throughout your website.
Final Thoughts
The Drupal Views module offers more types of views than just the common “Page” and “Block” views. For example, there’s the Attachment view that can be combined with other views, a Feed view where you can add RSS feeds of your content, a table view allowing you to display content in a tabular format, and much more! There are many contributed modules to extend these features as well. Want to stay updated with the latest in Drupal and Drupal-related insights? Subscribe to our newsletter and get weekly updates delivered to your inbox!

Ravikant
Related Insights


Don't Miss Out!


