It is official - customers engage more with a business that offers personalized and relevant content - 55% more! I mean, who doesn’t like tailored experiences that make them feel like they are being listened to? Content personalization is all about delivering contextual web experiences to your customers. Drupal 9 gives you the power of Content Personalization to help you deliver enhanced web experiences. Learn how you can leverage the Smart Content module for Drupal 9 to make your content smarter.

What is the Smart Content module?
The Drupal 9 Smart Content module helps personalize any Drupal 9 website. It allows site administrators to showcase different content to users based on their browser conditions.
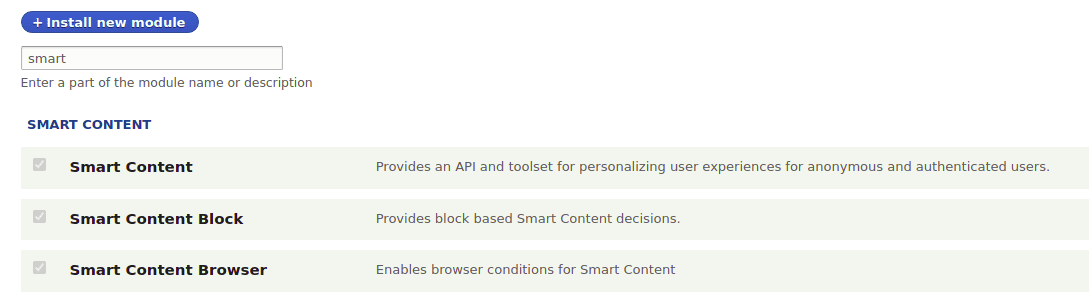
This module includes two submodules to extend its functionality. They can be enabled from the Extend tab in the admin window.
Smart Content Blocks : adds a Smart Block on your page that can hide, show, or swap content within that block, based on the segments.
Smart Content Browser : enables browser-based conditions (language, OS, mobile, cookies, etc.) which admins can use to evaluate whether to display personalized content.
There are a few other additional modules (not included) that you can use to further enhance your personalization experiences in conjunction with the Smart content module. Like the Smart content Datalayer module that connects with your analytics system via the data layer. Or the Smart content UTM that let’s you handle UTM strings data, which we will be discussing about later in this article.
Implementing the Smart Content module in 4 Steps
Step 1: Installation
First, let’s install and enable the Smart Content module and its submodules.
Step 2: Creating segments
Segments are conditions or a set of conditions that determines the display of reactions. To create segments:
- Navigate to Structure > Smart Content > Manage Segment Sets
- Click on “Add Global Segment Set”
- Add a label to the segment set and click on “Add Segment”
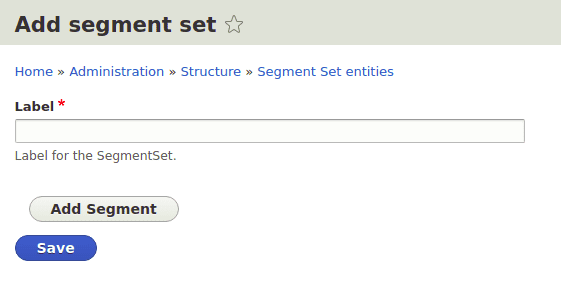
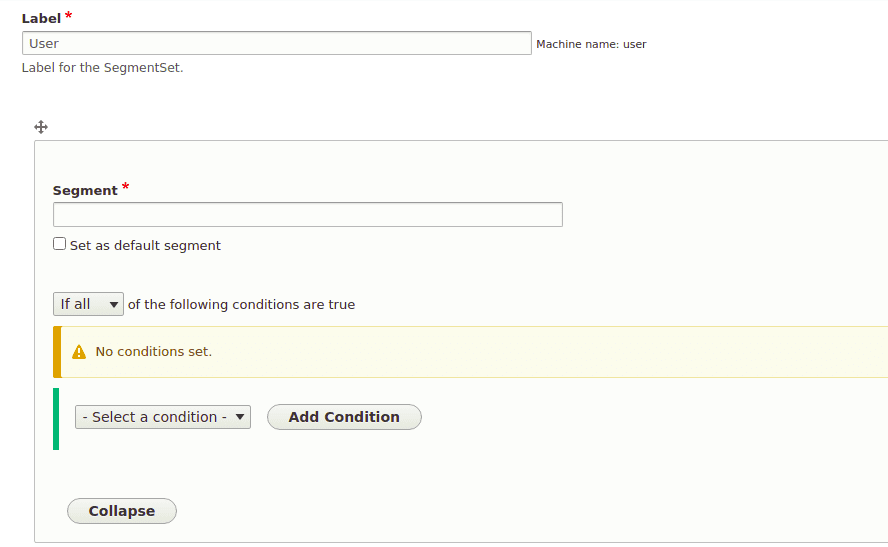
When you click on Add Segment, you get a segment form with mandatory field segment and options to add your conditions (like the one shown below).
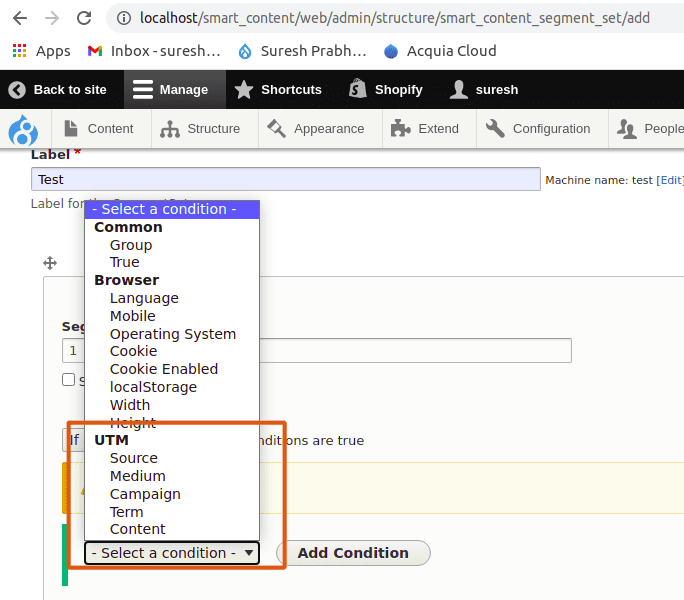
On clicking the Select a Condition dropdown list, a set of browser-based conditions will be shown provided by the smart content browser module. These conditions are used to create condition segments.
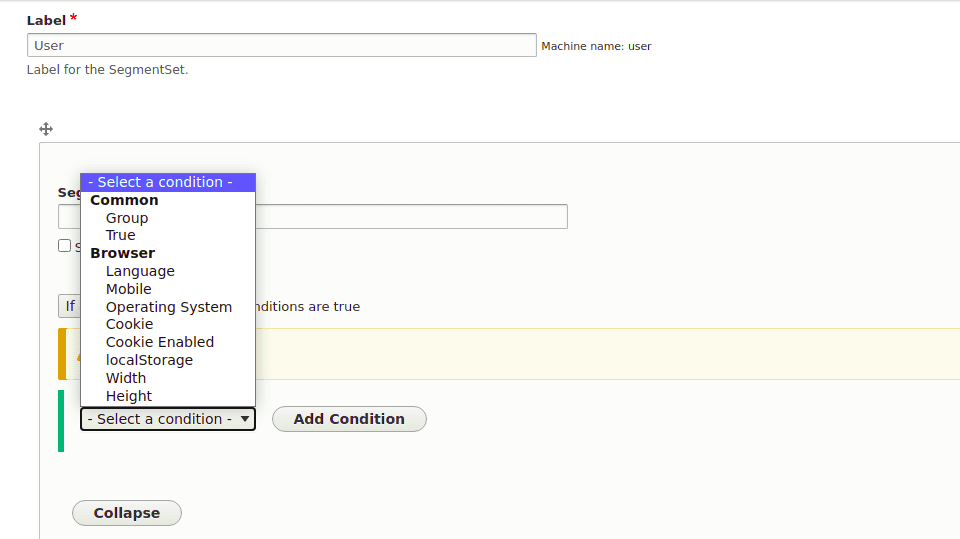
List of conditions you can choose from :
- Group - used to group two or more conditions
- True - when the value is 1
- Language - based on the language used by the browser to load the site
- Mobile - you can render different blocks based on the display. The mobile checks whether it's a mobile display or not.
- Operating system - checks for the OS; for example windows, mac, android, and a few more.
- Cookie enabled - checks whether the cookie is enabled for the site, and also can change the contents based on the value set through cookies.
- Local storage - can be used to personalize the contents
- We can even change the content based on the width and height of the browser.
For simplicity, let’s proceed with an example going further. I want to show different content for a user named “Specbee” and different content for other users.
Here, I have given my segment set name as “User” and also named my first segment as “specbee” because this condition is for the user specbee. It's always better to give the segment name related to the conditions.
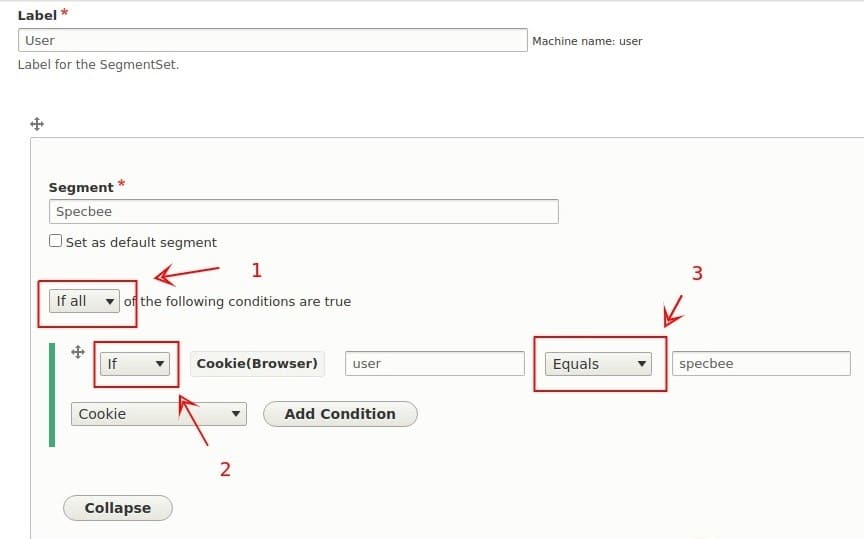
Here the conditions can be changed as needed (Refer to the image above):
- “If all” can be changed to “if any”.
- Here we have 2 options “if” and “if not”.
- This has 5 options Equals, Contains, Starts with, Is empty, and Is set. You can change it as required.
The first condition will be: “if” the cookie with the name “user” is set to “specbee”.
For the other condition, click on Add Condition below and add the second condition: “if not” the cookie “user” equals “specbee”.
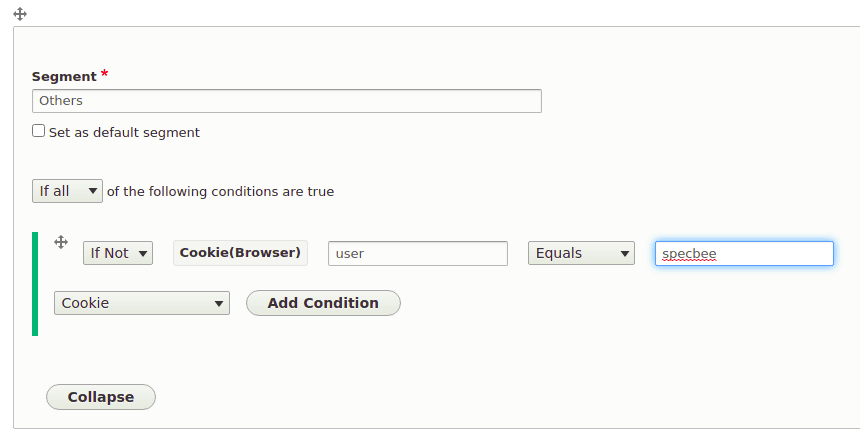
Next, save the segment.
Step 3: Creating blocks
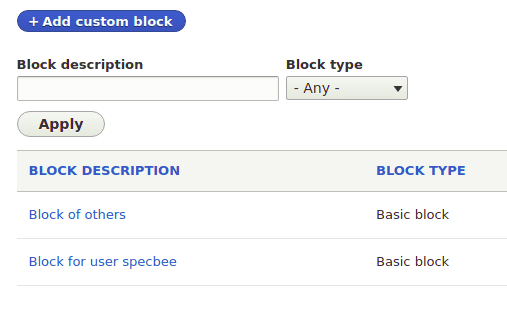
Now that we have created our conditions, let’s get moving with what to display based on those conditions. For that, you will need to create blocks based on the conditions. As per the same example, let’s now create two blocks - one for each condition (specbee user and other users).
Step 4: Placing the block
Go to Structure -> Block layout, choose the region where the block has to be placed, and click Place block. Search for the Decision block and place the block.
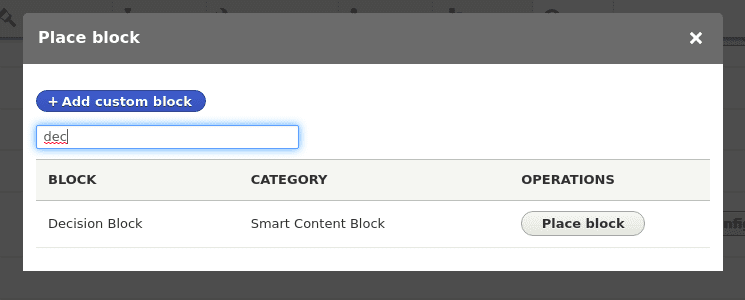
This Decision block is provided by default by the Smart content block module.
On clicking the Place block button, you will now see options to choose the segments.
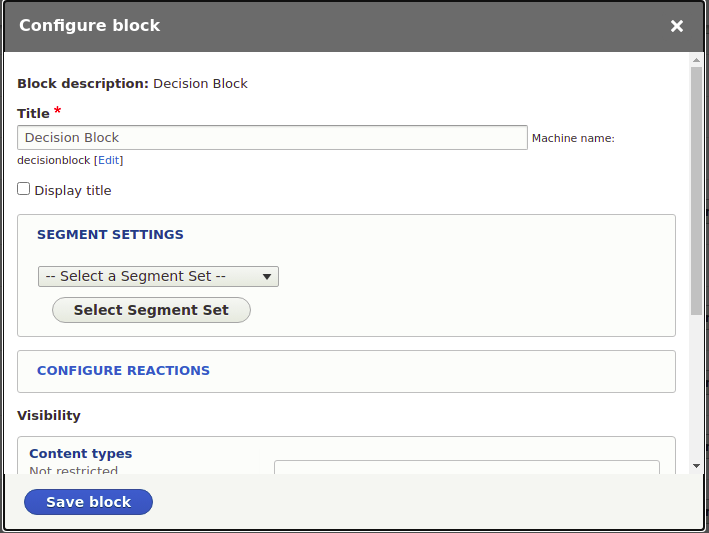
It's always better to change the title of the block because otherwise all the blocks will have the same name.
- Clicking on Select a Segment Set will list all the segment sets created under the smart content tab. Select the segment and click on “Select Segment Set”.
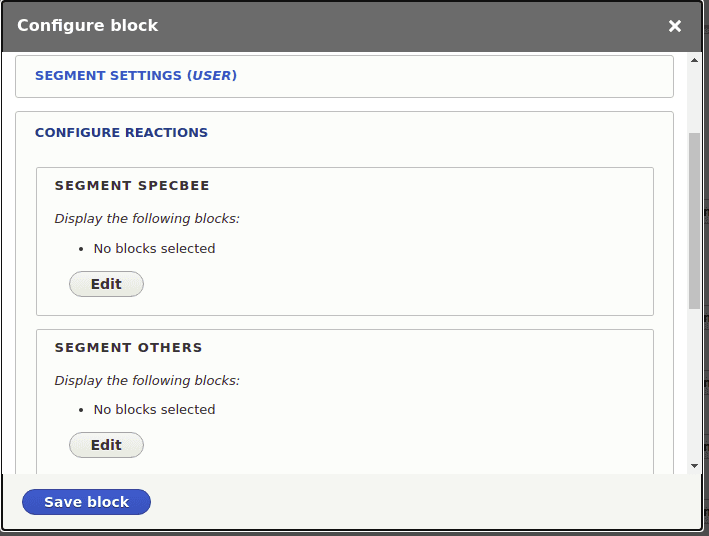
- Now, you will get the conditions created in the segment set selected. Click on edit and select the blocks to display based on conditions. Same as placing a normal block. Any number of blocks can be placed for one condition.
- After selecting the block, click on save.
Displaying the Blocks
Here the blocks are displayed based on the cookie property. If the cookie user is set to “specbee” (as per our example) then the “Block for user specbee” will be displayed else the “block of others” will be displayed.
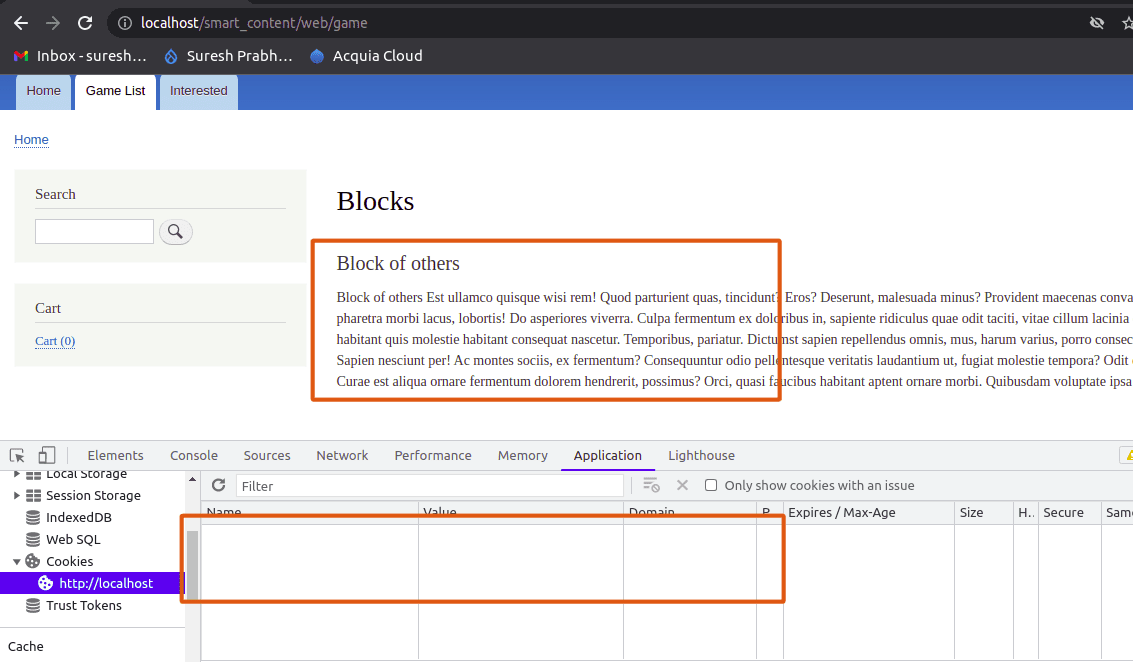
In the above image, you can see that since no cookie is set, as per the condition the “blocks of others” is displayed.
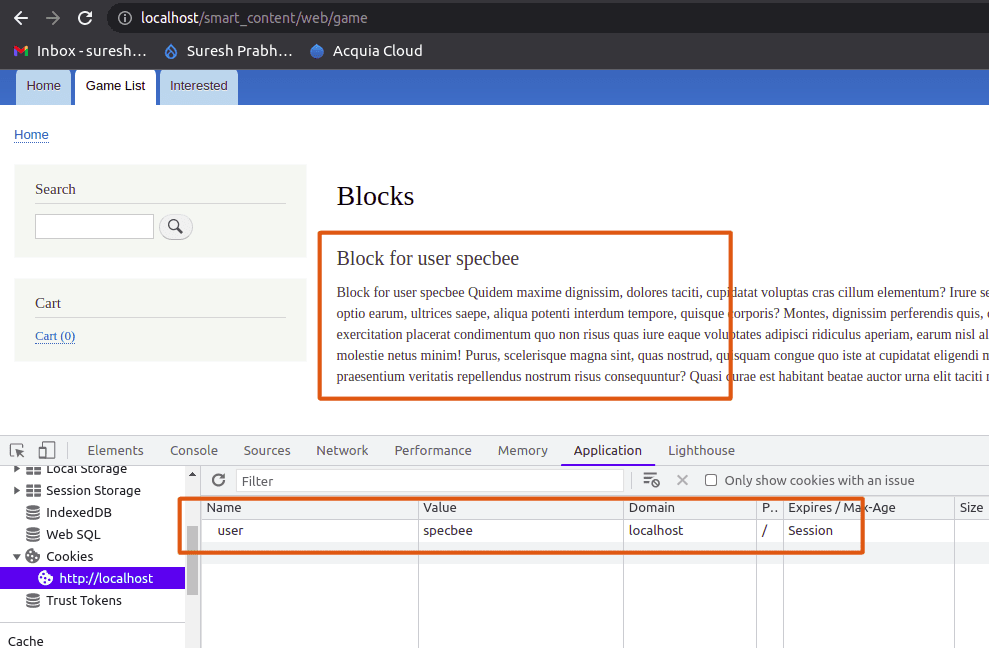
And here the “Block for user specbee” is displayed instead of the “block of others” because the cookie with the name “user” is set to “specbee” which makes the condition true.
Smart Content UTM Module
As discussed previously, there are other additional modules that you can install to extend the features of the personalization module. Smart content UTM is one such module that works along with the Smart Content module. It allows UTM parameters to be used in creating segments.

Implementation of this module is very simple. Simply install and enable the Smart Content UTM module. On creating the segment, options on UTM parameters are available to use (as shown below).
This module can be used only if required. It is not a submodule and needs to be installed separately. It is particularly useful when you want to display content based on different ad campaigns that you are running. It grabs the ad source from the UTM source parameter in the URL and displays content based on it.

Suresh Prabhu
Related Insights


Don't Miss Out!


