Table of contents
- Introducing the Layout Builder
- Layout Builder module installation and configuration
- Modify the Content Type and Taxonomy
- Insert Sections into the Layout
- Insert Blocks into the Section Regions
- Selecting a block
- Layout Overrides:
- Layout Builder from Code
- Layout Builder Pros and Cons
- Pros:
- Cons:
- Final Thoughts
When it comes to page building, site builders, content authors, and content editors are constantly on the lookout for a smooth, user-friendly experience. When they wish to design and construct pages, they expect to use drag-and-drop and CKEditor technologies. This identical experience is provided by Drupal Layout Builder's simple page construction functionality in the Drupal core.
The distinctive Drupal Layout Builder offers a potent visual design tool to let content authors alter how content is presented. Layout Builder, which was added to Drupal core in its most recent version, Drupal 9 enables you to add/remove sections to show the content using various layouts and customize your pages according to what you need. With Drupal 9's Layout Builder Module, you can mix these sections to make a completely unique page.
There are two different ways to use the Drupal 9 Layout Builder: Layout Defaults (to design a layout for all the content of the content type) and Layout Overrides (to design a layout for the specific content item). You may learn more about and get started using the Drupal 9 Layout Builder module with the help of this blog.
Introducing the Layout Builder
You can change how entities like content types, taxonomies, users, and more look by using the Drupal 9 Layout Builder module. Site builders may easily drag and drop blocks, fields, and other elements into place using this feature.
By providing a preview of the changes made as you design your layouts, the layout builder module in Drupal 9 facilitates the layout-building process. The layout builder in Drupal 9 enables previews of the changes made for a smooth layout creation experience rather than requiring users to save every tiny modification they make to the layout and then look it up on the front end.
The layout builder has two modules:
Layout Discovery - Gives modules or themes a means to register layouts.
Layout Builder - Enables users to directly add and organize blocks and content fields on the content.
When designing a layout, Layout Builder uses two key ideas:
Sections - Columns or containers where blocks can be placed. For example, it could be a 2-column layout or a 3-column layout, etc.
Blocks - Content elements that can be placed in sections.
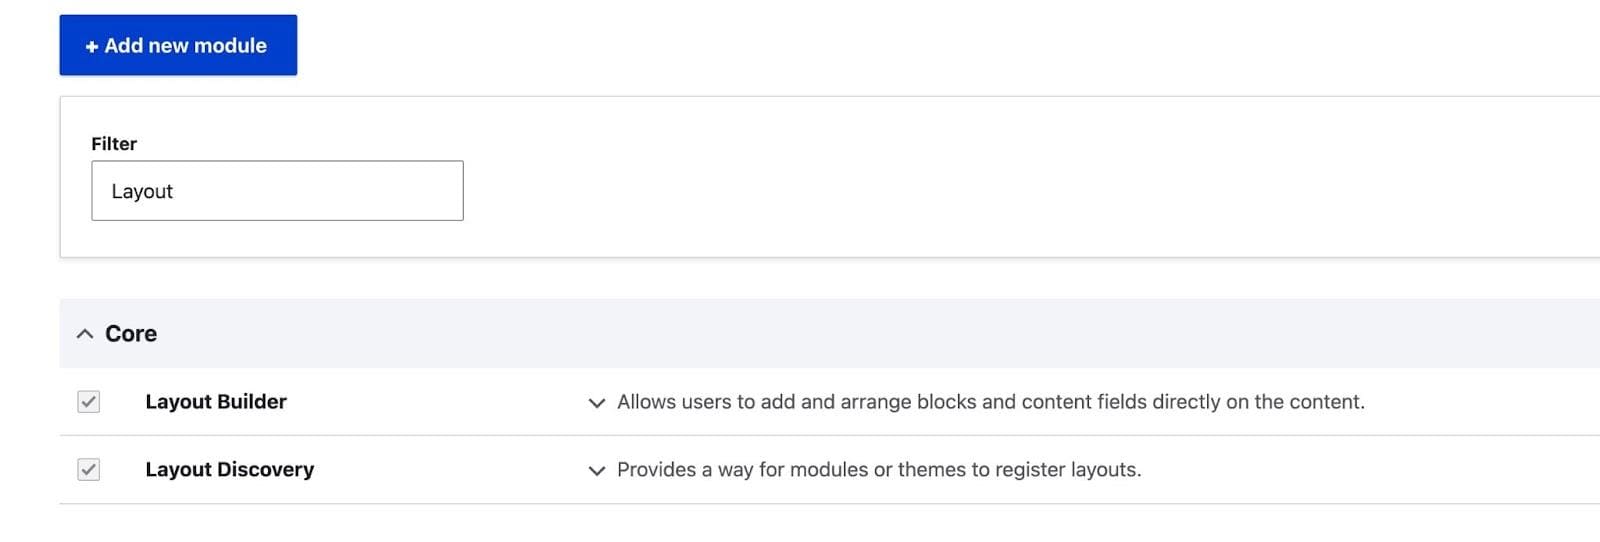
Layout Builder module installation and configuration
Go to Extend and activate the Layout Builder and Layout Discovery modules to install and configure the Drupal 9 layout builder module.
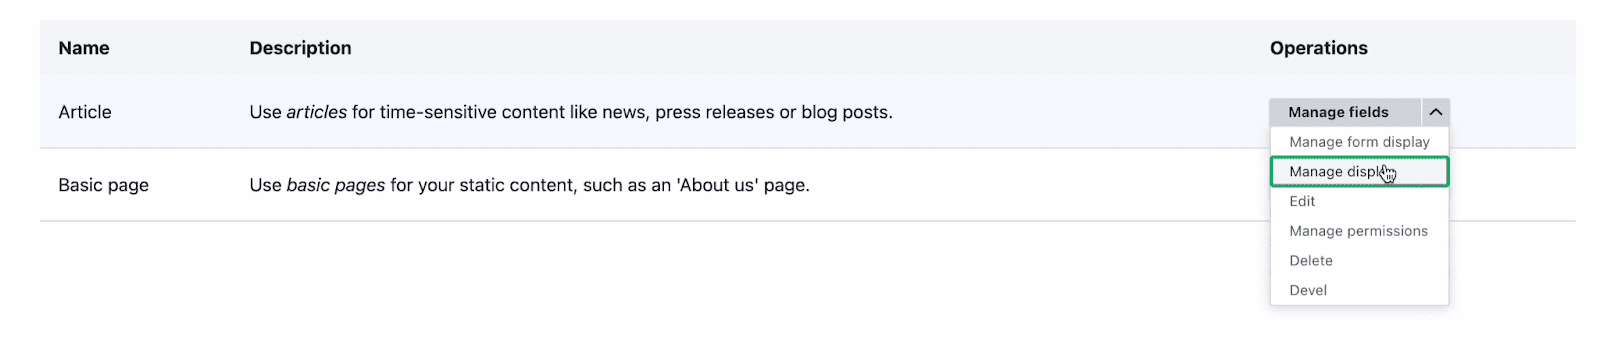
Modify the Content Type and Taxonomy
Once the module has been installed, go to Structure, Content types, and select "Manage display" for any content type. For this example, we'll use the "article" content type.
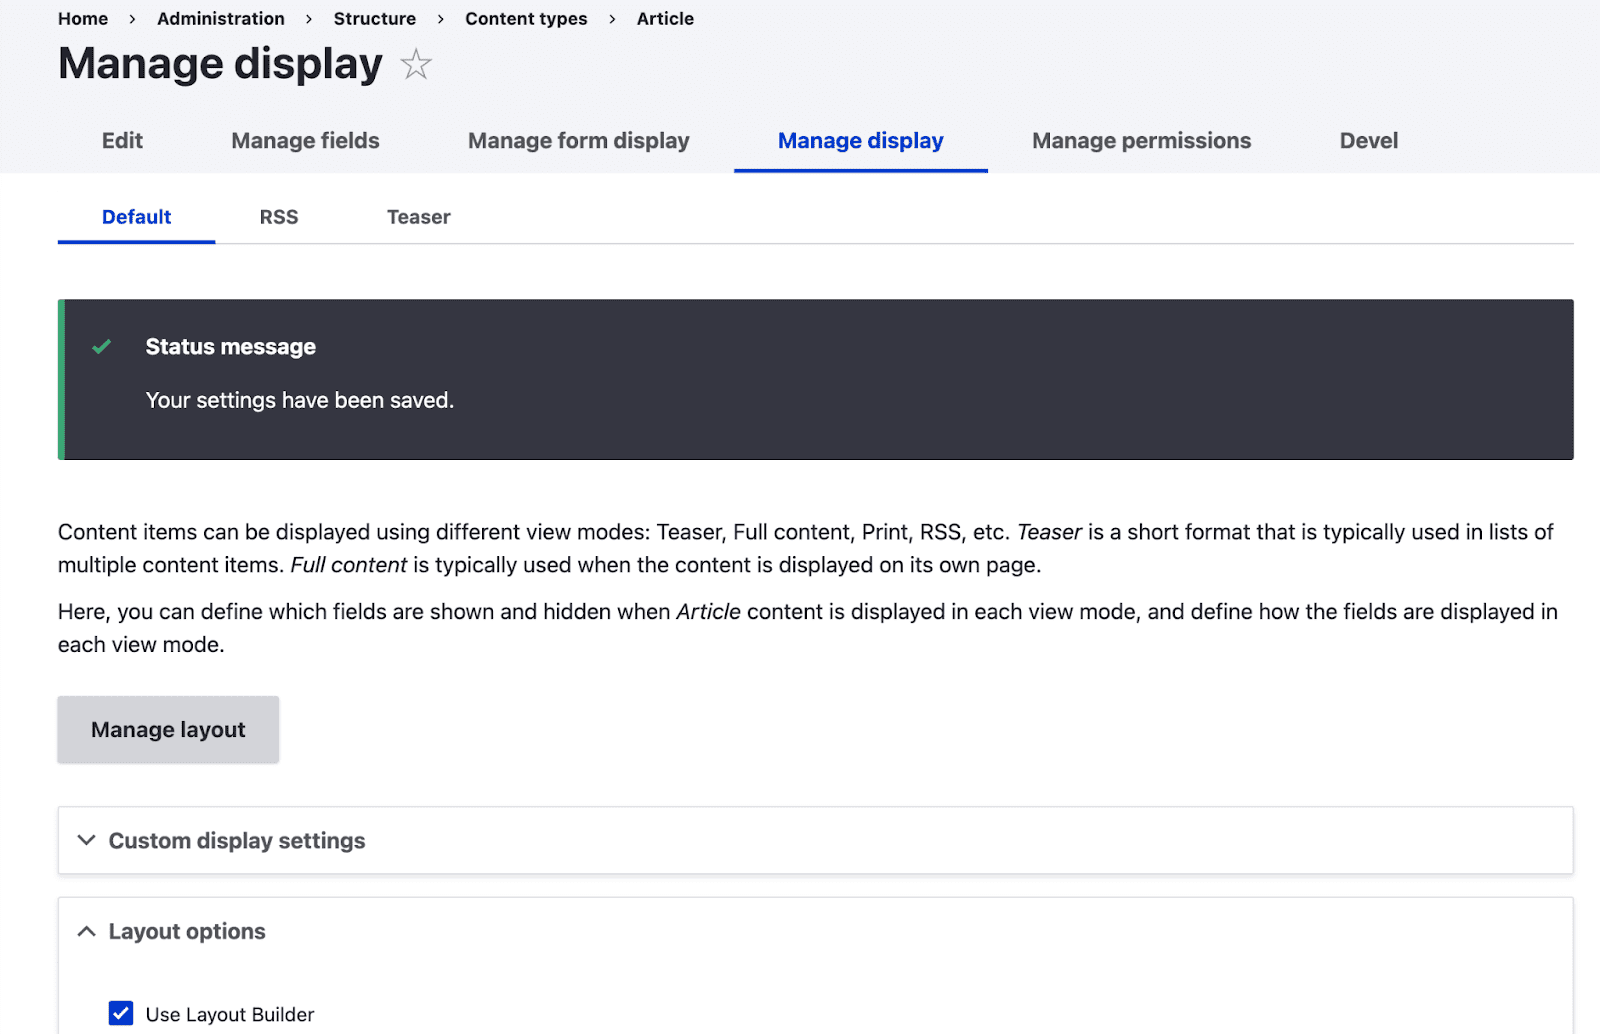
Click the Layout options drop-down menu at the bottom to select "Use Layout Builder," then click Save.

Field formatters are replaced with a "Manage layout" option after Layout Builder is activated in the view mode. Each of the available view modes can be used with Layout Builder.
You will be taken to the article content type layout when you click "Manage layout."
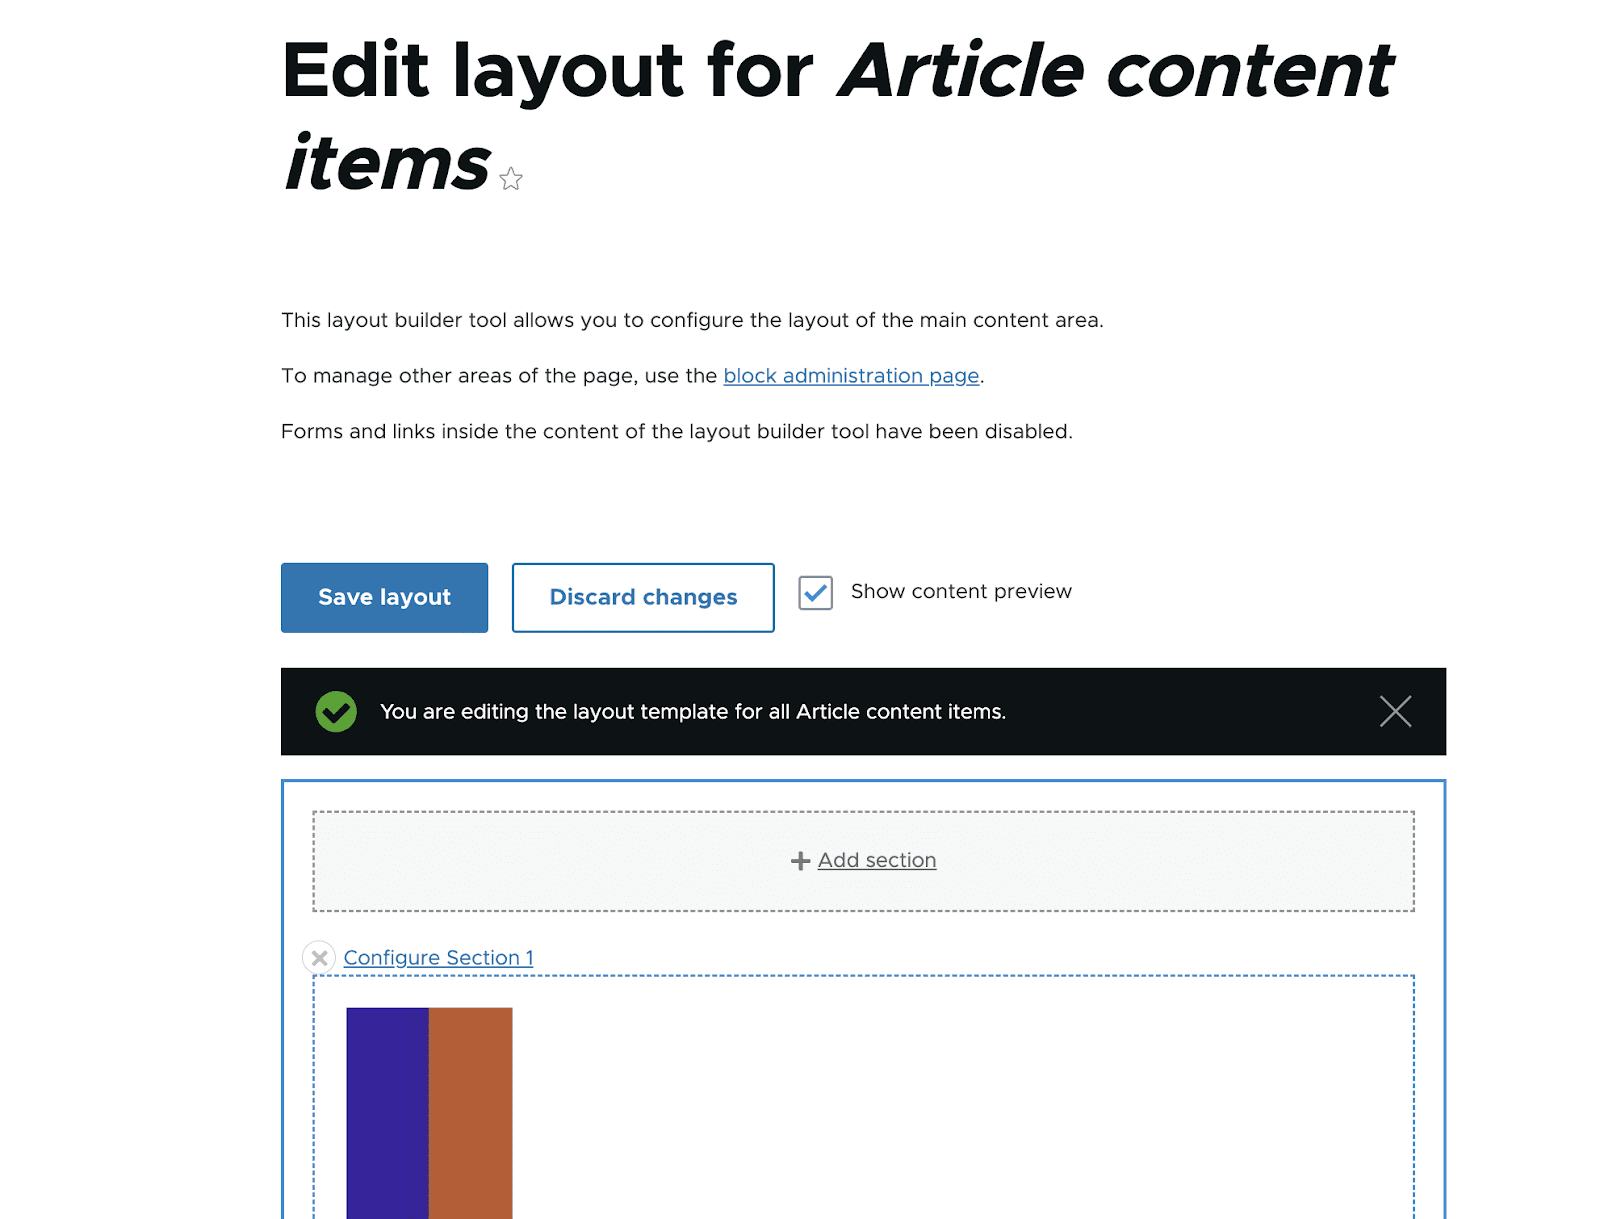
Insert Sections into the Layout
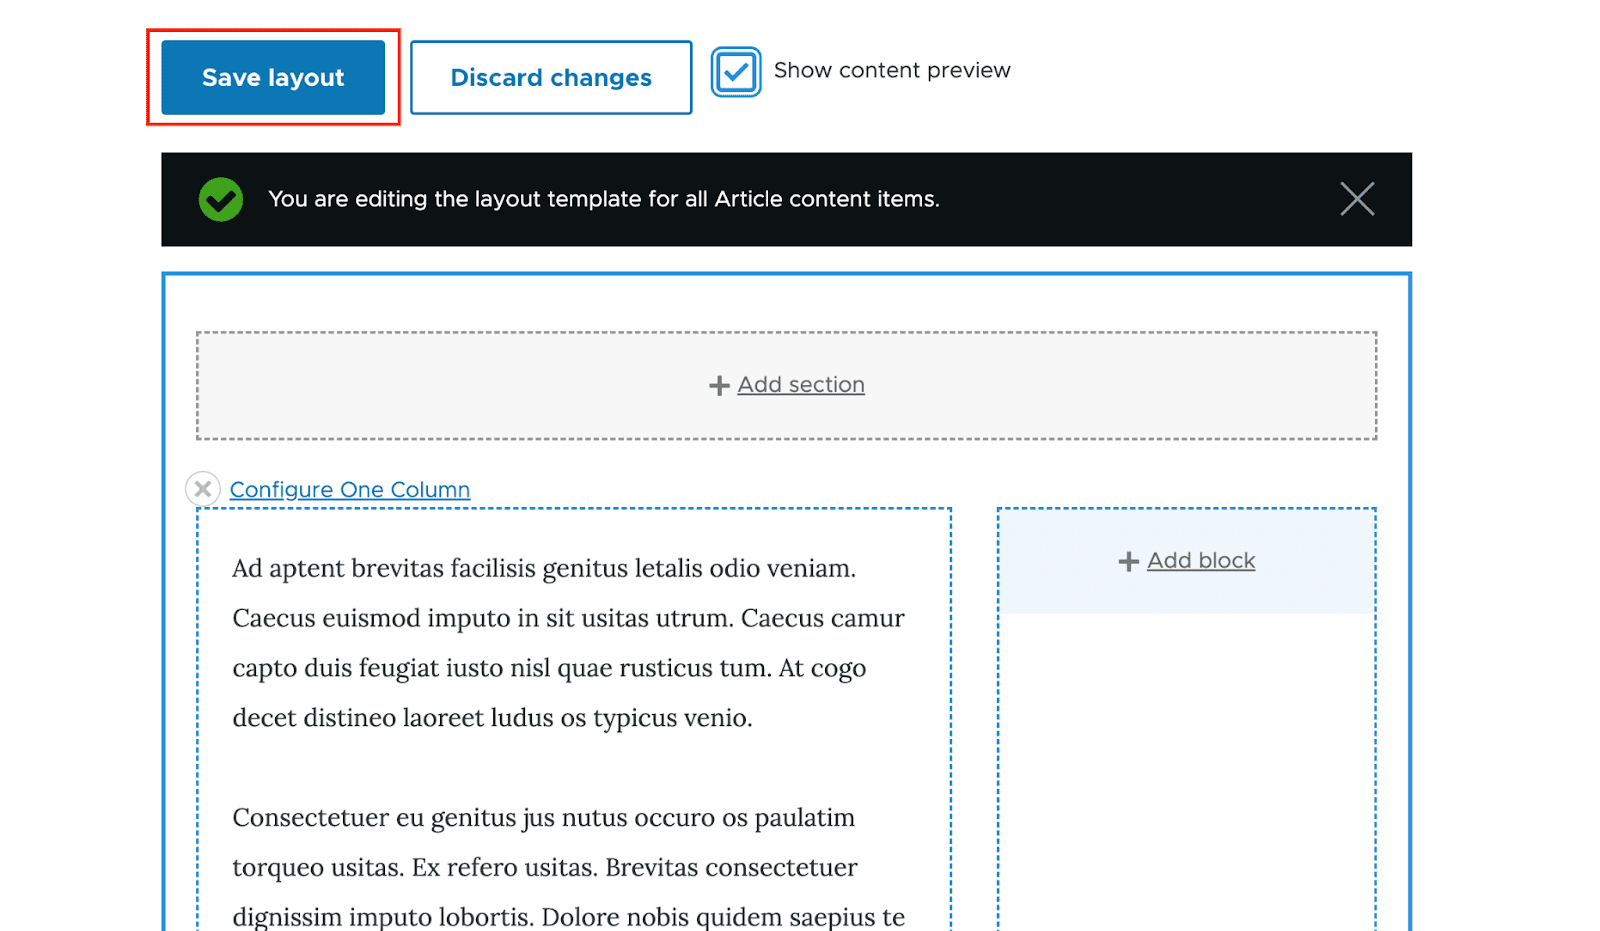
Remove the default section before adding any more ones to the layout builder. Select the "close" button (as depicted in the below screenshot). Also, a button to remove the default section will be available to you on the right side of your screen. Then select "Remove."

By selecting the "Add Section" option, let's add a few sections to our layout. On the right side of the screen, options will also be offered to you so that you can select a layout for your section. For now, let's pick the "Two Column Section."
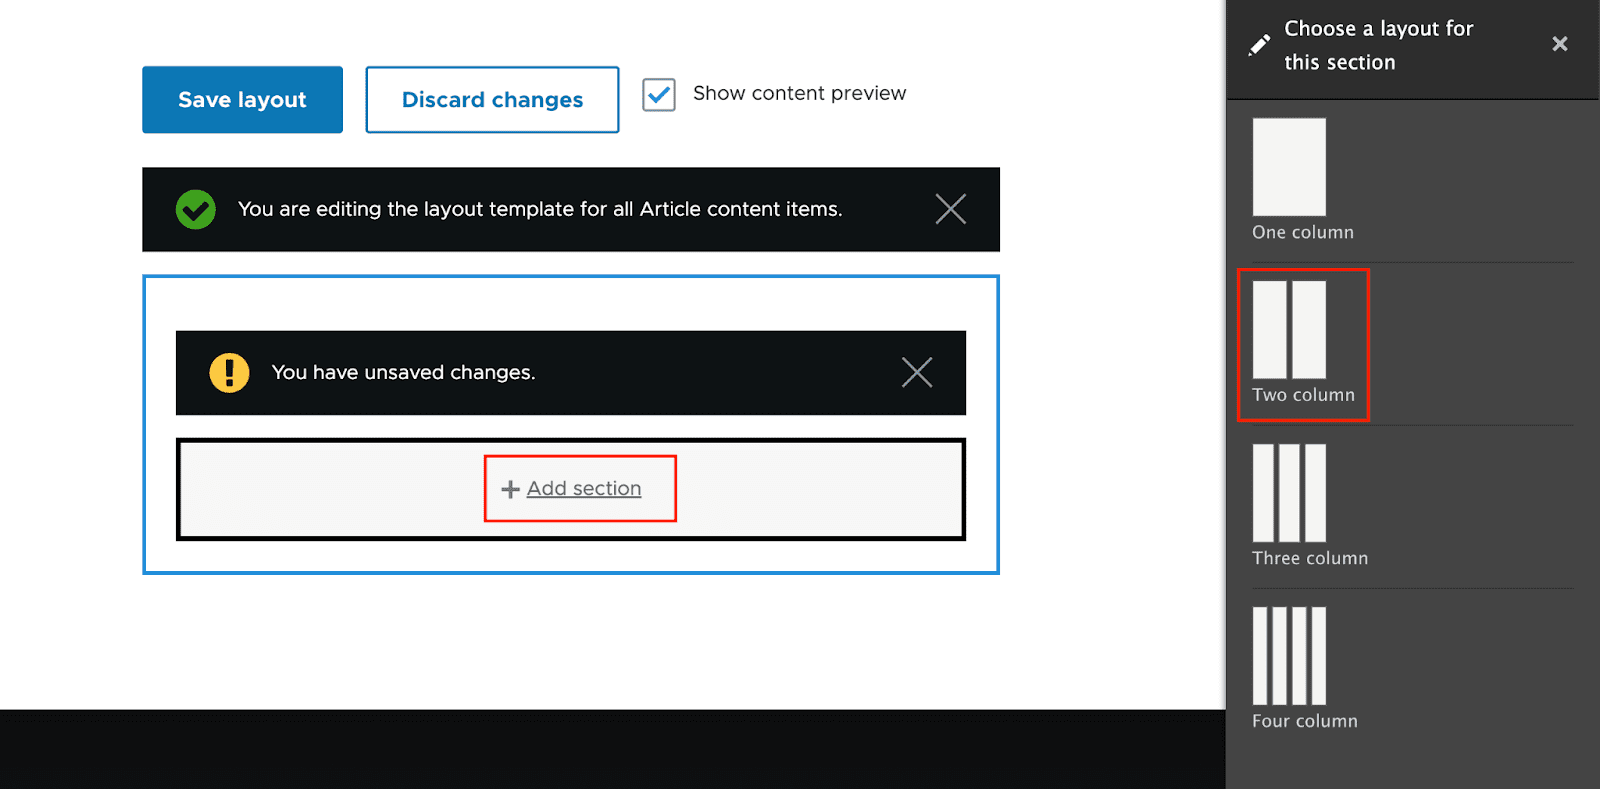
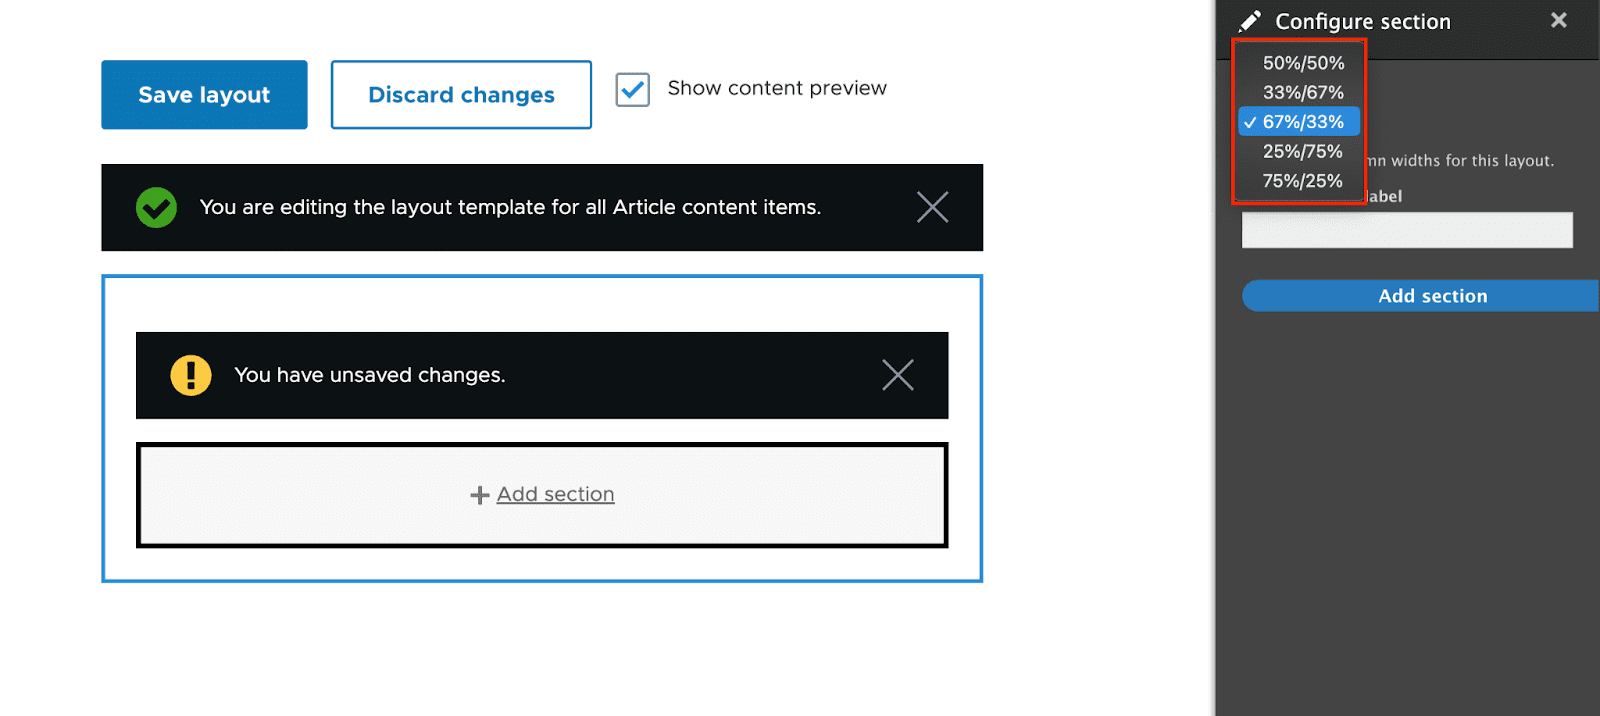
You will be given the option to select the "Two Column Layout” width. For now, let's choose a "67%/33%". Next, select "Add section."
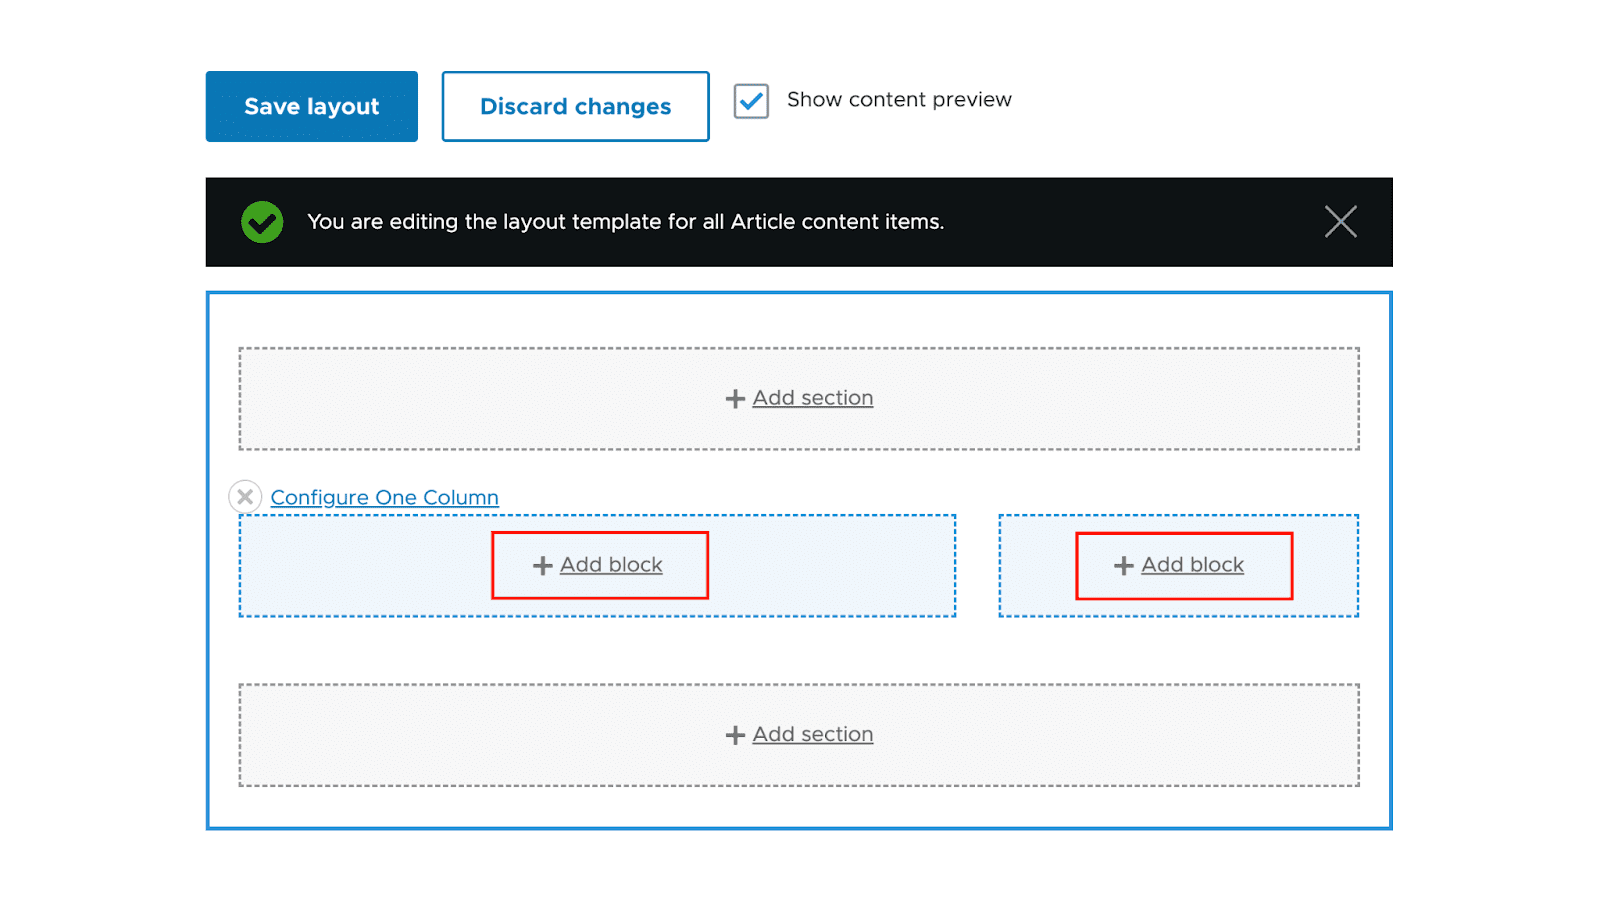
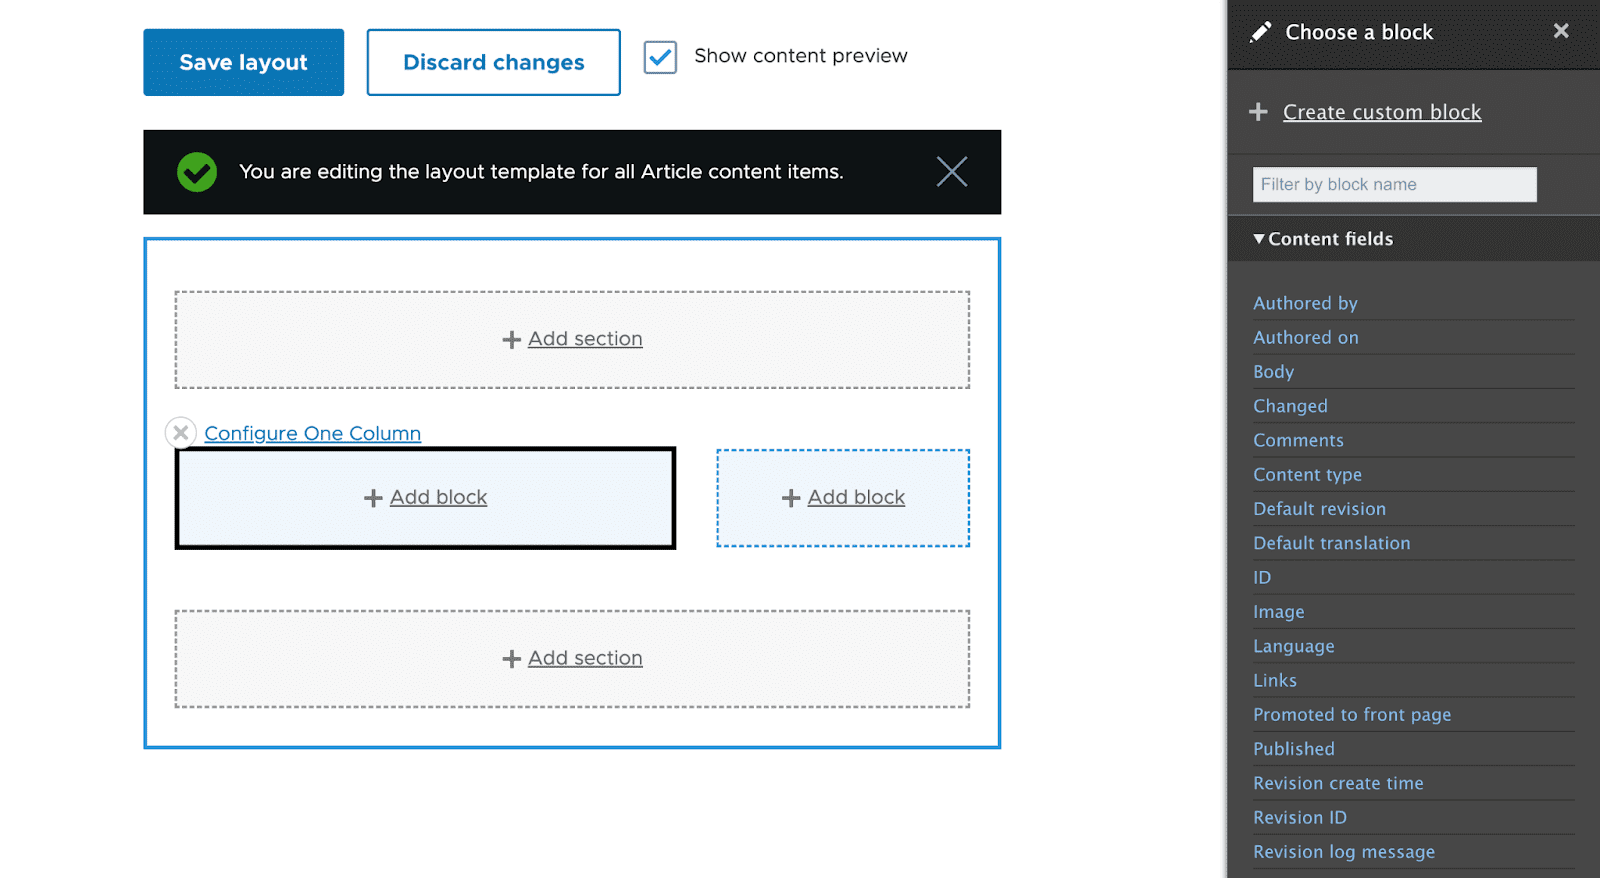
After being added, each section region should display an "Add Block" link.
Insert Blocks into the Section Regions
You can add blocks to your area after selecting it for the layout. Simply click "Add Block" and the "Choose a block" option will slide out from the right when you want to add a block.
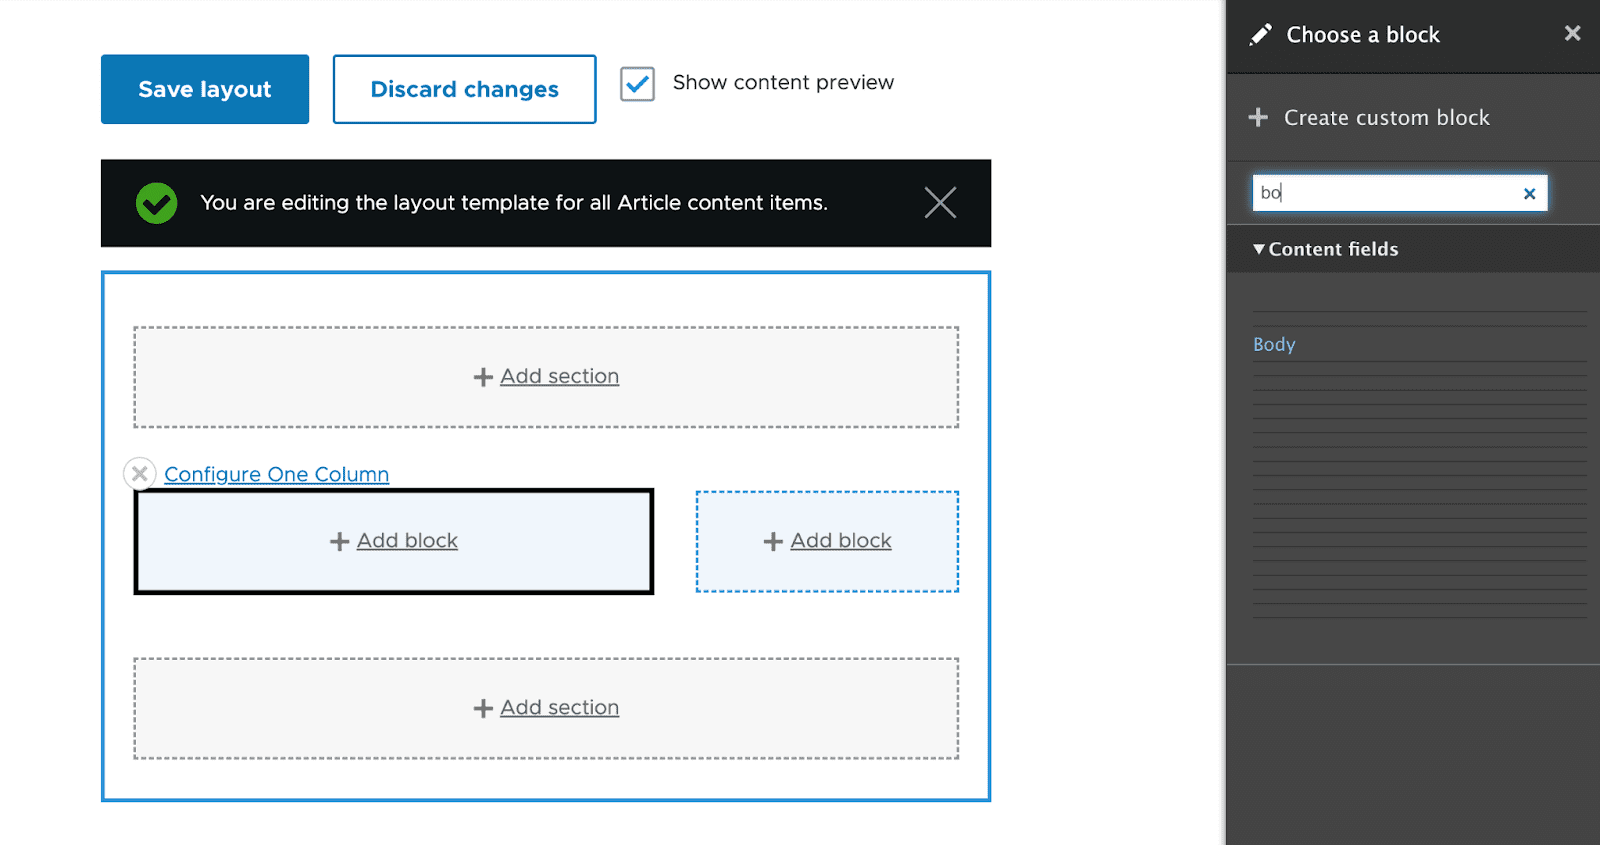
Selecting a block
Just clicking on the blocks in the right column will choose them. Using the "Filter by block name" text field, you can even locate blocks by filtering out the search based on their names.
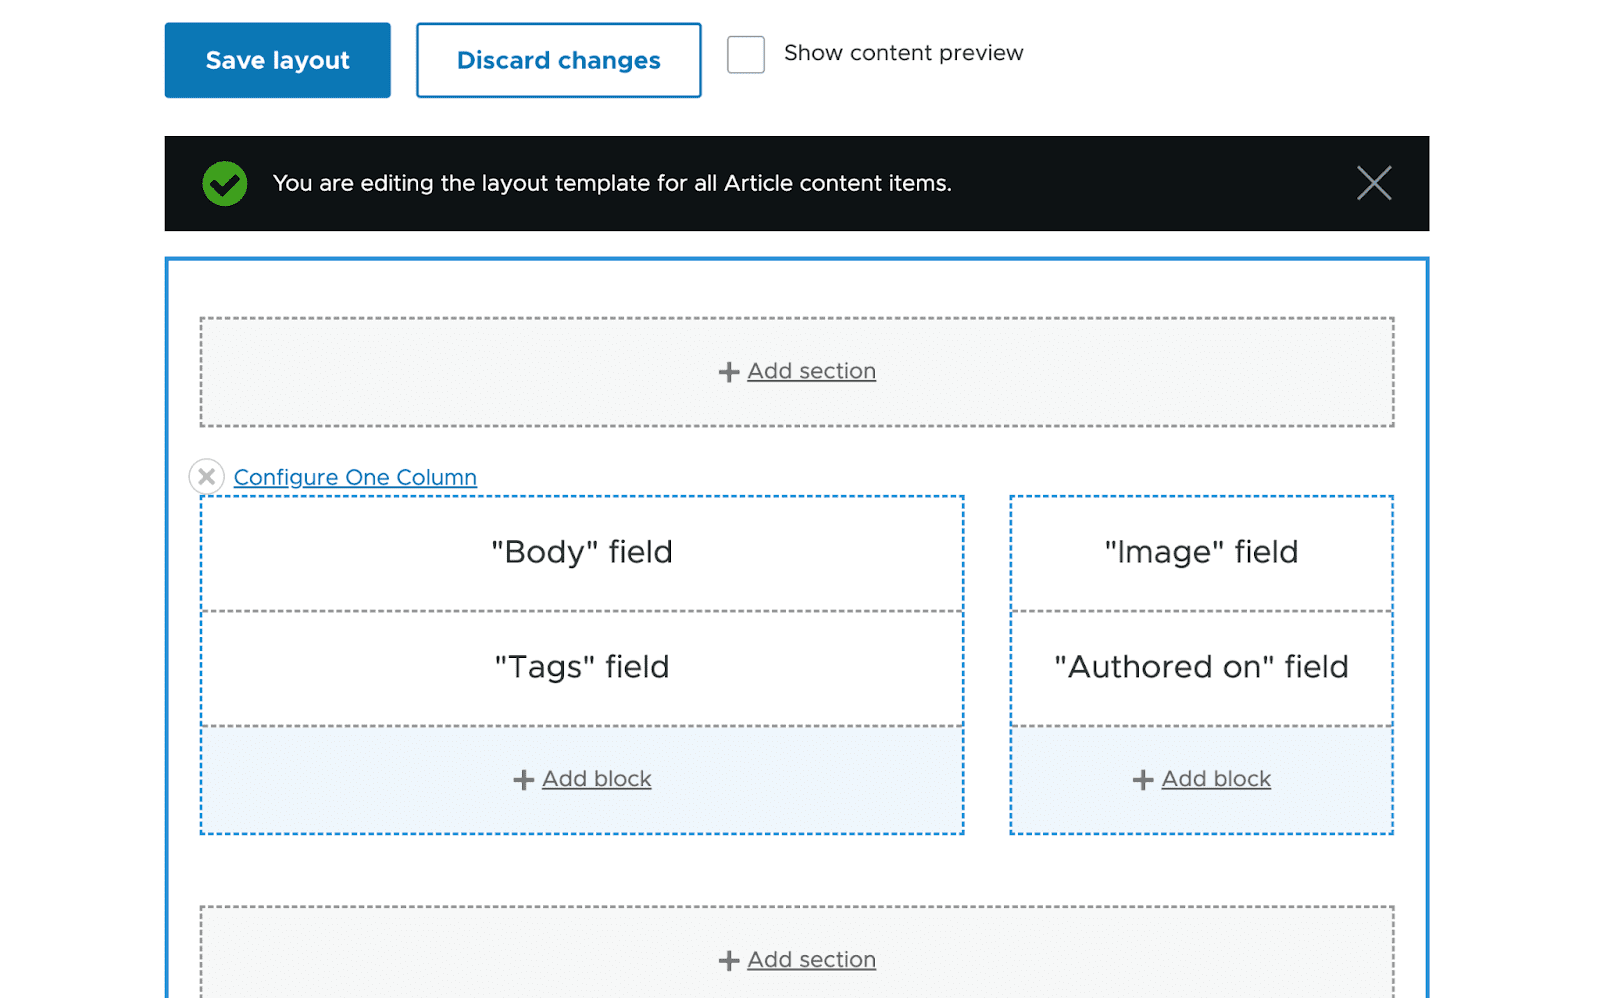
For now, we'll choose the "Body" content field.
The field formatter will allow you to make changes when you click on the block you want to add. Click "Add Block" after configuring the formatter.
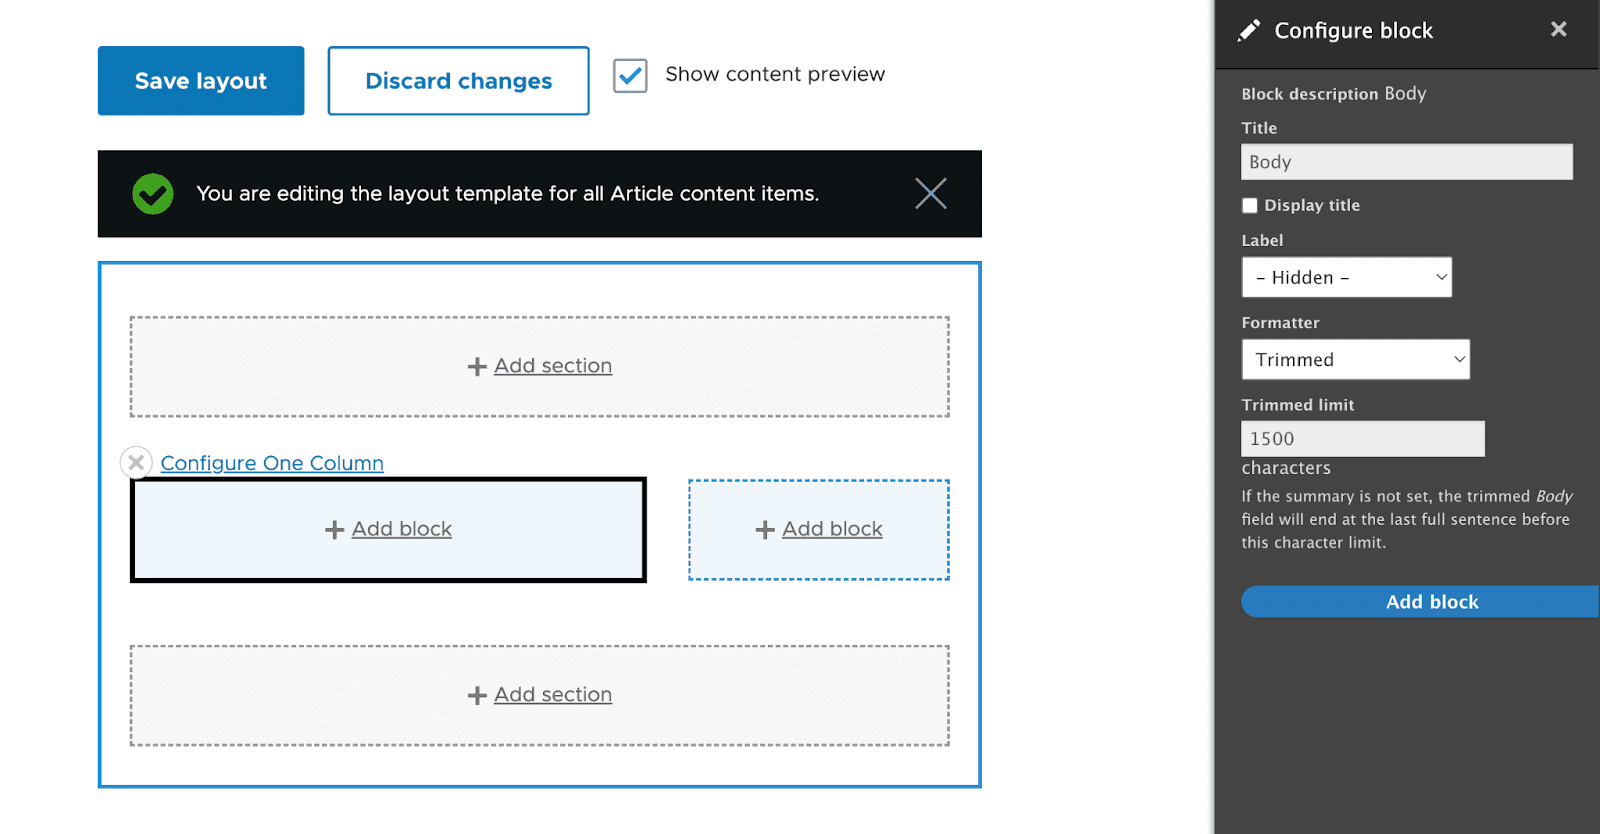
On the left side of the block, there will be a "Body" content area.
The "Body" field has been added; now save your changes. By selecting "Save Layout" from the menu at the top of the Drupal 9 layout page, you can save all the changes you've made to your section.
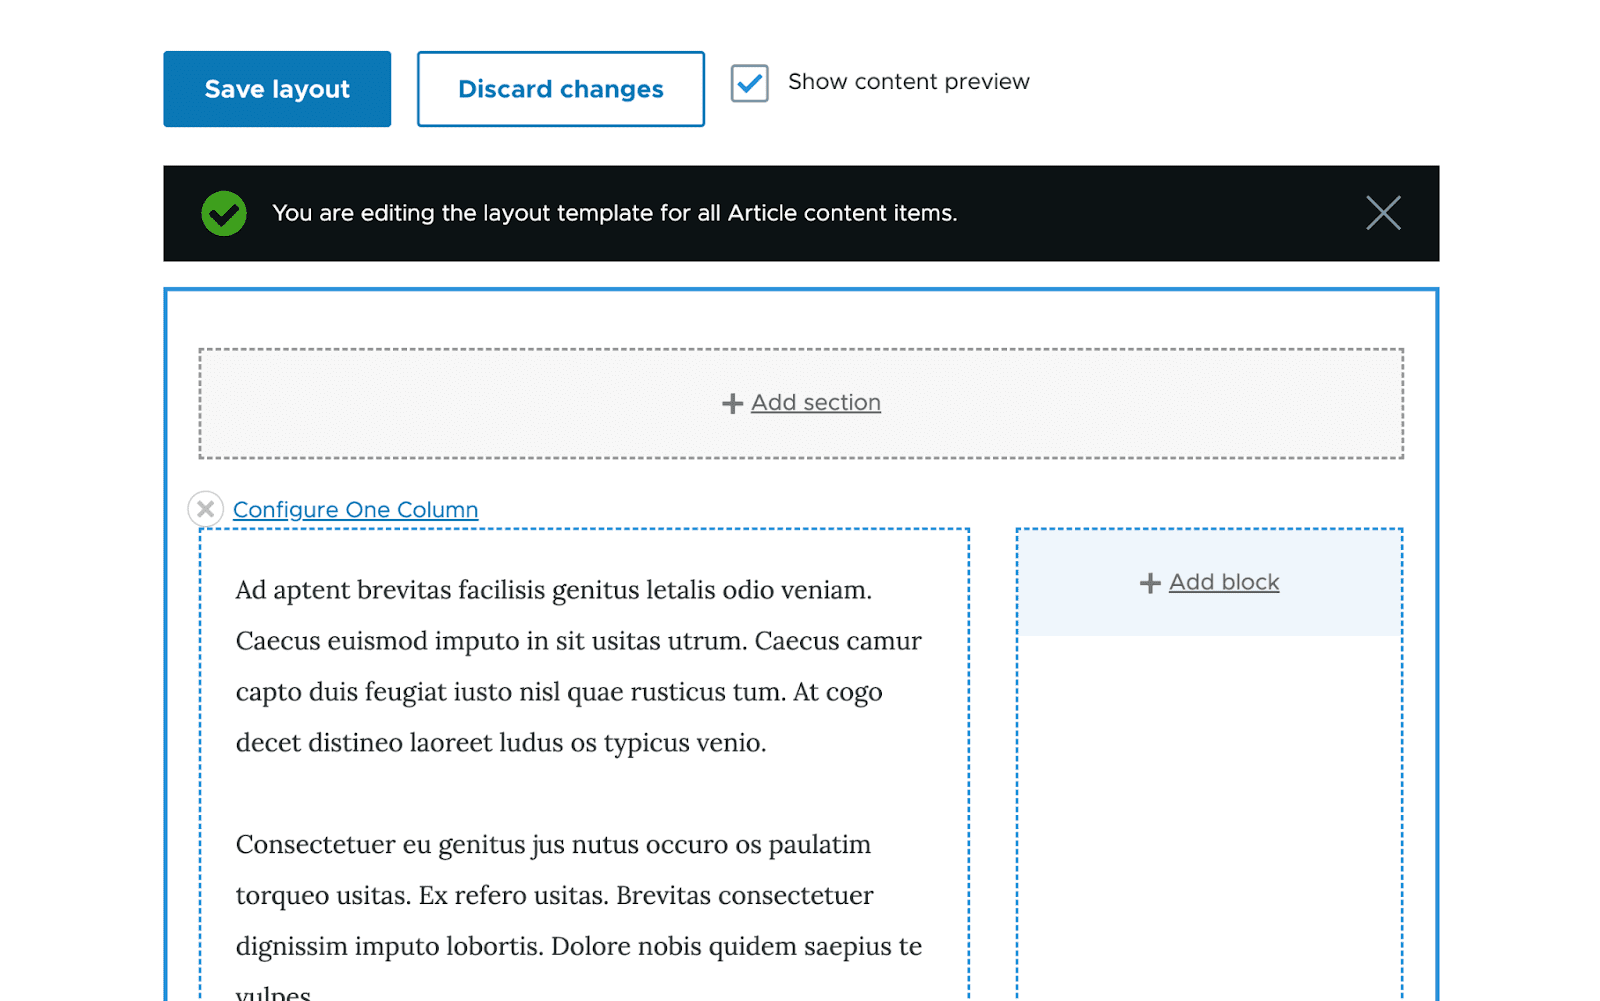
To further personalize our layout builder, let's try adding a few more fields to our design.
When you visit a page with article content type after saving this layout, you will be able to see a preview of the layout you just created.
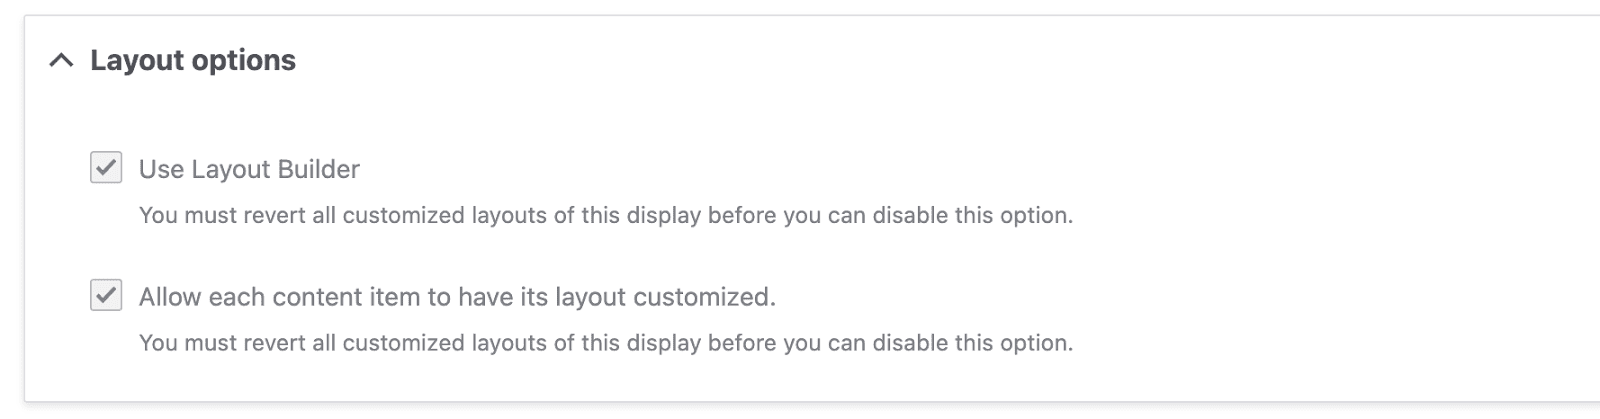
Layout Overrides:
The layout we just created will work for all of the articles. Drupal has a number of settings that must be enabled in order to create a custom layout for a certain article. To do this, select "Allow each content item to have its layout customized".

If you visit an article after activating this option, a Layout tab button will be visible.
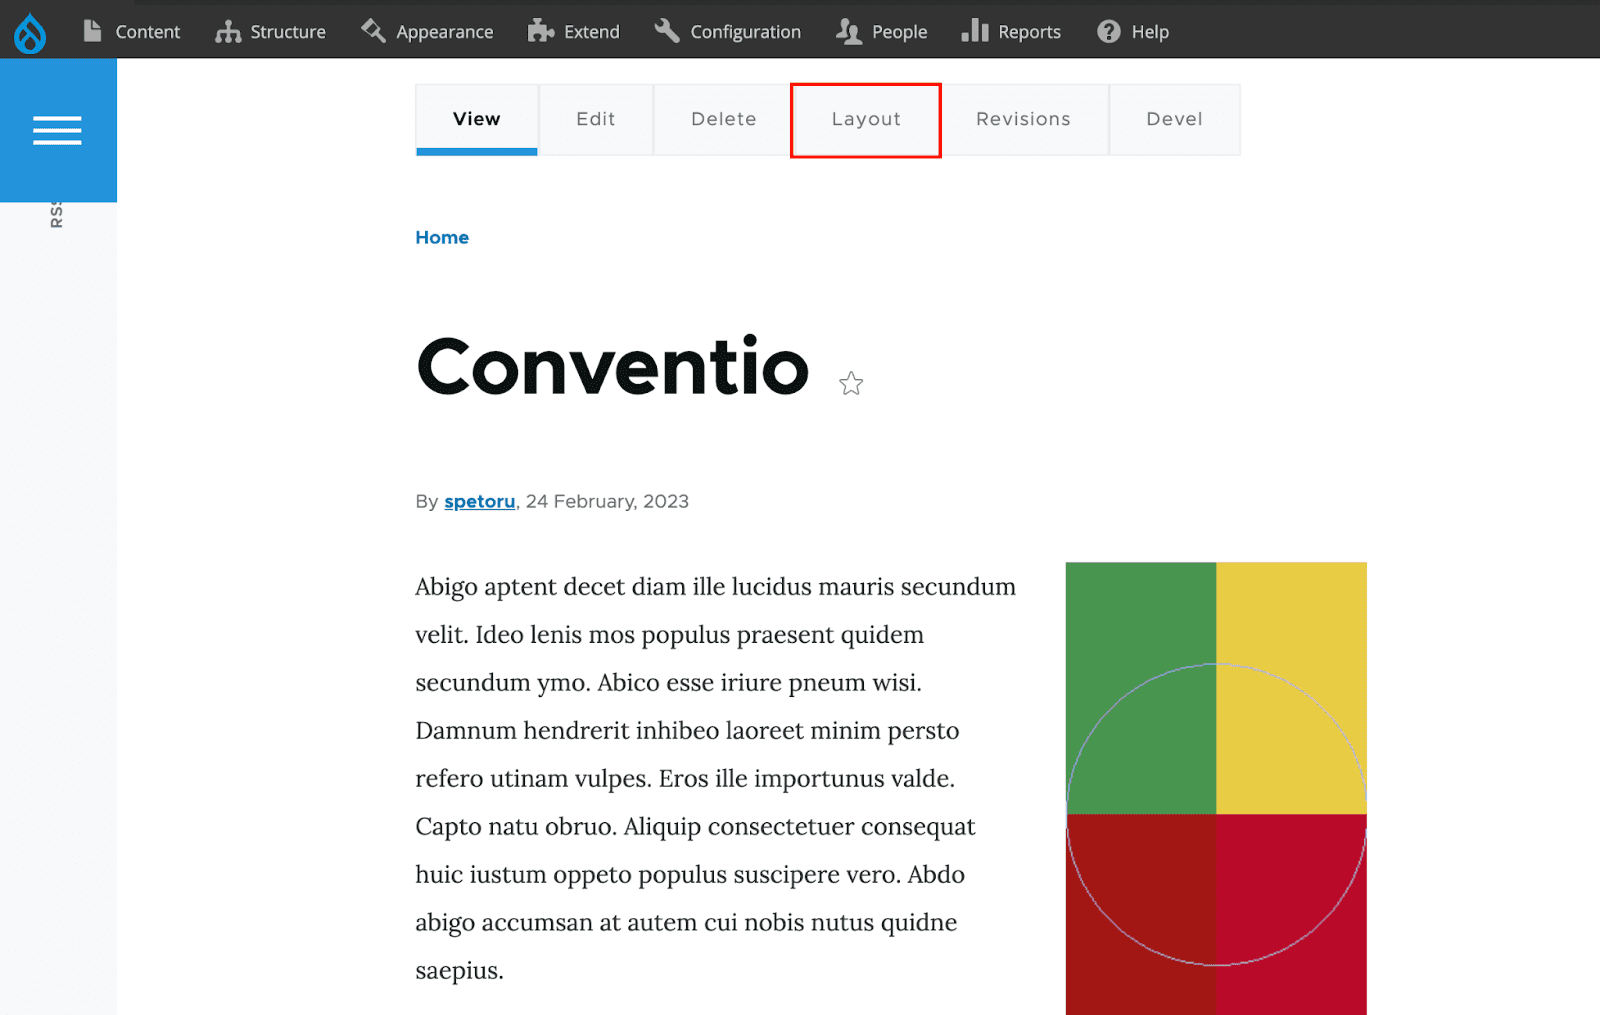
With the same interface, the layout may now be changed. This, however, will only alter the design of this one piece of content.
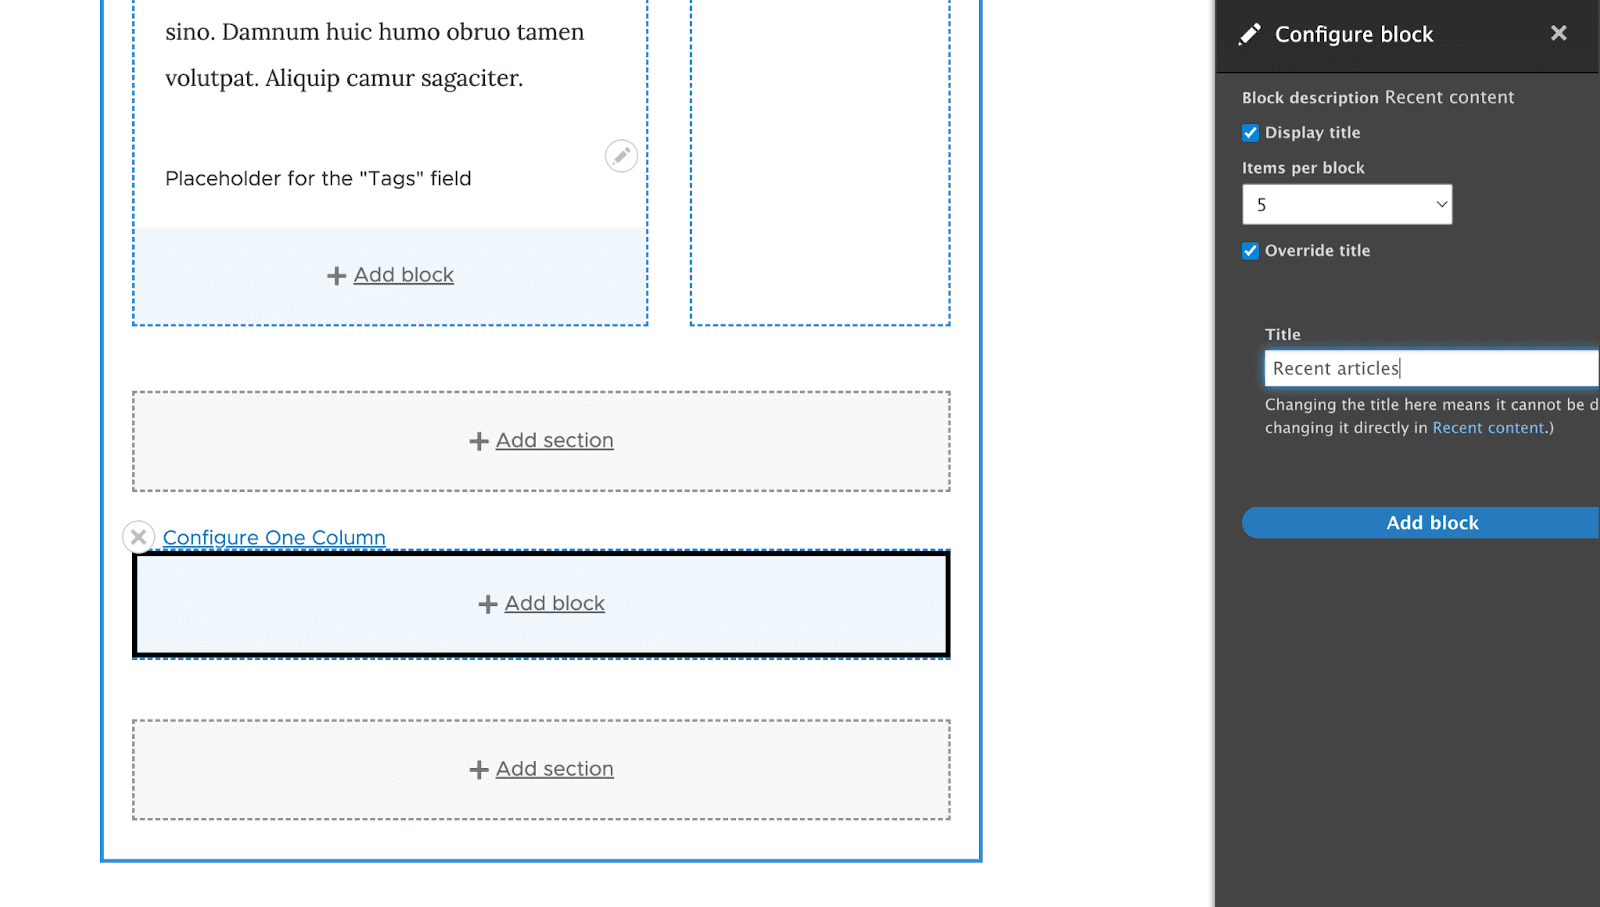
Now let's add a block to this page. Create a new one-column section and click the "Add Block" button. Consider the case when we wish to show recently edited content from other users on this page, Filter off the "Recent content" block when adding a new block, then customize it to your needs before saving the layout.
Eventually, when we've included the most recent article block, our page will appear like this.
Important: If you've changed the layout of a single entity, you won't be able to disable the Layout Builder.
You can only update the layout options once you've reset all altered layouts to their original settings.
Layout Builder from Code
When it comes to GUI management, Drupal Layout Builder is undoubtedly amazing. The programming problems you deal with while using the tool on a regular basis, nevertheless, might be a little more difficult. Now, you might ask how to use Layout Builder using code.
It turns out that it's rather simple to enable and disable templates for a single entity.
Simply load the display using the following code:
$entityViewDisplay = \Drupal::entityTypeManager-
>getStorage('entity_view_display')-
>load('ENTITY_TYPE.ENTITY_BUNDLE.VIEW_MODE');
It will then return an object of the type LayoutBuilderEntityViewDisplay, which you must then change as follows:
$entityViewDisplay->enableLayoutBuilder();If you wish to additionally set the flag or activate the Layout Builder for a specific view mode:
$entityViewDisplay->setOverridable(TRUE);to enable the creation of unique layouts for a single entity.
After that, you must save everything.
$entityViewDisplay->save();What actually occurs in the background is that the Layout Builder module adds the layout_builder_key to the third_party_settings of a certain entity type, with values for the parameters described above (enabled, allow custom), and then stores the default layout for this type of entity under sections.
A new entity field named layout_builder__layout is created and used to hold the updated layout for this specific entity if the setOverridable option is set to TRUE.
Contrarily, it takes a little more work to create a section using code and populate it with relevant content.
Starting off, let's add a new section. The layout_id parameter, which serves as a layout identifier, must be included when creating a new instance of the \Drupal\layout_builder\Section class in order to accomplish this.
Protip: The layout discovery module contains the default templates. Layouts are defined in *.layouts.yml files. For more detailed information, please check out the following article on how to create custom layouts in drupal.
Then, adding a new element directly to the section would be the simplest course of action. To do this, use the appendComponent method, which accepts an instance of the \Drupal\layout_builder\SectionComponent class as an argument. Nevertheless, before you can develop such a section component, you must first arrange a few things. To start, you will require:
- the uuid of the embedded element,
- the name of the region in the section,
- plugin configuration.
In this tutorial, we'll embed a sample node in a single-column section using the plugin supplied by Entity Blocks:
$section = new Section('layout_onecol');
$uuid = $node->uuid();
$region = 'content';
$pluginConfiguration = [
  'id' => 'entity_block:node',
  'provider' => 'entity_block',
  'label_display' => FALSE,
  'view_mode' => 'default',
  'entity' => $node->id(),
];
$component = new SectionComponent($uuid, $region, $pluginConfiguration);
$section->appendComponent($component);
Always keep in mind that layouts are saved in third-party settings or a field; therefore, in order to save the section, you must do so in one of these locations.
In our case, a field is being used, so:
$entity->layout_builder__layout->setValue($section);
$entity->save();
You have now added a single column section to an entity and shown an example node in it by following all of these steps.
You may also be interested in Improving Drupal's Layout Builder Experience.
Layout Builder Pros and Cons
We've compiled a brief list of some advantages and disadvantages of Layout Builder below:
Pros:
- Deployment is simple because there is no need to add new entity types because the module is already included in the core.
- User-friendly UI with drag-and-drop capabilities.
- Choices for individual entity customization.
- A simple method for combining fields with other entities without the need to add more reference fields.
- A simple method of leveraging entity blocks to embed existing entities.
Cons:
- New entity types and embeddable elements add to the website's size, which significantly lengthens the time it takes for all items to load.
- The module is UI-focused, so creating new layouts might be simpler. Right now, we have to write code to generate.yml files and templates.
- Dragging elements between sections can be a little challenging when there are many parts in the layout.
- Twig's names are suffixed with uuid, making it challenging to render a specified section and restricting access to sections.
Final Thoughts
The Drupal Layout Builder opens us to a wide range of intriguing possibilities for managing layouts through both user interface and code. Will it replace all current solutions?
It is the ideal tool, in my opinion, for dealing with the layout issue on a large scale. It seems like the best course of action would be to use widely used modules like Paragraphs and Field Group to create closed components, and then Layout Builder to create pre-made layouts composed of these components.
Layout Builder has a unique purpose, much like every other Drupal module. As a result, it will always perform better in some situations while performing substantially worse in others. Check it out for yourself!
If you’re looking for experts to help you out with anything Drupal, we’re just an email away!

Mustakim Farooqui
Related Insights


Don't Miss Out!


