Table of contents
Drupal 8 is making things so much easier for content authors. One of the most important reasons being the addition of the Layout Builder module in core Drupal 8. With easy drag and drop interface, preview and customizing abilities, the layout builder is soon becoming a favorite page-building and designing tool.
In my previous article, I wrote about how you can get started with installing and using Drupal 9’s Layout builder. Here, I want to share my knowledge on customizing a layout builder for unique requirements.
If your drupal website needs multiple sections with multiple blocks, then you can’t use the default sections that are provided by Drupal. For this, you can create your own custom layout.

Getting Started with Layout Builder :
We will first create a custom layout builder module for our custom layout builder We will name the folder as custom_layout. Next, we will create an info.yml file. We should specify the basic keys for it. The custom layout builder in drupal 8 will have a dependency on the layout builder module. Let us specify it over here.
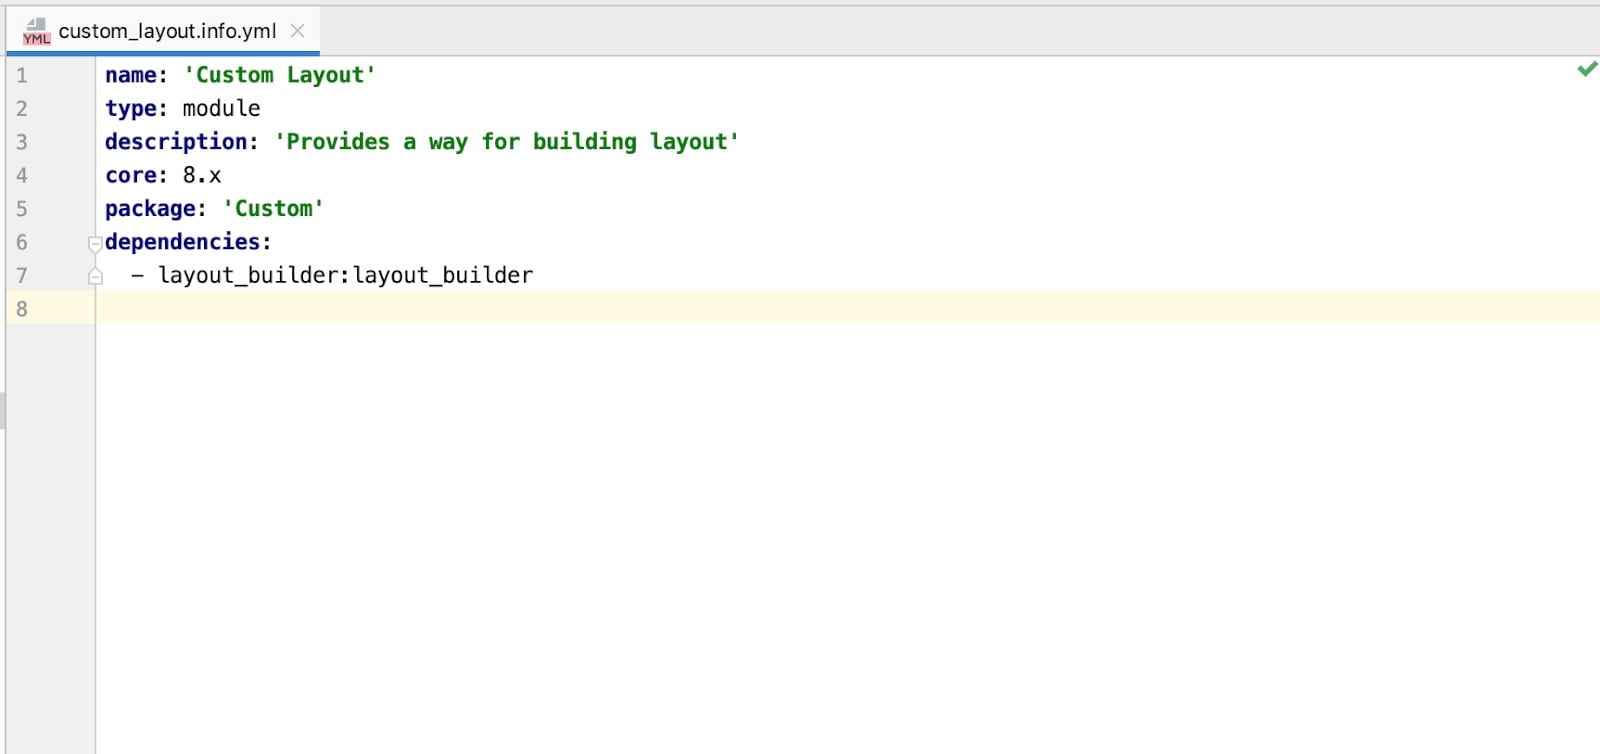
Code:
name: 'Custom Layout'
type: module
description: 'Provides a way for building layout'
core: 8.x
package: 'Custom'
dependencies:
 - layout_builder:layout_builder
Next we will create layouts.yml file to specify regions for our custom layout.
- custom_layout: key for our custom layout builder layout.
- label: Label for our custom layout builder layout.
- category: Category for our custom layout builder layout.
- default_region: Default region are the regions which are default in all type of layout.
- icon_map: Icon which will be shown up while we choose our layout.
Eg:
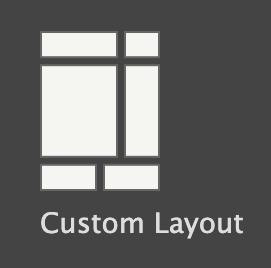
To create above icon map we need to follow the below steps.
1. First row is “Header Left” and “Header Right”
We have specified - [header_left, header_left, header_right] - header_left is
defined 2 times so it will take 2 parts of total width of the screen then header_right will take rest of the portion so ratio will be “75%/25%”.
2. Second row is “Content” and “Sidebar”
We have specified - [content, content, sidebar] same above logic applied here.
3. Third row is “Footer Left” and “Footer Right”
We have specified - [footer_left, footer_right] - since there are only 2 regions it will take 50% each.
- regions: Regions which we need for our layout. We have header_left, header_right, sidebar, content, footer_left, footer_right.
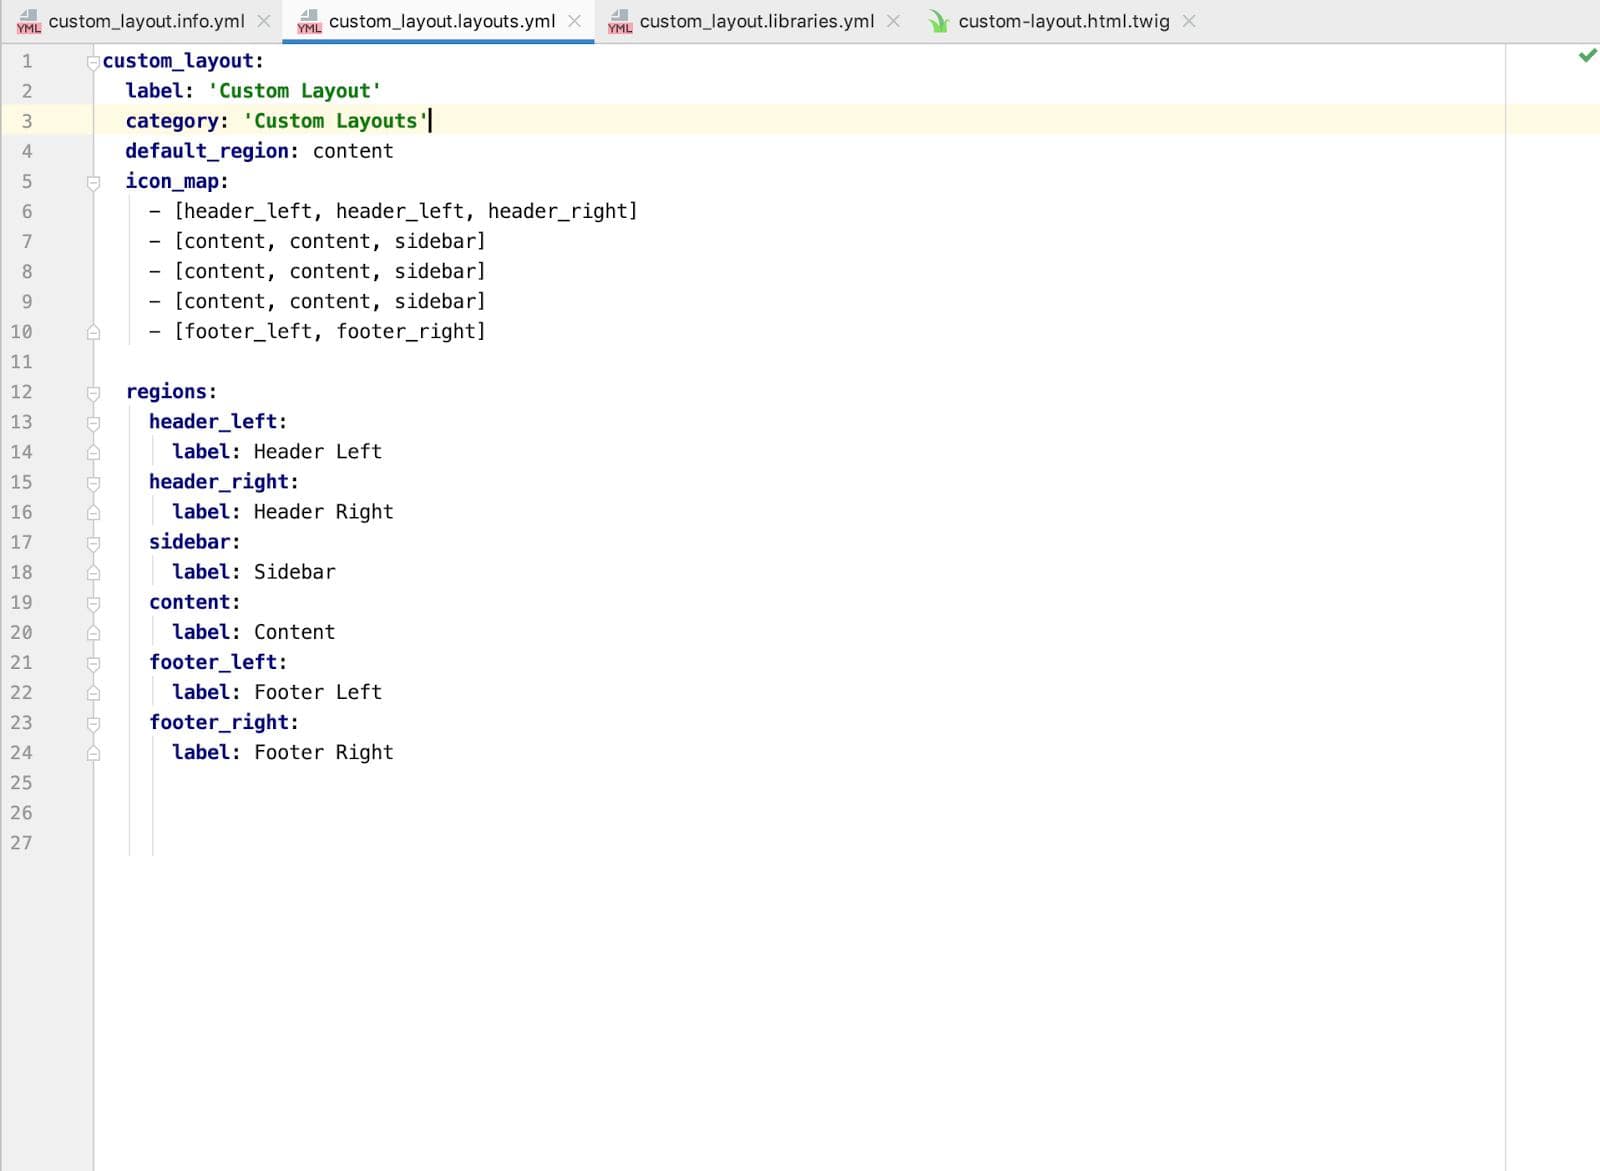
Code:
custom_layout:
label: 'Custom Layout'
category: 'Custom Layouts'
default_region: content
icon_map:
- [header_left, header_left, header_right]
- [content, content, sidebar]
- [content, content, sidebar]
- [content, content, sidebar]
- [footer_left, footer_right]
regions:
header_left:
label: Header Left
header_right:
label: Header Right
sidebar:
label: Sidebar
content:
label: Content
footer_left:
label: Footer Left
footer_right:
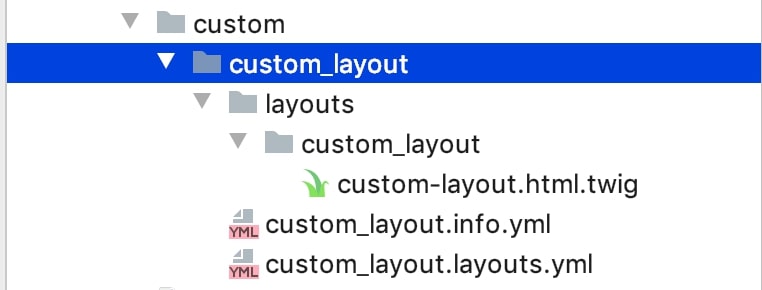
label: Footer RightNext, let us create an html structure for our layout. We will create a folder named “layouts” within our module. In the folder we will create another folder named “custom_layout”
And within that folder, we will create twig file named “custom-layout.html.twig”
We have to specify the twig file in layouts.yml
- path: It specifies in which folder your html structure will be written
- template: It specifies which twig template to use for this layout under the path.
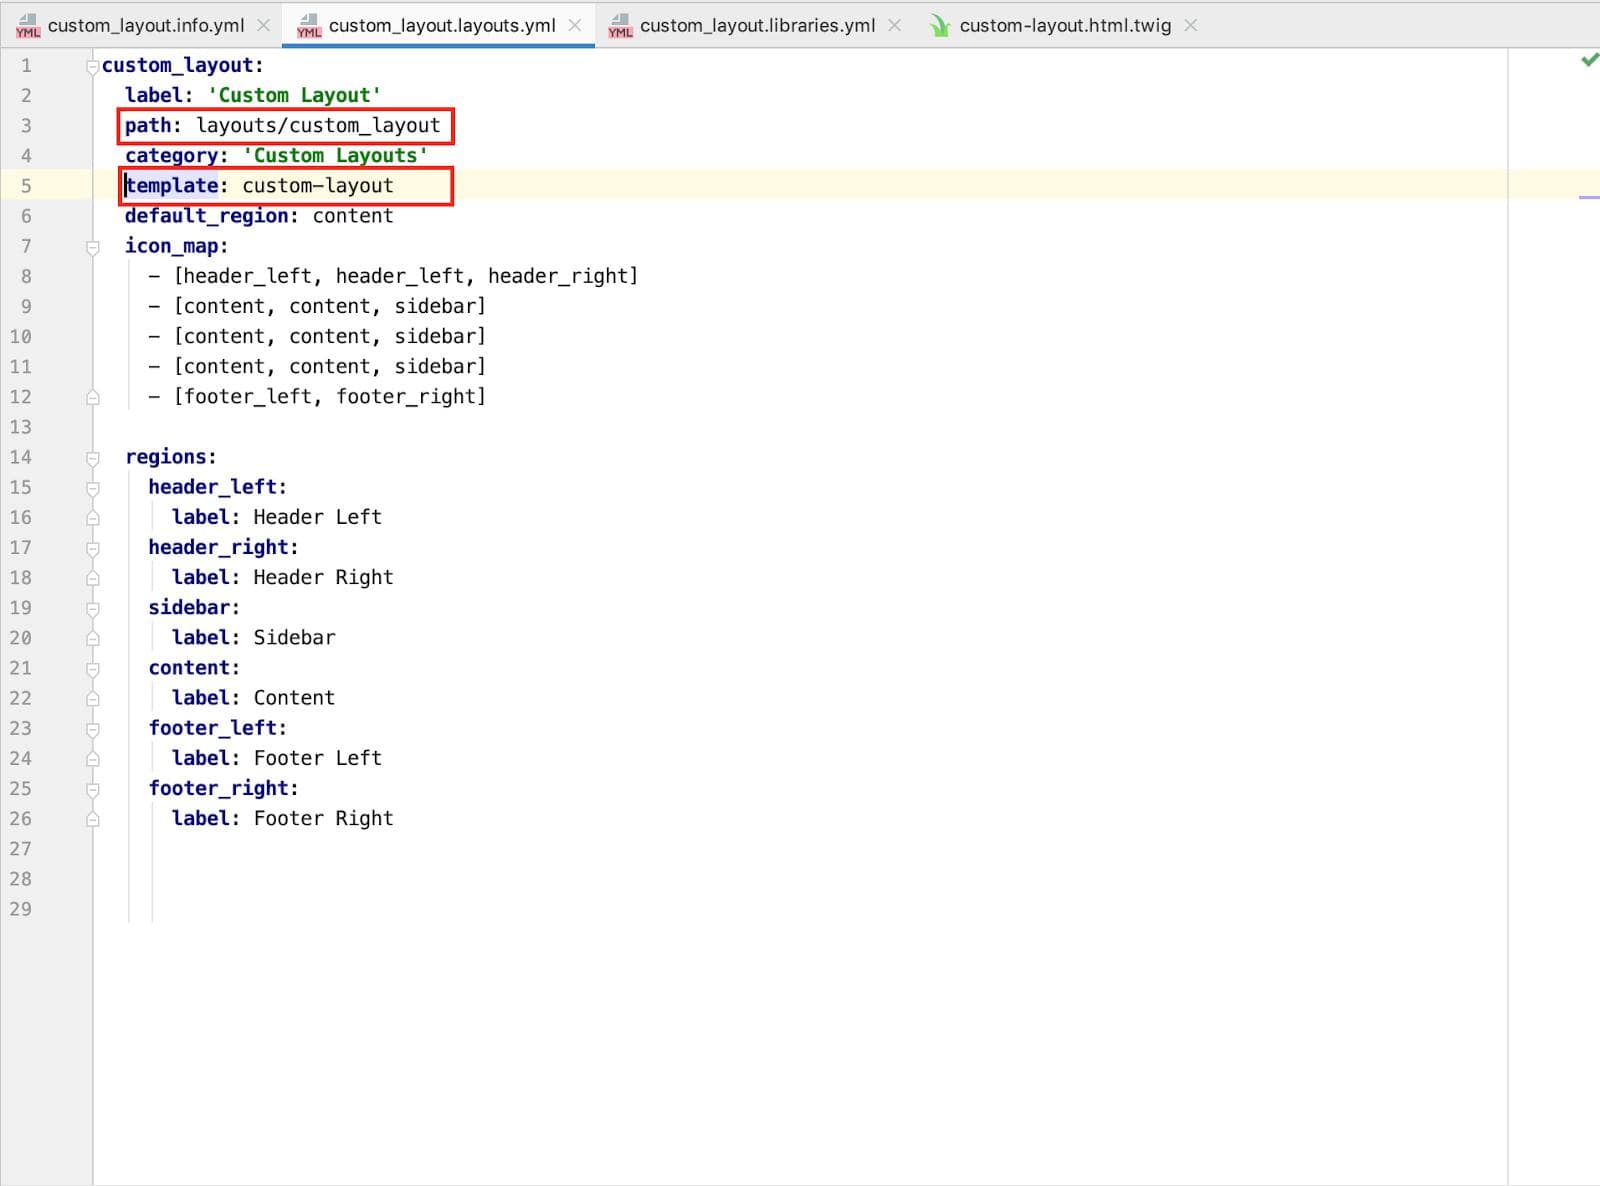
Code:

custom_layout:
 label: 'Custom Layout'
 path: layouts/custom_layout
 category: 'Custom Layouts'
 template: custom-layout
 default_region: content
 icon_map:
   - [header_left, header_left, header_right]
   - [content, content, sidebar]
   - [content, content, sidebar]
   - [content, content, sidebar]
   - [footer_left, footer_right]

 regions:
   header_left:
     label: Header Left
   header_right:
     label: Header Right
   sidebar:
     label: Sidebar
   content:
     label: Content
   footer_left:
     label: Footer Left
   footer_right:
     label: Footer Right
Next we will write html structure for our regions in “custom-layout.html.twig” file.
We will set classes has “layout” and “layout--custom-layout” and we will wrap the whole content inside it.
We will specify regions which where been defined in layouts.yml , we can access those regions like “{{ content.header_left }}”

Code:
{% set classes = [
'layout',
'layout--custom-layout',
] %}
{% if content %}
<div{{ attributes.addClass(classes) }}>
{% if content.header_left %}
<div {{ region_attributes.header_left.addClass('layout__region', 'layout__region--header_left') }}>
{{ content.header_left }}
</div>
{% endif %}
{% if content.header_right %}
<div {{ region_attributes.header_right.addClass('layout__region', 'layout__region--header_right') }}>
{{ content.header_right }}
</div>
{% endif %}
{% if content.content %}
<div {{ region_attributes.content.addClass('layout__region', 'layout__region--content') }}>
{{ content.content }}
</div>
{% endif %}
{% if content.sidebar %}
<div {{ region_attributes.sidebar.addClass('layout__region', 'layout__region--sidebar') }}>
{{ content.sidebar }}
</div>
{% endif %}
{% if content.footer_left %}
<div {{ region_attributes.footer_left.addClass('layout__region', 'layout__region--footer_left') }}>
{{ content.footer_left }}
</div>
{% endif %}
{% if content.footer_right %}
<div {{ region_attributes.footer_right.addClass('layout__region', 'layout__region--footer_right') }}>
{{ content.footer_right }}
</div>
{% endif %}
</div>
{% endif %}
After the html structure is written, we will have to write css for each region. We will now create libraries.yml in our custom module.
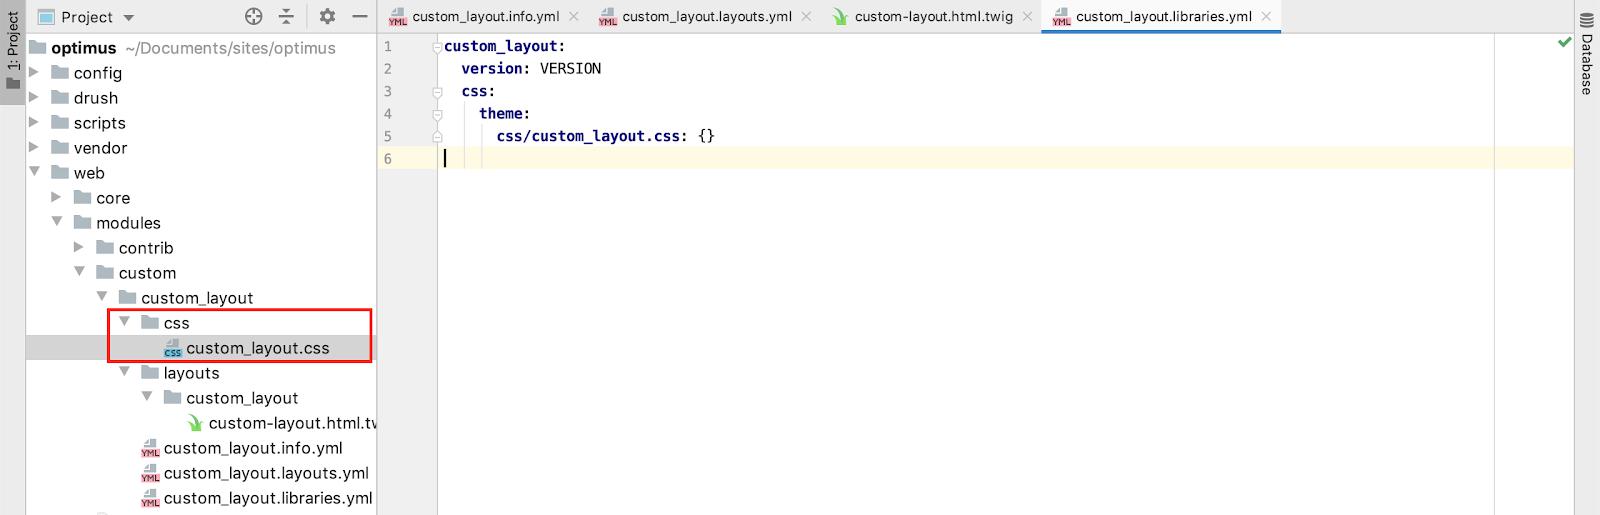
Code:
custom_layout:
version: VERSION
css:
   theme:
     css/custom_layout.css: {}
We will define that library in layouts.yml
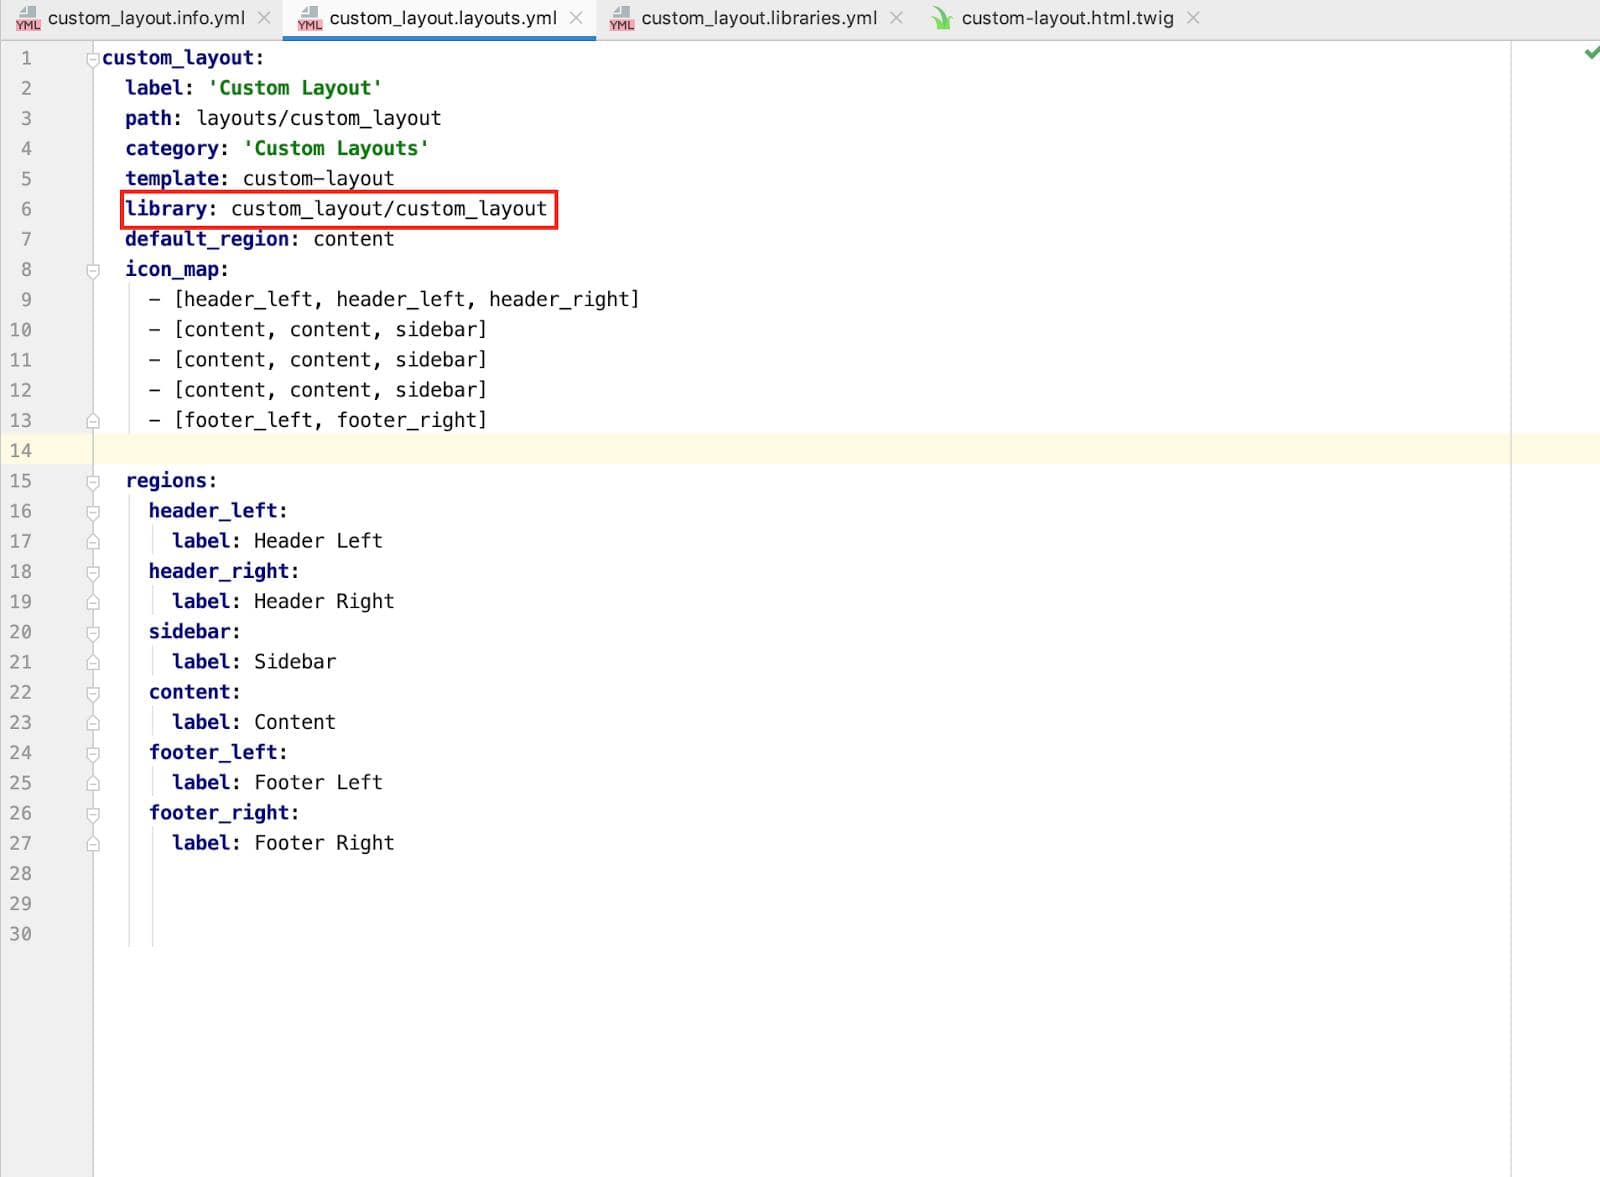
Code:
custom_layout:
 label: 'Custom Layout'
 path: layouts/custom_layout
 category: 'Custom Layouts'
 template: custom-layout
 library: custom_layout/custom_layout
 default_region: content
 icon_map:
   - [header_left, header_left, header_right]
   - [content, content, sidebar]
   - [content, content, sidebar]
   - [content, content, sidebar]
   - [footer_left, footer_right]

 regions:
   header_left:
     label: Header Left
   header_right:
     label: Header Right
   sidebar:
     label: Sidebar
   content:
     label: Content
   footer_left:
     label: Footer Left
   footer_right:
     label: Footer Right
Now let’s start with styling our regions block. We will specify structure for each region as below-
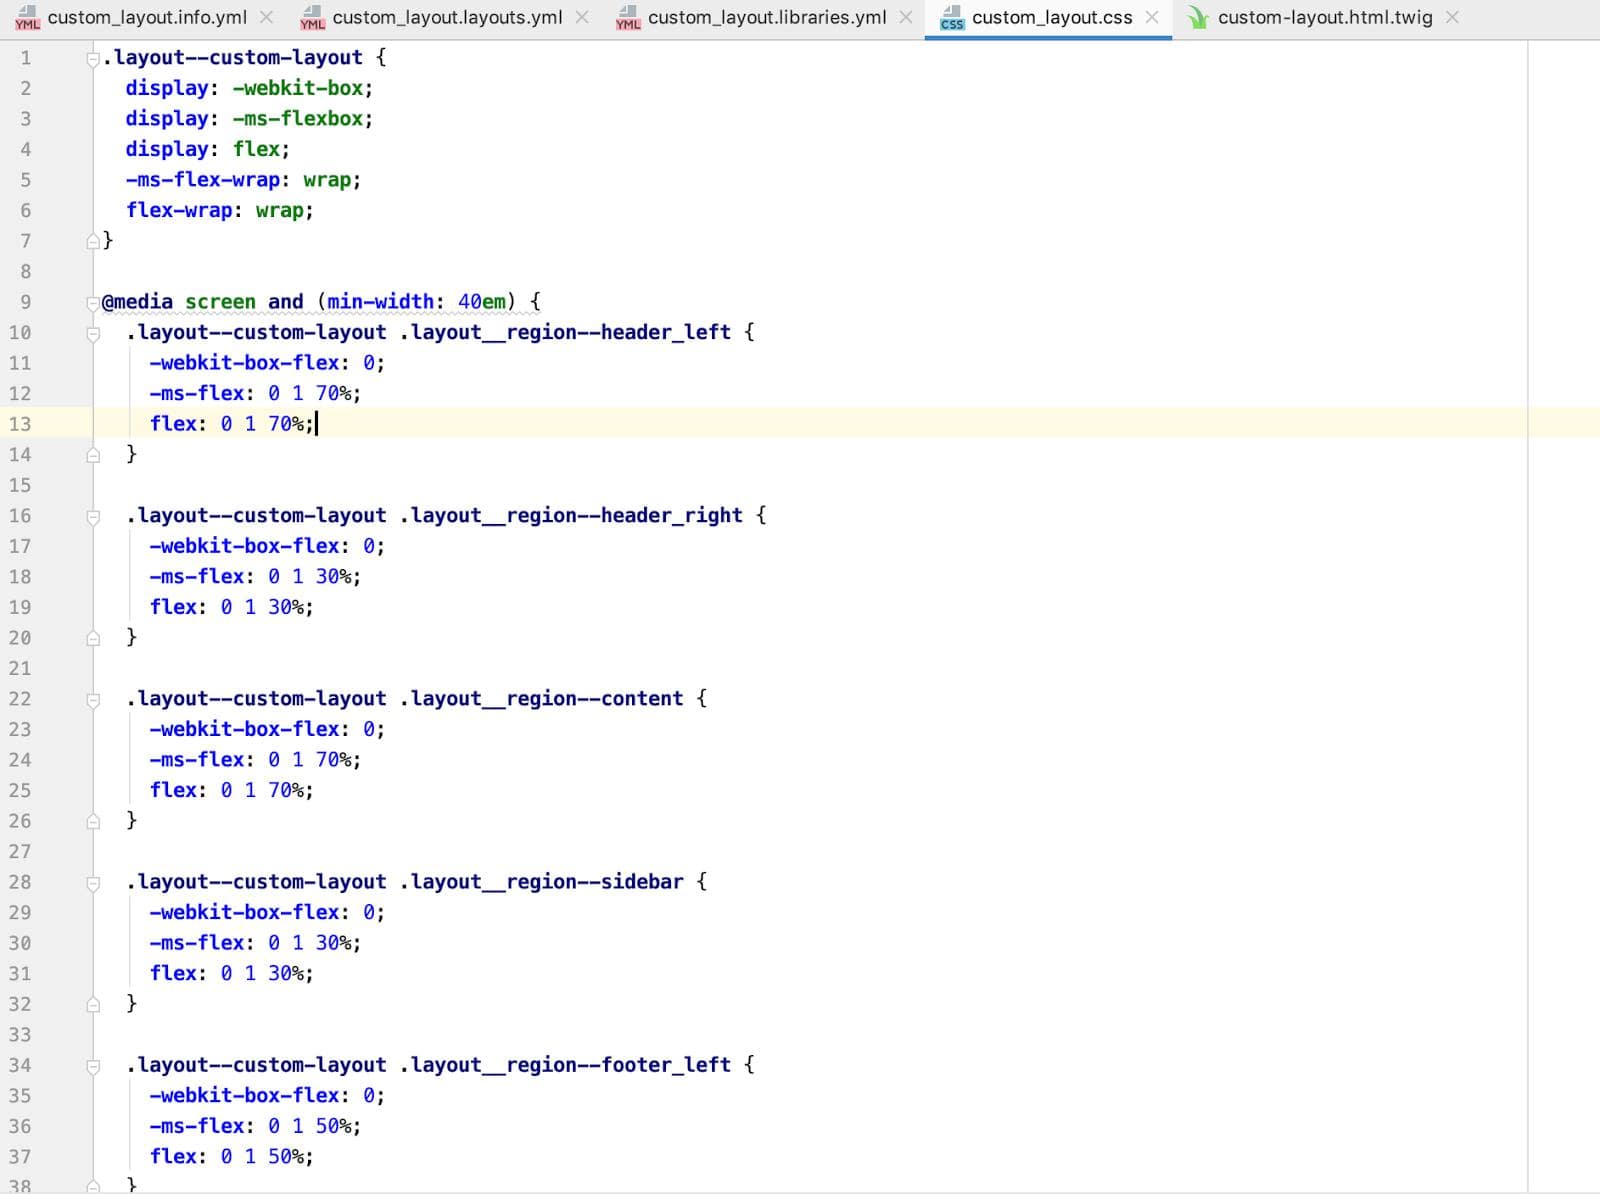
Code:
.layout--custom-layout {
 display: -webkit-box;
 display: -ms-flexbox;
 display: flex;
 -ms-flex-wrap: wrap;
 flex-wrap: wrap;
}

@media screen and (min-width: 40em) {
 .layout--custom-layout .layout__region--header_left {
   -webkit-box-flex: 0;
   -ms-flex: 0 1 70%;
   flex: 0 1 70%;
 }

 .layout--custom-layout .layout__region--header_right {
   -webkit-box-flex: 0;
   -ms-flex: 0 1 30%;
   flex: 0 1 30%;
 }

 .layout--custom-layout .layout__region--content {
   -webkit-box-flex: 0;
   -ms-flex: 0 1 70%;
   flex: 0 1 70%;
 }

 .layout--custom-layout .layout__region--sidebar {
   -webkit-box-flex: 0;
   -ms-flex: 0 1 30%;
   flex: 0 1 30%;
 }

 .layout--custom-layout .layout__region--footer_left {
   -webkit-box-flex: 0;
   -ms-flex: 0 1 50%;
   flex: 0 1 50%;
 }

 .layout--custom-layout .layout__region--footer_right {
   -webkit-box-flex: 0;
   -ms-flex: 0 1 50%;
   flex: 0 1 50%;
 }
}
Next, let us enable our custom module
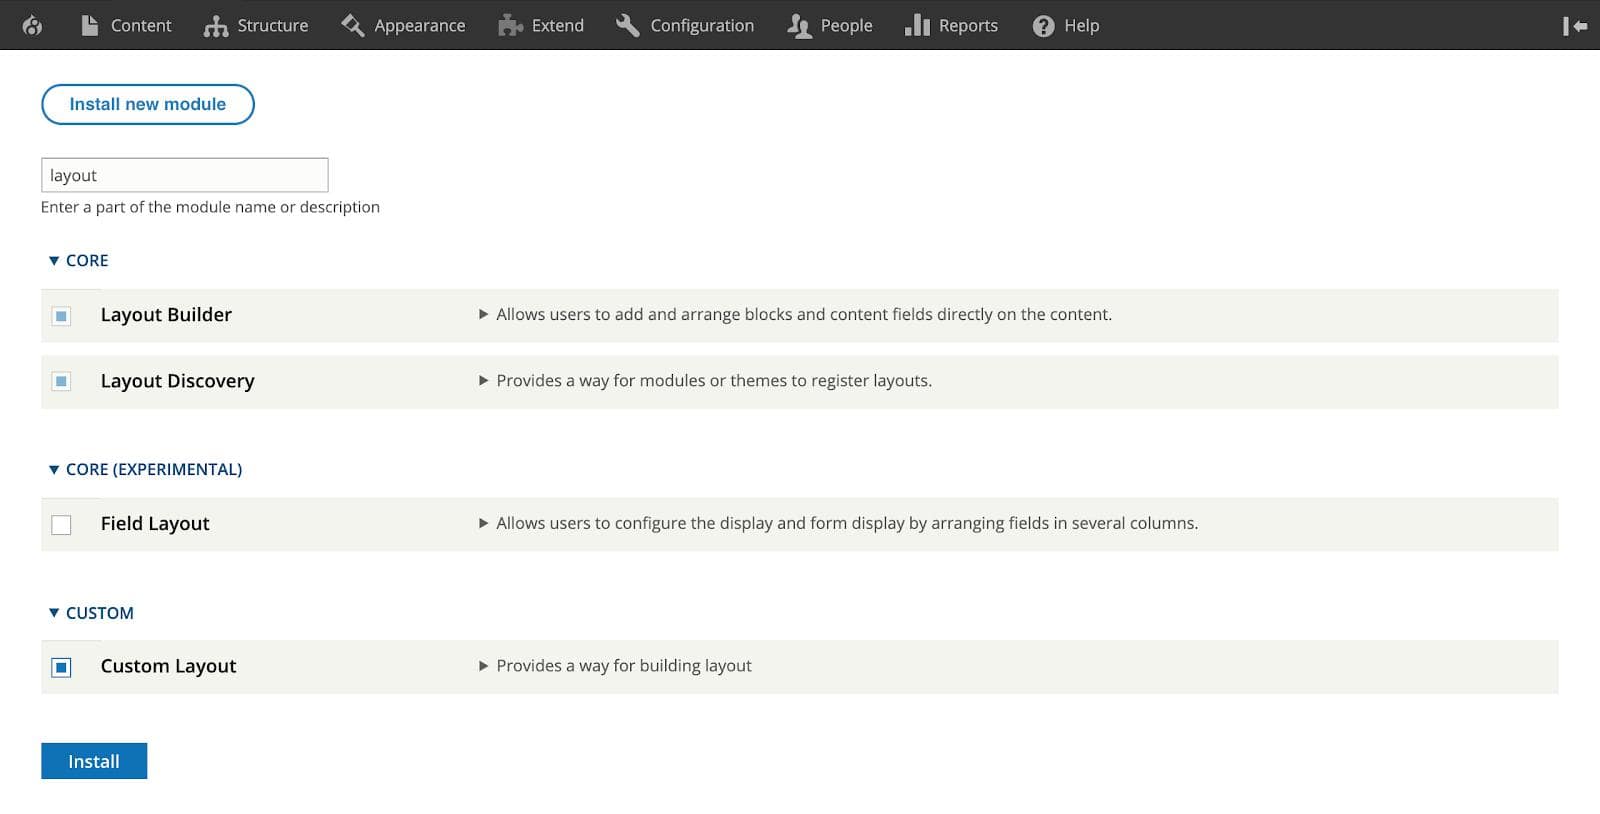
Let us go to Structure -> Content types and click on “Manage display” for any content type. For now we will use ‘article’ content type.
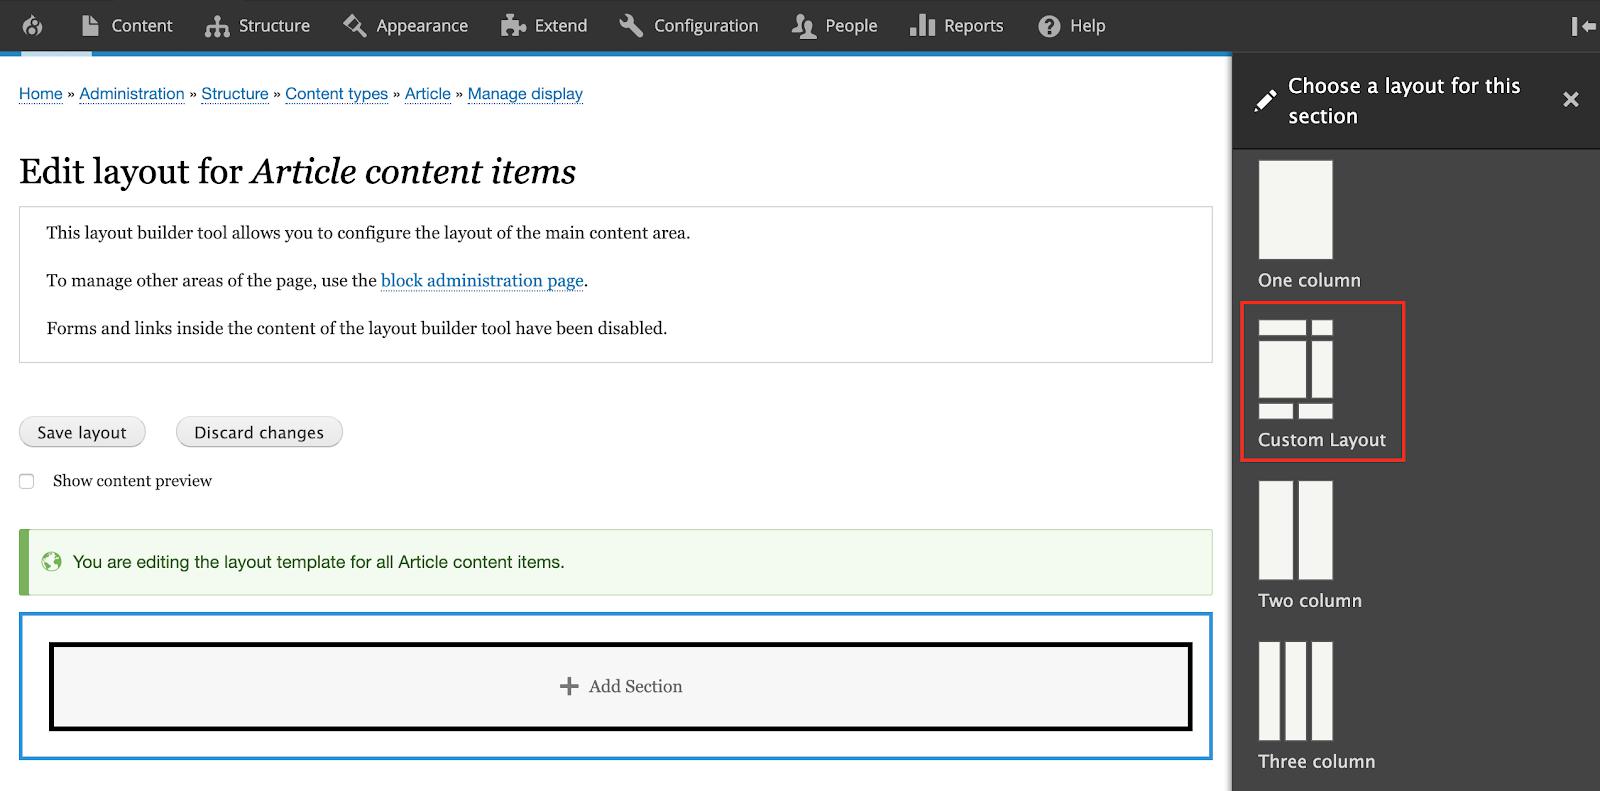
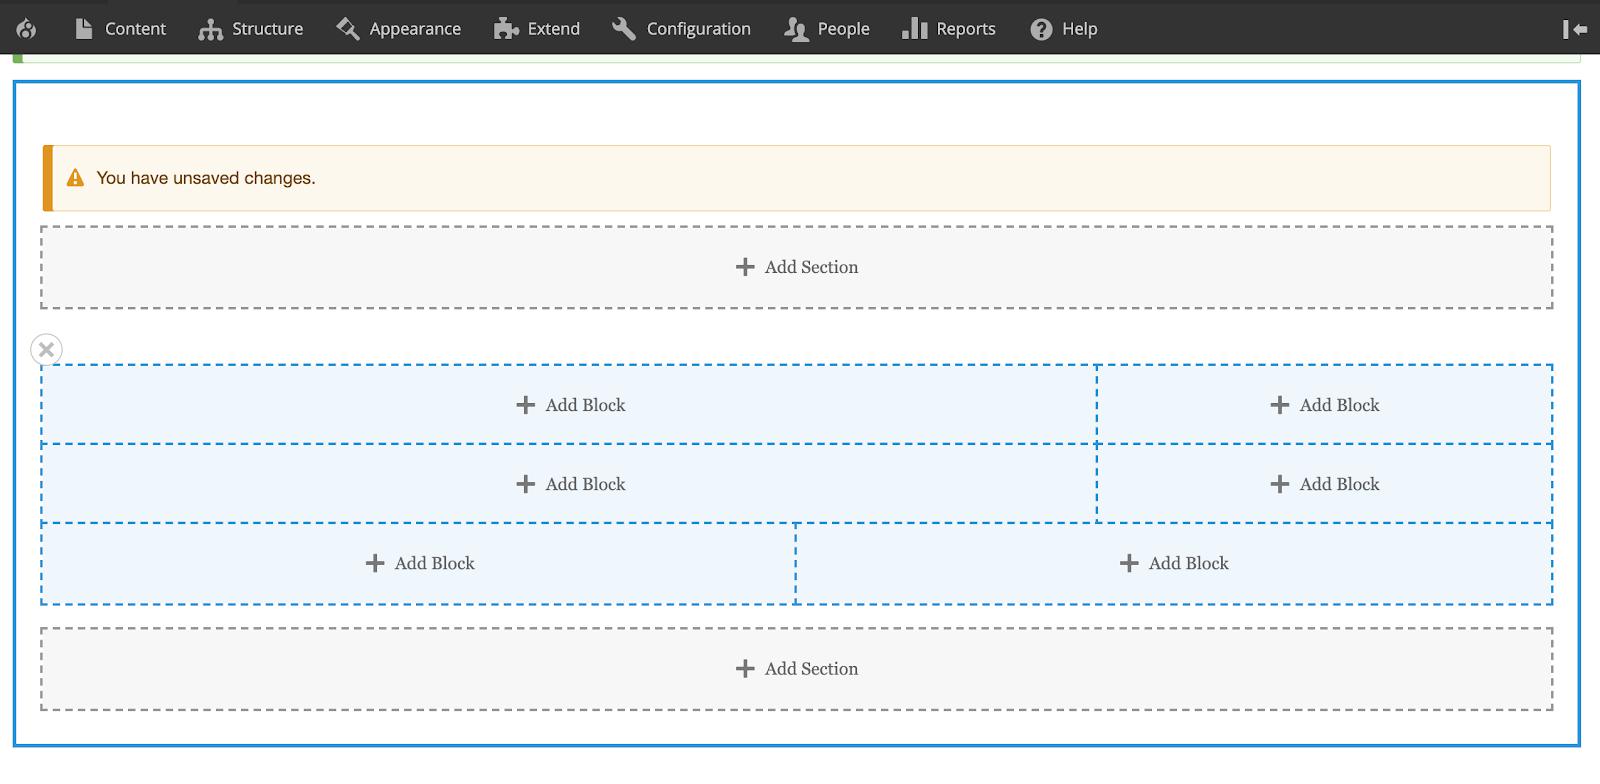
After we choose our custom layout-
Neslee Canil Pinto
Related Insights


Don't Miss Out!


