Table of contents
- What is Faceted Search?
- Installing the Facets Module for Drupal 10
- Step 1: Enabling the modules
- Step 2: Creating content types
- Step 3: Configuring the search server
- Step 4: Configuring the search index
- Step 5: Adding fields for indexing
- Step 6: Indexing the content
- Step 7: Creating a view
- Step 8: Adding fields to the view
- Step 9: Configuring the facets
- Step 10: Placing the facet blocks in the chosen page regions
- The Result
- Final Thoughts
Faceted search offers users with a superior search experience by displaying filters against their search results. It is particularly useful for websites having large catalogues and listings. Once the user types in their search query, they will be presented with a list of relevant filter options to further narrow down their search. These filtering elements are facets.
Previously Facet API in Drupal 9, the Facet module in Drupal 10 enables your website with faceted searching abilities. Let’s look at configuring and implementing Faceted search with Drupal’s own search server, Search API.
What is Faceted Search?
If your users are finding it hard to see what they are searching for even after keying in their search query, they are bound to get frustrated. Faceted search provides users with multiple filters at the same time for the various attributes of the content. The facets provided are based on the search query the user has executed. Facets will also display the number of matched results (usually within brackets) next to it. Let’s take a look at this below screenshot to understand Facets better.

In one of our Drupal projects, a quick search for Homes in Columbia on this website presents to you with facets like Communities, Hot Deals, Quick Move-ins and more. You will also see the count of the results next to each facet. So, a query with “Columbia” keyword is sent to the search server to retrieve the already configured and indexed categories (Communities, Hot Deals, etc.)
Installing the Facets Module for Drupal 10
As previously discussed, we will be implementing Faceted search using Drupal’s Search API module.
Step 1: Enabling the modules
Install and enable these modules
• The Facet Module
• Search API module
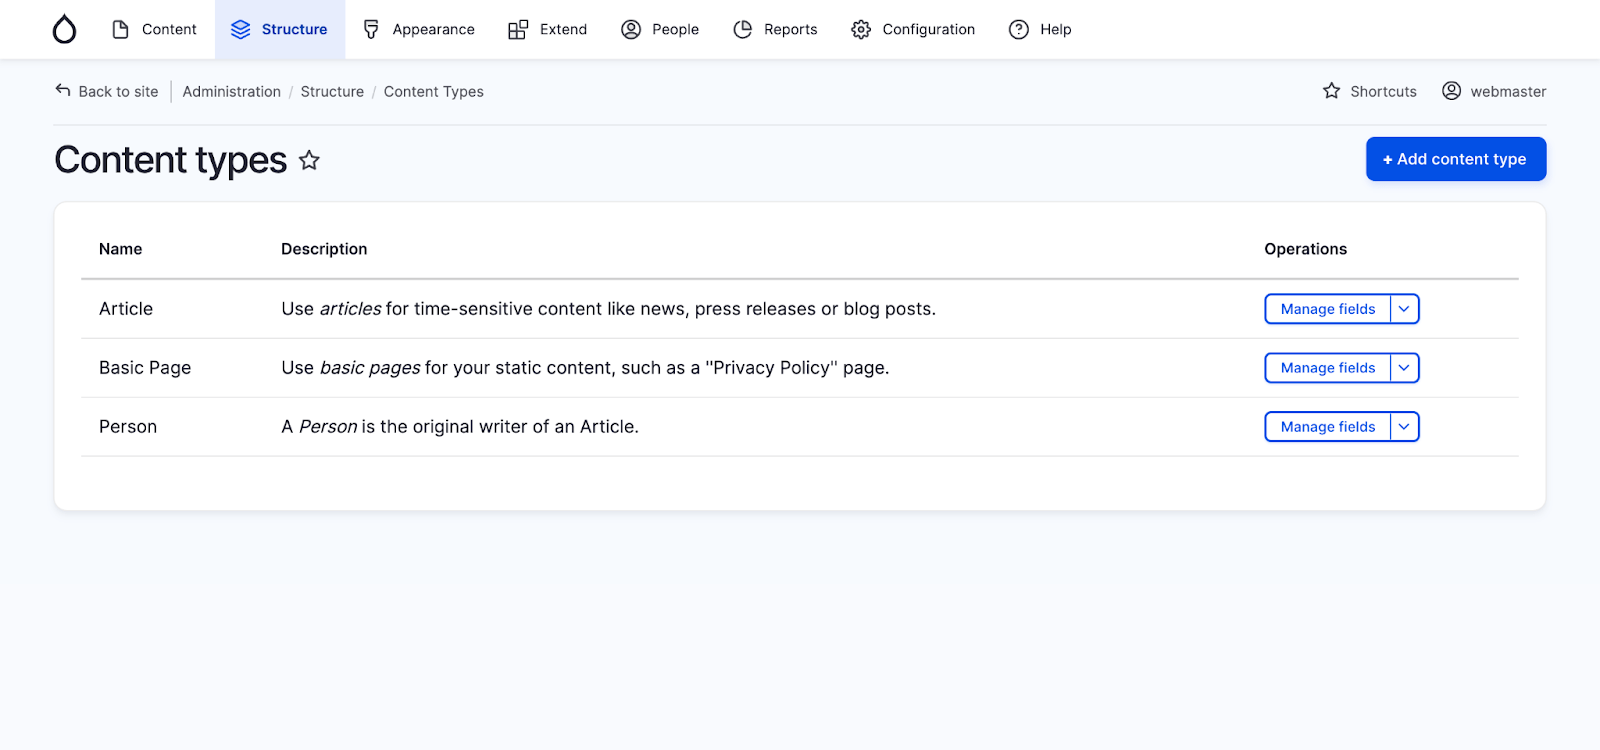
Step 2: Creating content types
Create the content you would like to include in the faceted search by adding Content types as shown below. You can also use the default content types provided by Drupal.
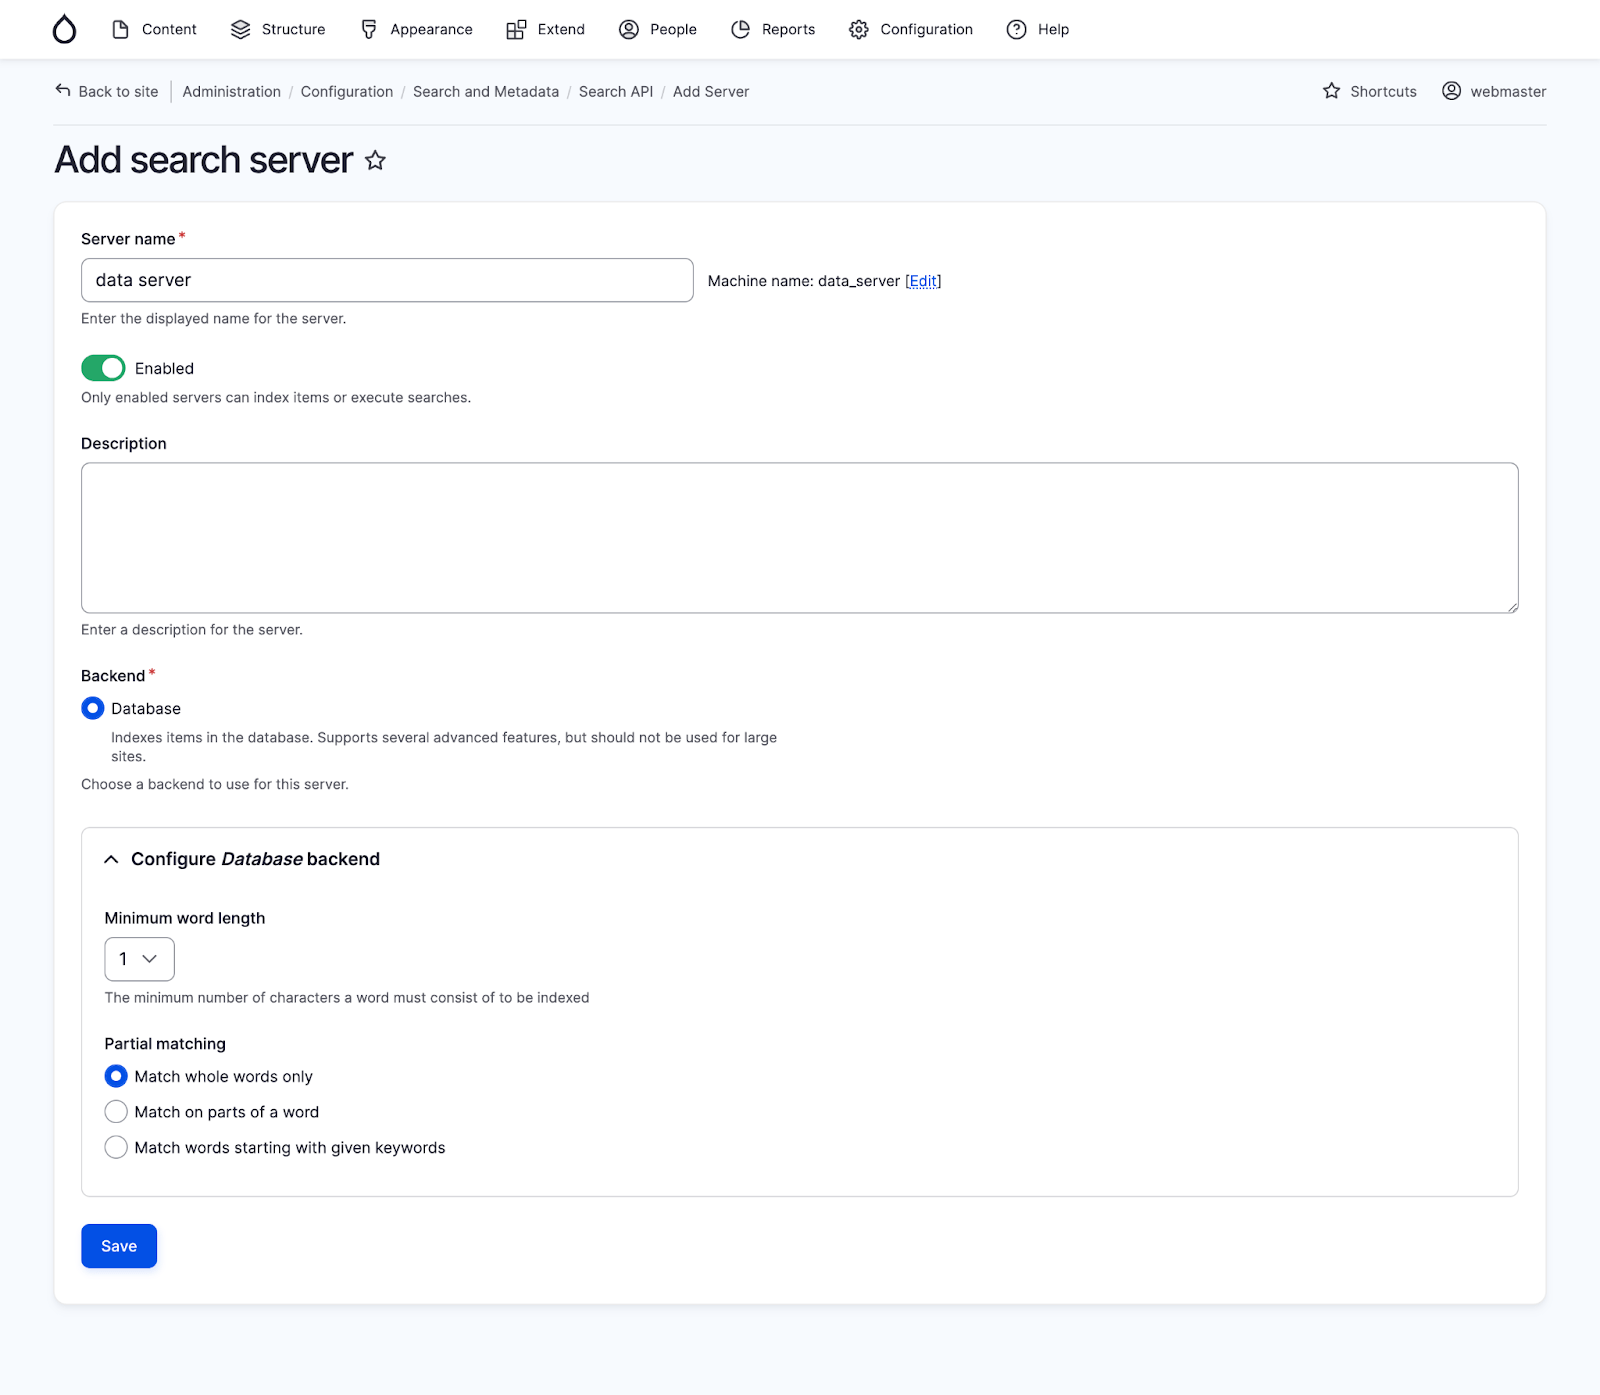
Step 3: Configuring the search server
Navigate to Configuration -> Search and metadata -> Search-API from the admin interface to configure your search server. Give a name to your search server (here - data server).
Step 4: Configuring the search index
Next, configure the search index to improve the search performance. Navigate to Configuration -> Search and metadata -> Search-API -> Index -> data_index.
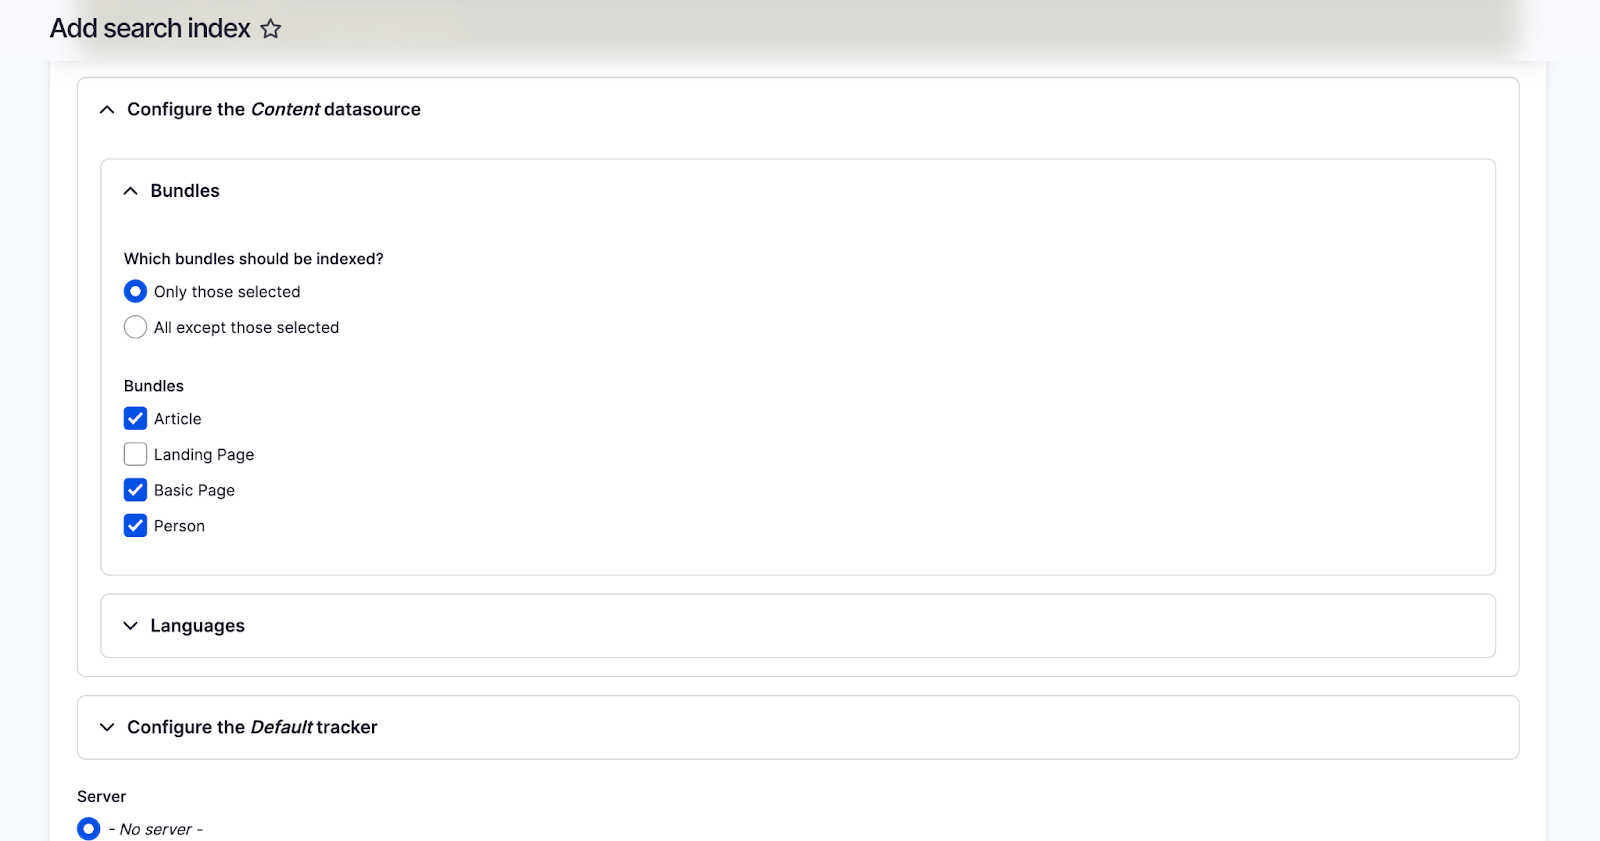
Give a name to your index and then select Content as your Datasources since we will be indexing the Content entities here.
You can then move on to the next section - Configuring the Datasource (here – Content). Here you can choose to select all the bundles or only select a few from the below list to index.
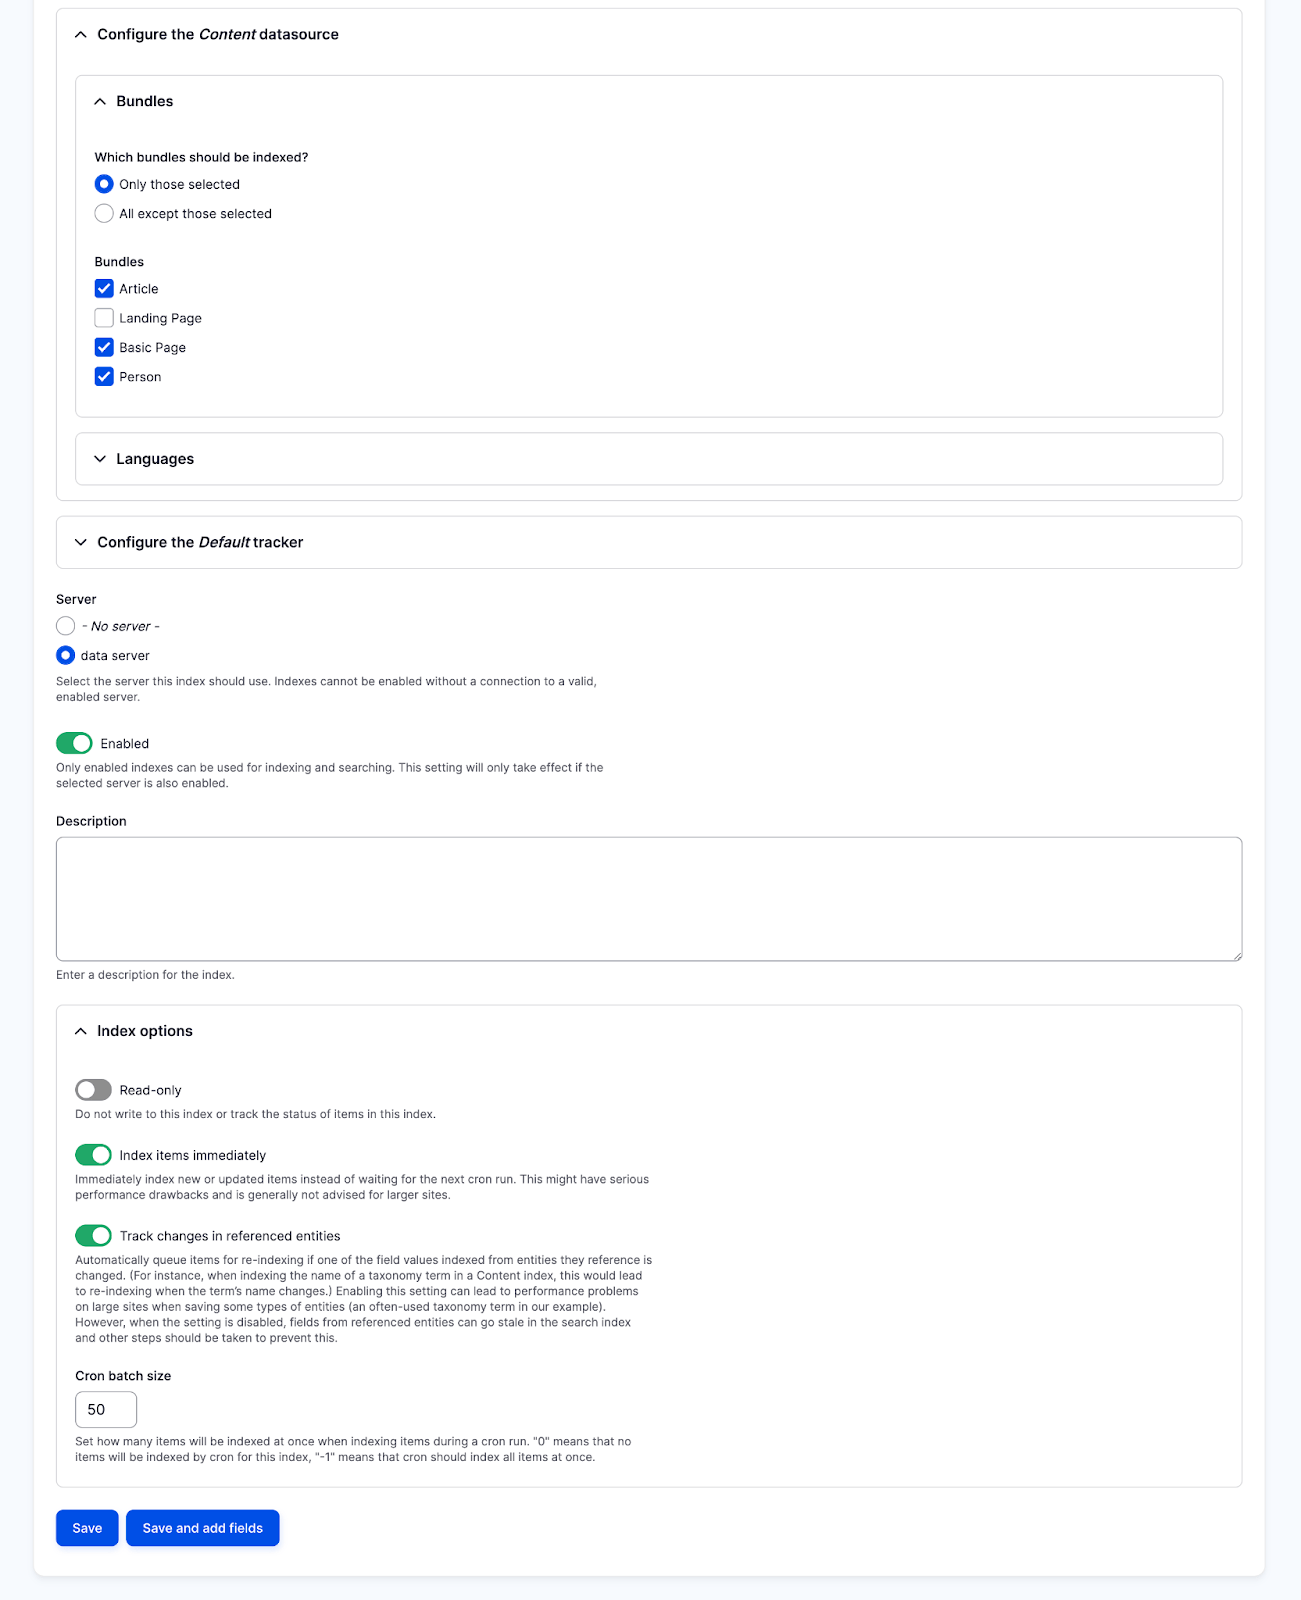
Next, select your server that you had already created (here - data server). Select the “Index items immediately” option to begin the indexing process. Click on Save.
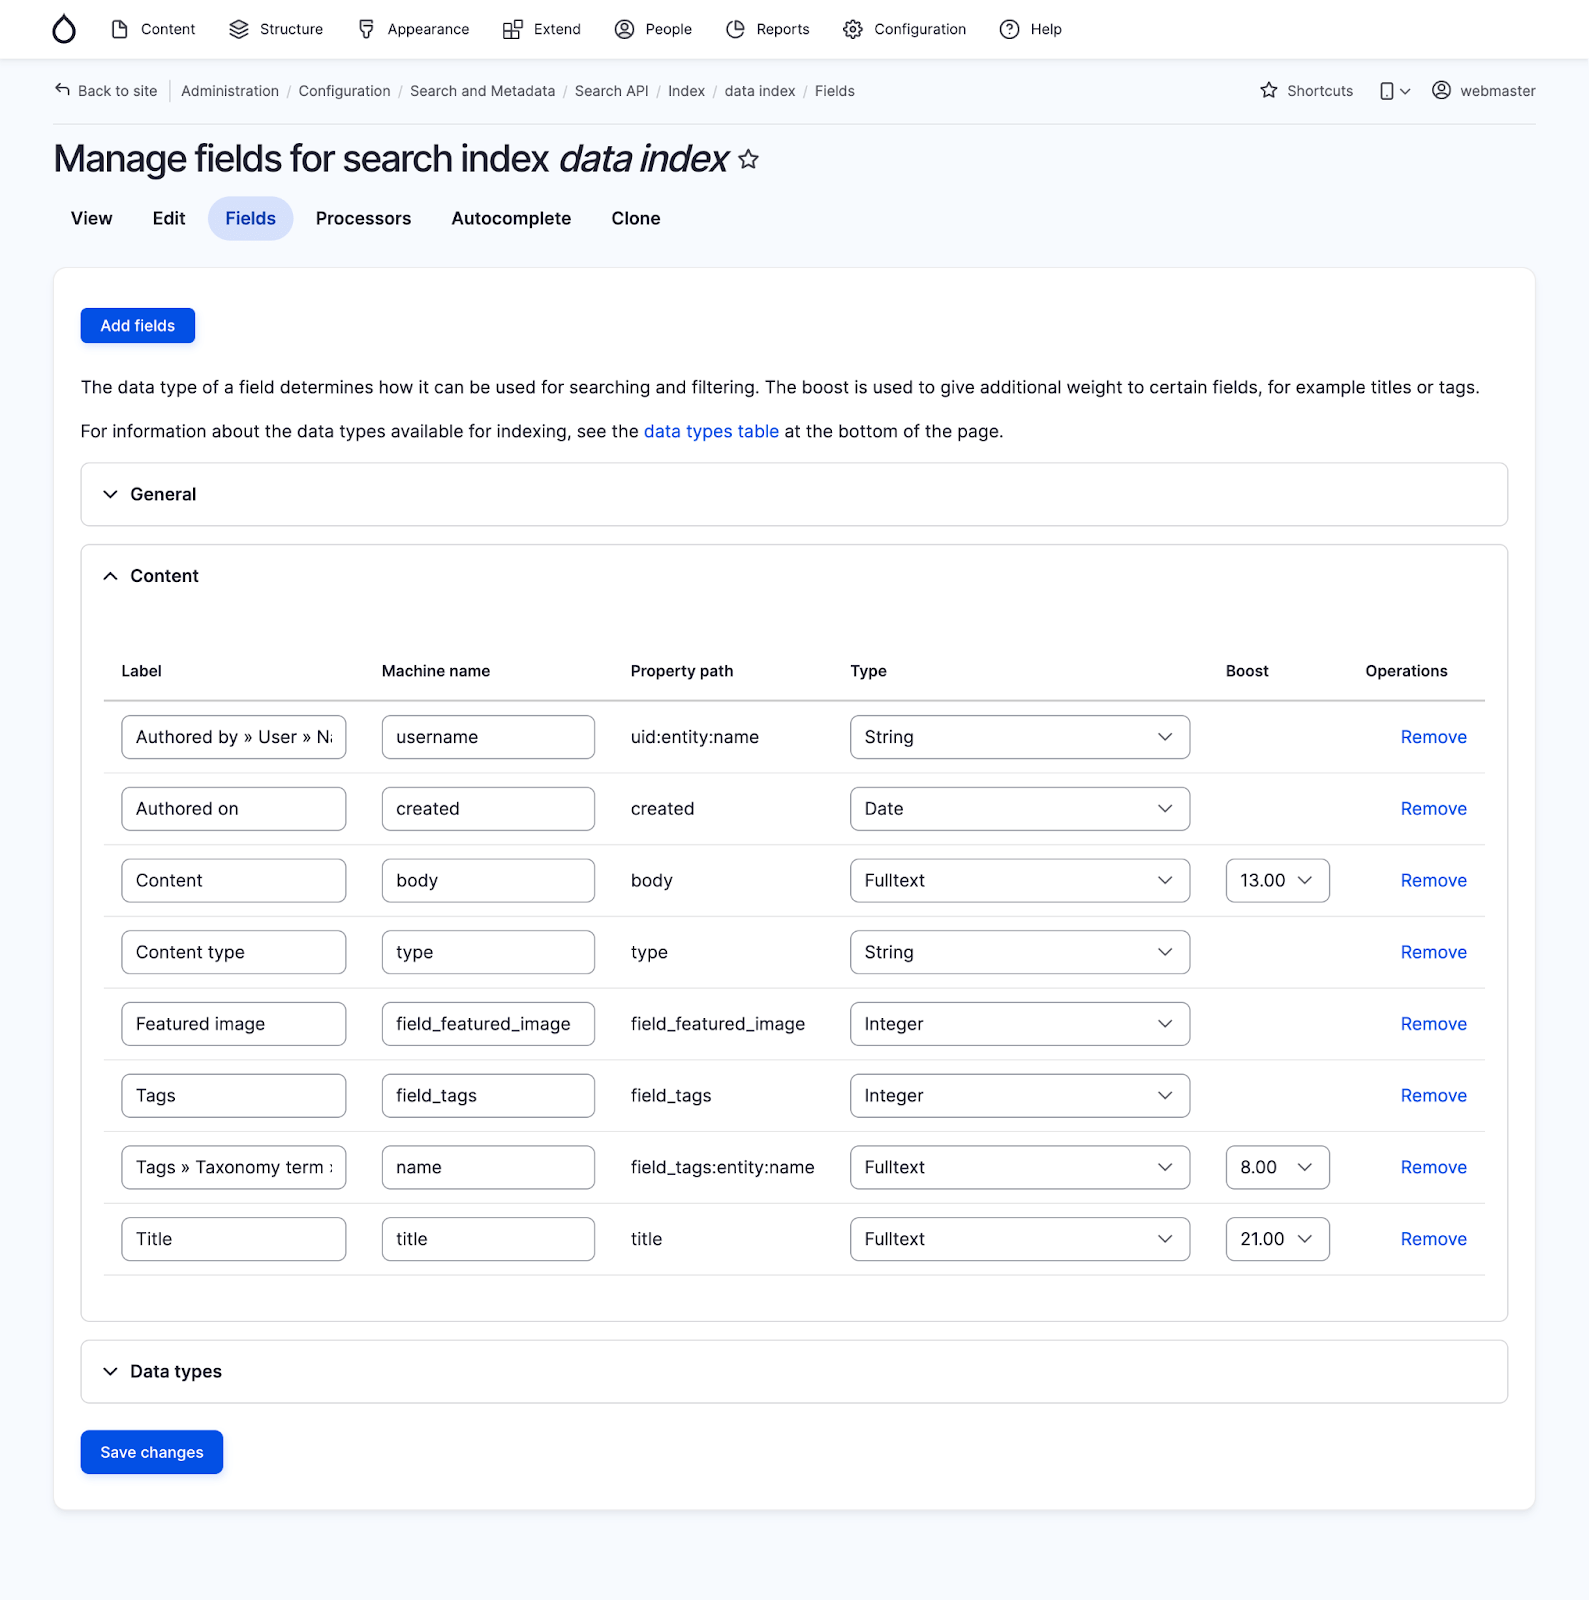
Step 5: Adding fields for indexing
Next, we need to add Fields to be indexed. Navigate to Configuration -> Search and metadata ->Search API -> data index and select the Fields tab. Click on the Add fields button to create fields according to your requirement.
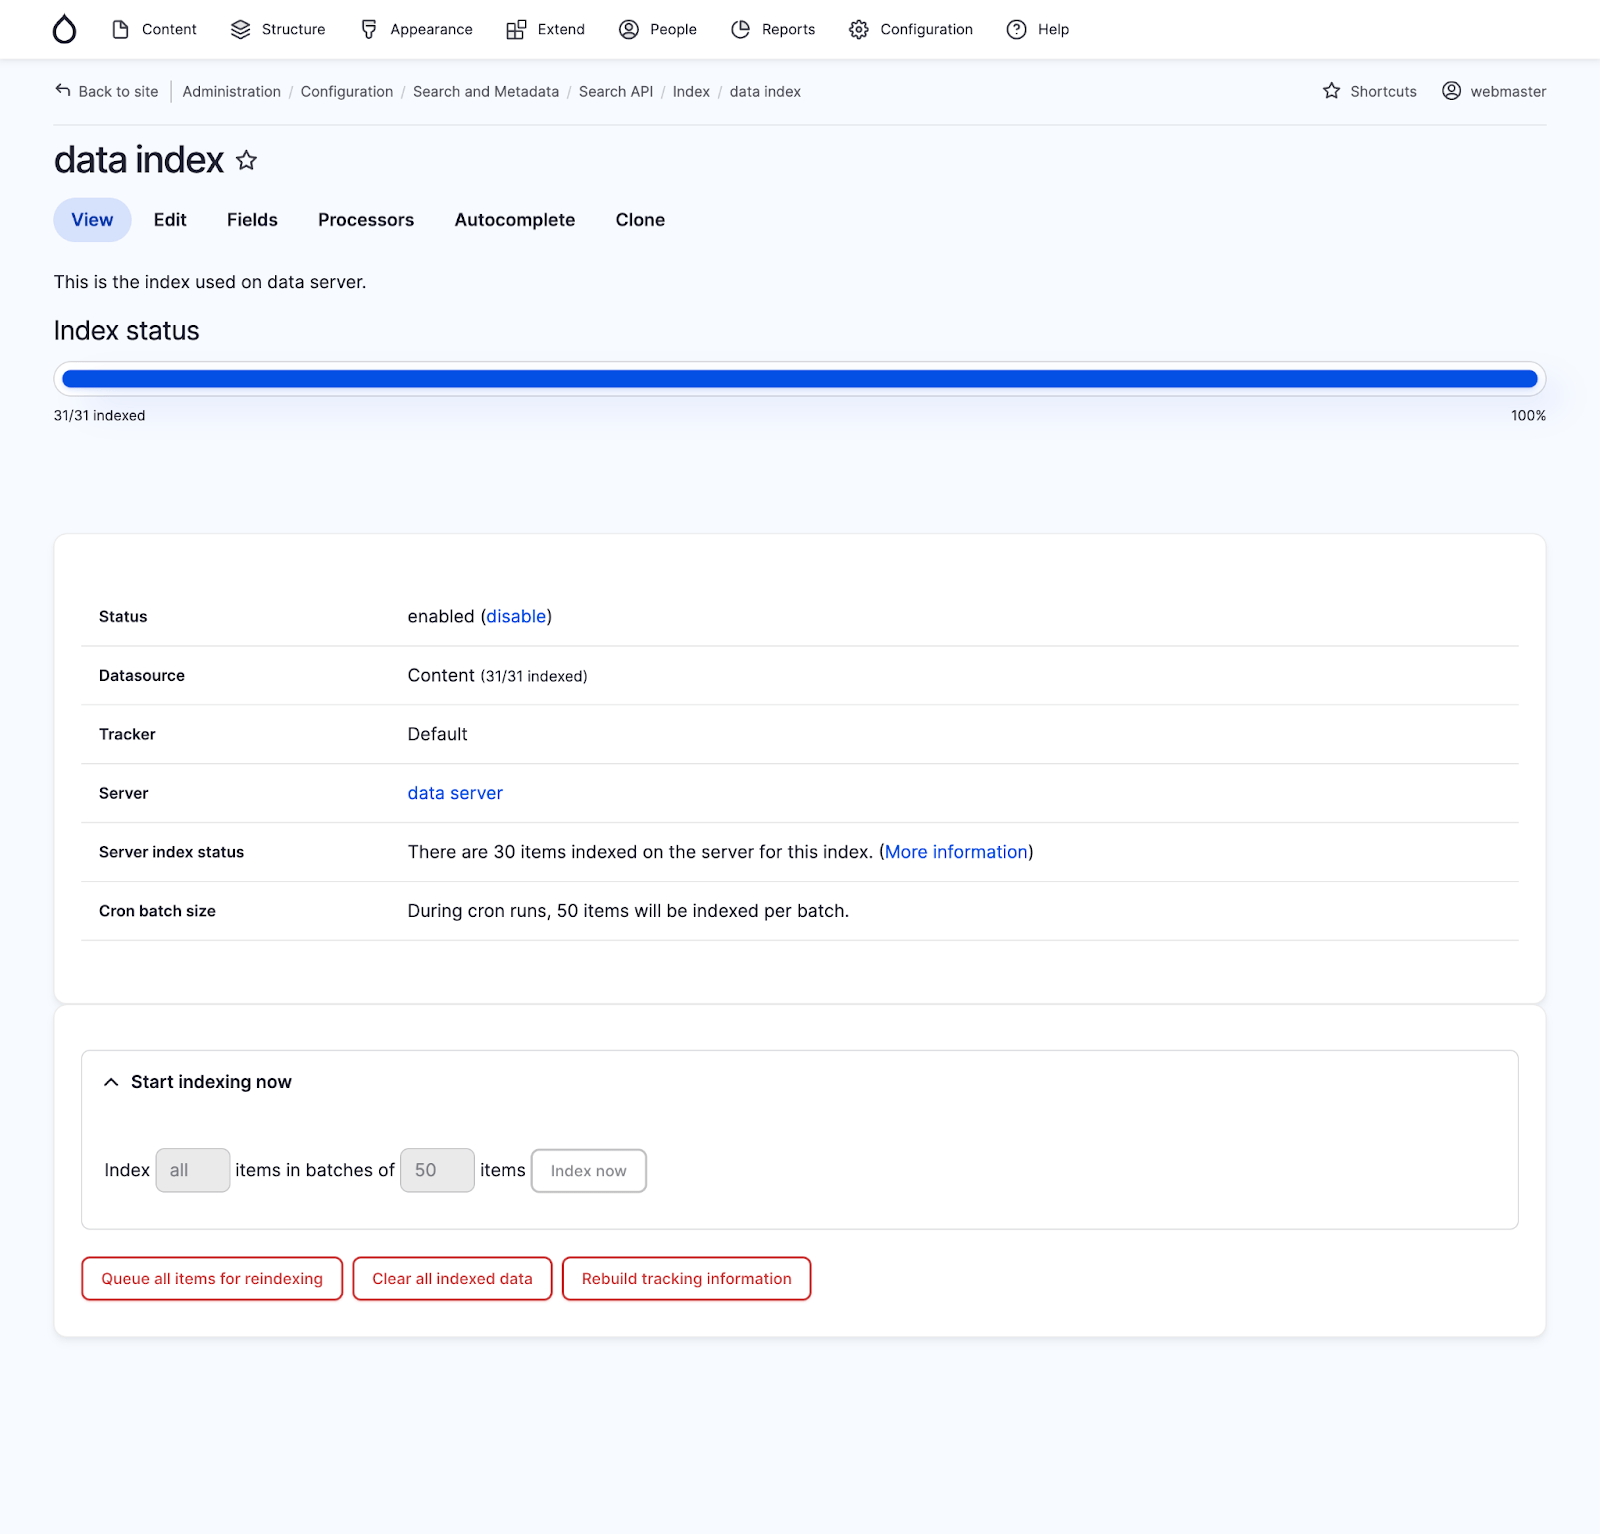
Step 6: Indexing the content
Under the same location, click on the View tab to start the process of indexing your content. In the Start Indexing Now section, click on the Index Now button. It will then show you a progress bar with the status of the number of items that have been indexed.

Step 7: Creating a view
Now we will be creating a view for the data that needs to be indexed and displayed to your users. Navigate to Structure -> Views -> Add View.
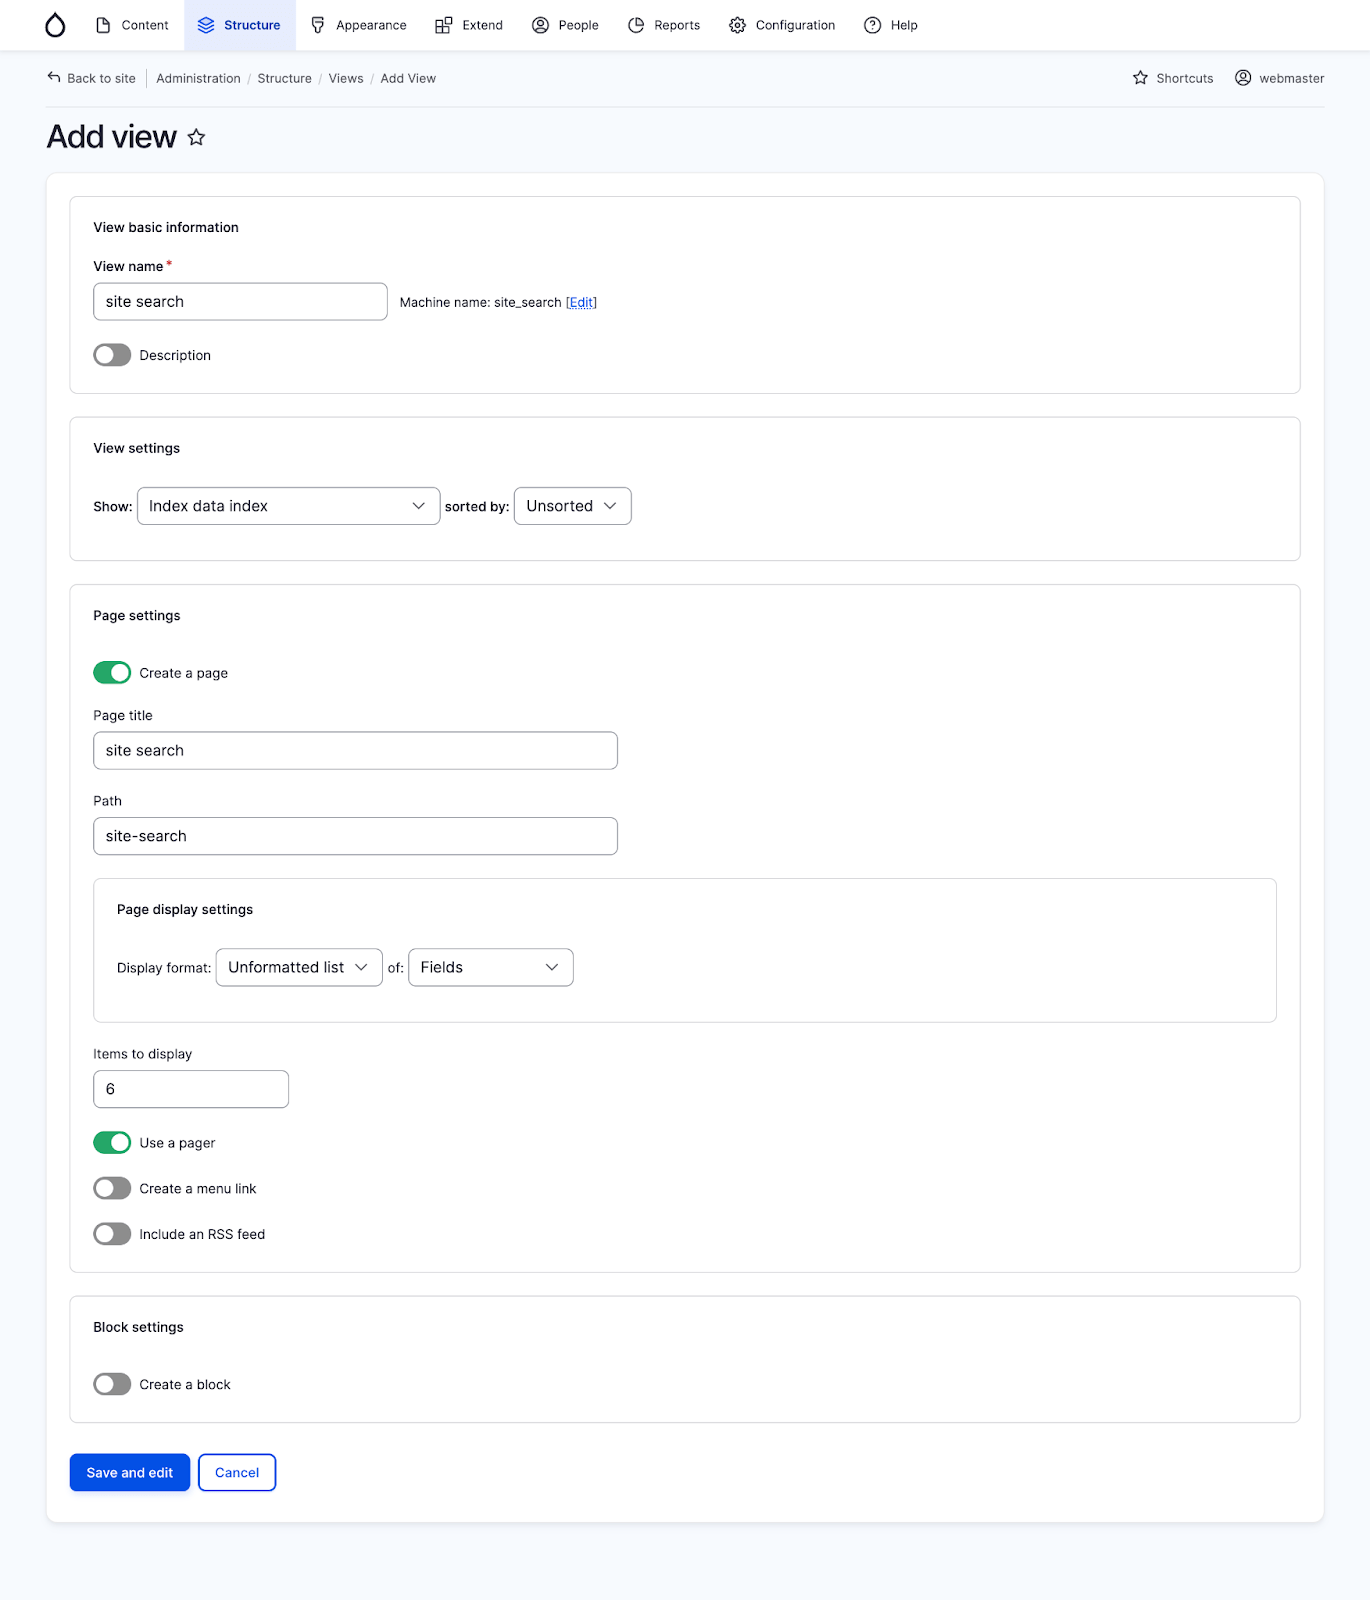
Give a name for the View.
Under View Settings dropdown list, select the index that you have created in Step 4.
Create a page for your search results by clicking on the Create a page checkbox under the Page Settings tab. Give a name and a path for the same.
Under Items to Display, select 0 if you want to display all the results in one page. Else, select a number of results to be displayed.
Under Page Display settings, you can select the format in which you want to display your results – Table, Grid, HTML list or Unformatted list. We have selected Unformatted list here.
Click on Save.
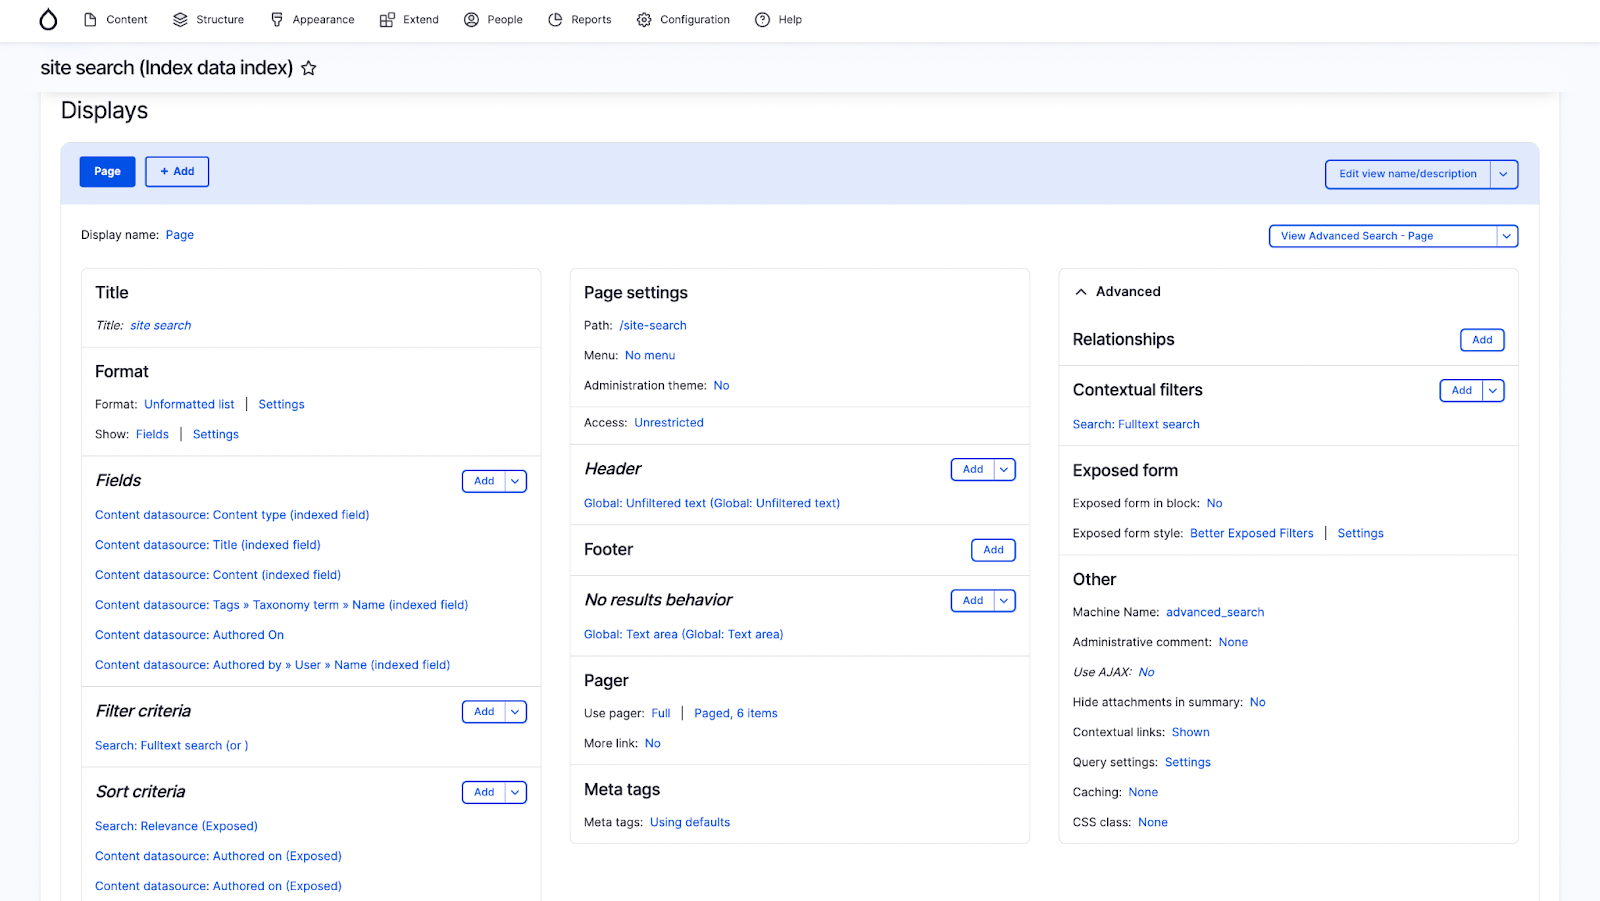
Step 8: Adding fields to the view
Here we will be adding fields that we have indexed earlier to the View.
Go to Views, click on Add button next to the Fields section. Select the Fields, click on Add and Configure.
Under Render Settings, select the Link to Content checkbox so that the results displayed are clickable.
Click Save.
Step 9: Configuring the facets
Now let’s begin configuring and enabling the facets. Navigate to Configuration -> Search and meta data -> Facets
Click on the Add Facet button.
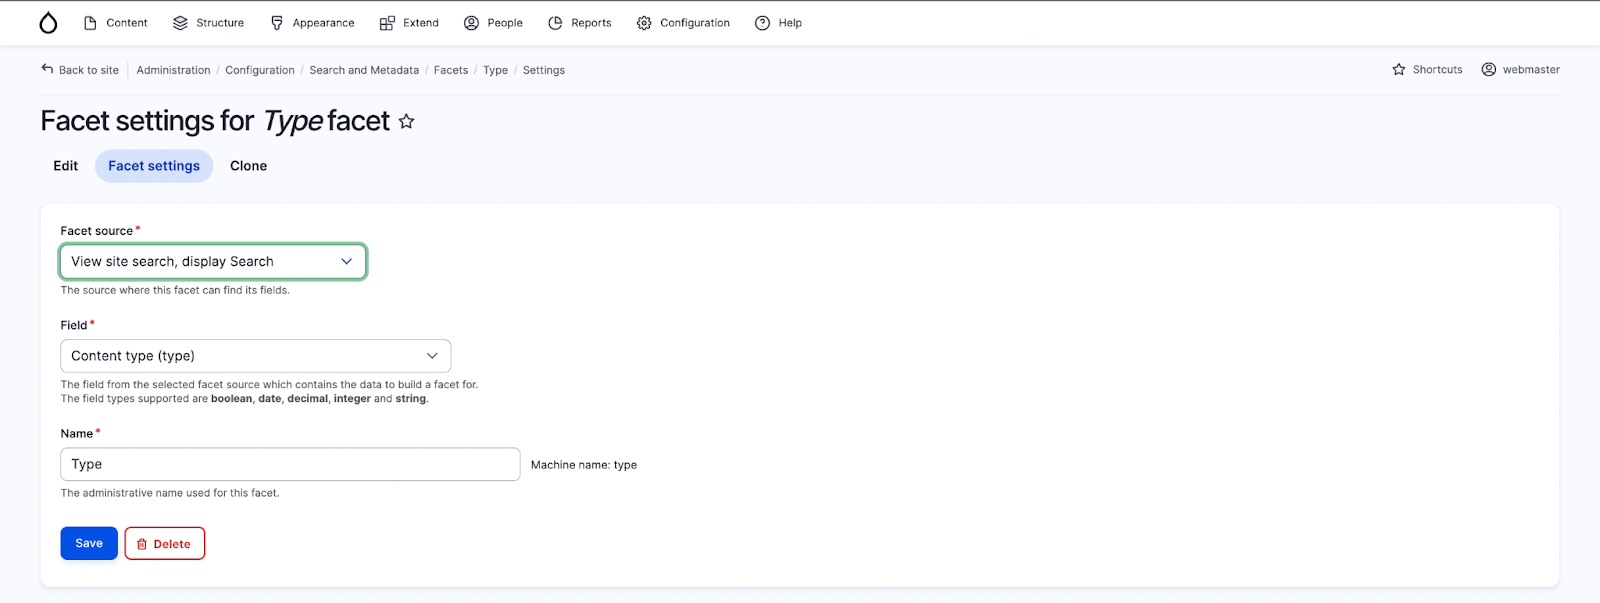
Select the Facet Source – This will be your View that you created previously.
Select the Field – This will display the fields you had added for indexing in Step 5.
Give a name to the Facet.
Click on Save.
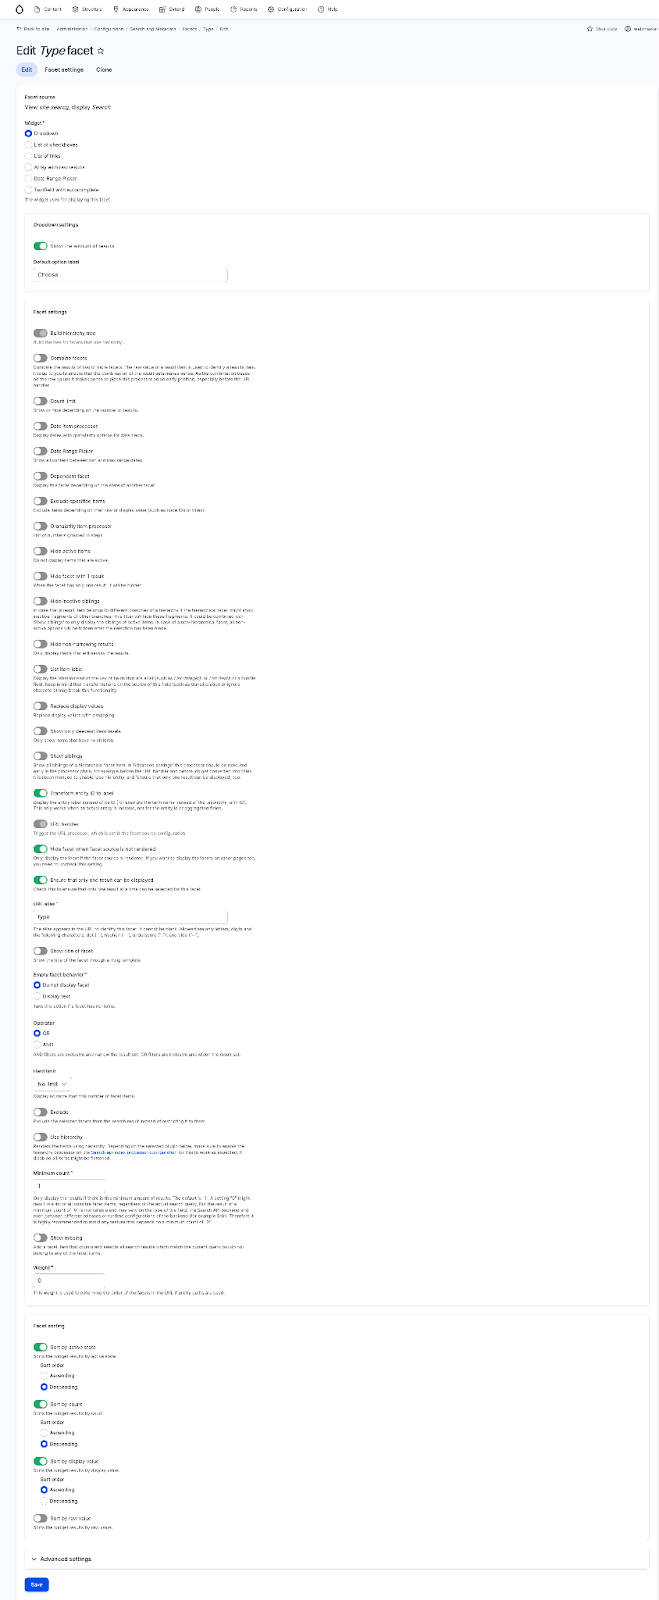
Next, you will then see more configuration options for displaying the facets (as shown in the below image). Widgets will list out a number of options like List of links, array, dropdown, etc. You can choose what suits your website the best.
Select the “Transform entity ID to label” to avoid displaying the machine name of the content type.
Click on Save.
Step 10: Placing the facet blocks in the chosen page regions
Next, place the Facets you created as blocks in a page region of your choice.
Navigate to Structure -> Block Layout.
Select the region of the page where you would like to place the block containing the Facets.
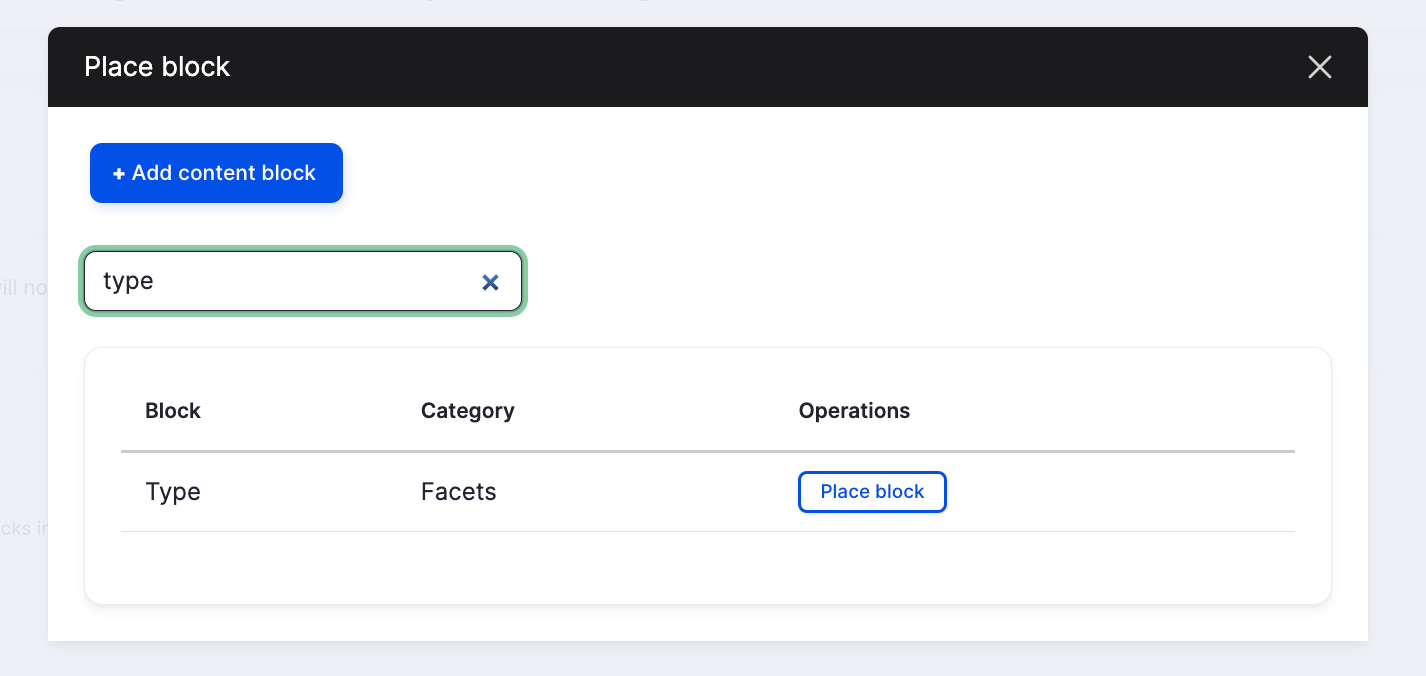
Here, we are selecting Sidebar. Click on the Place Block button next to the Sidebar.
In the next dialog box, search for the Facet name and click on Place Block.
In the Configure Block section, mention the Search page path that you had previously created. Here -“site-search” is our page we had created.
Give a display name for your Block and select the Display title checkbox if you want the block name to be displayed (here – Type).
Click on Save Block.
The Result
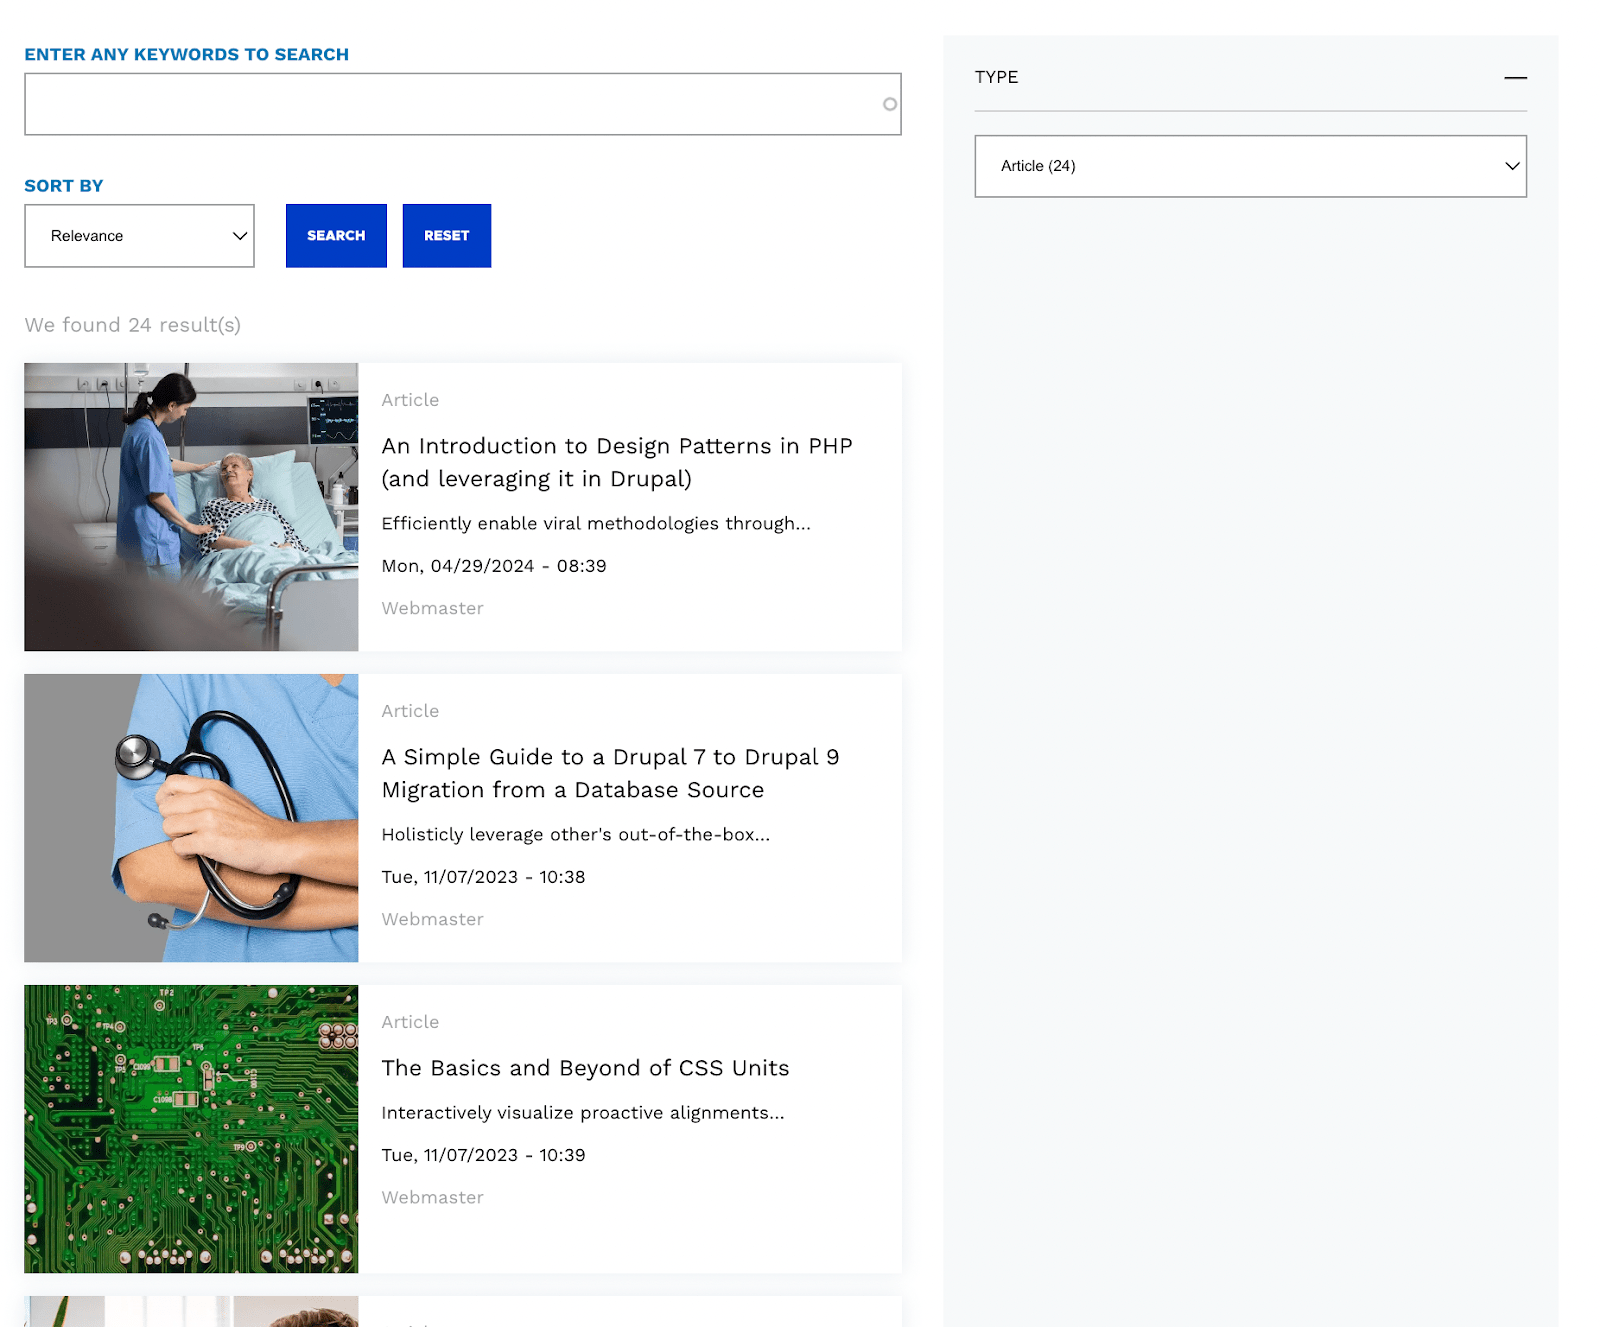
And just like that, your faceted search page and functionality is ready! Notice the Facet called Type (display name) that has Basic page and Article listed as content types to filter against.(Note: Since there is no content available under ‘Basic Page’, it will not show up in the filter).
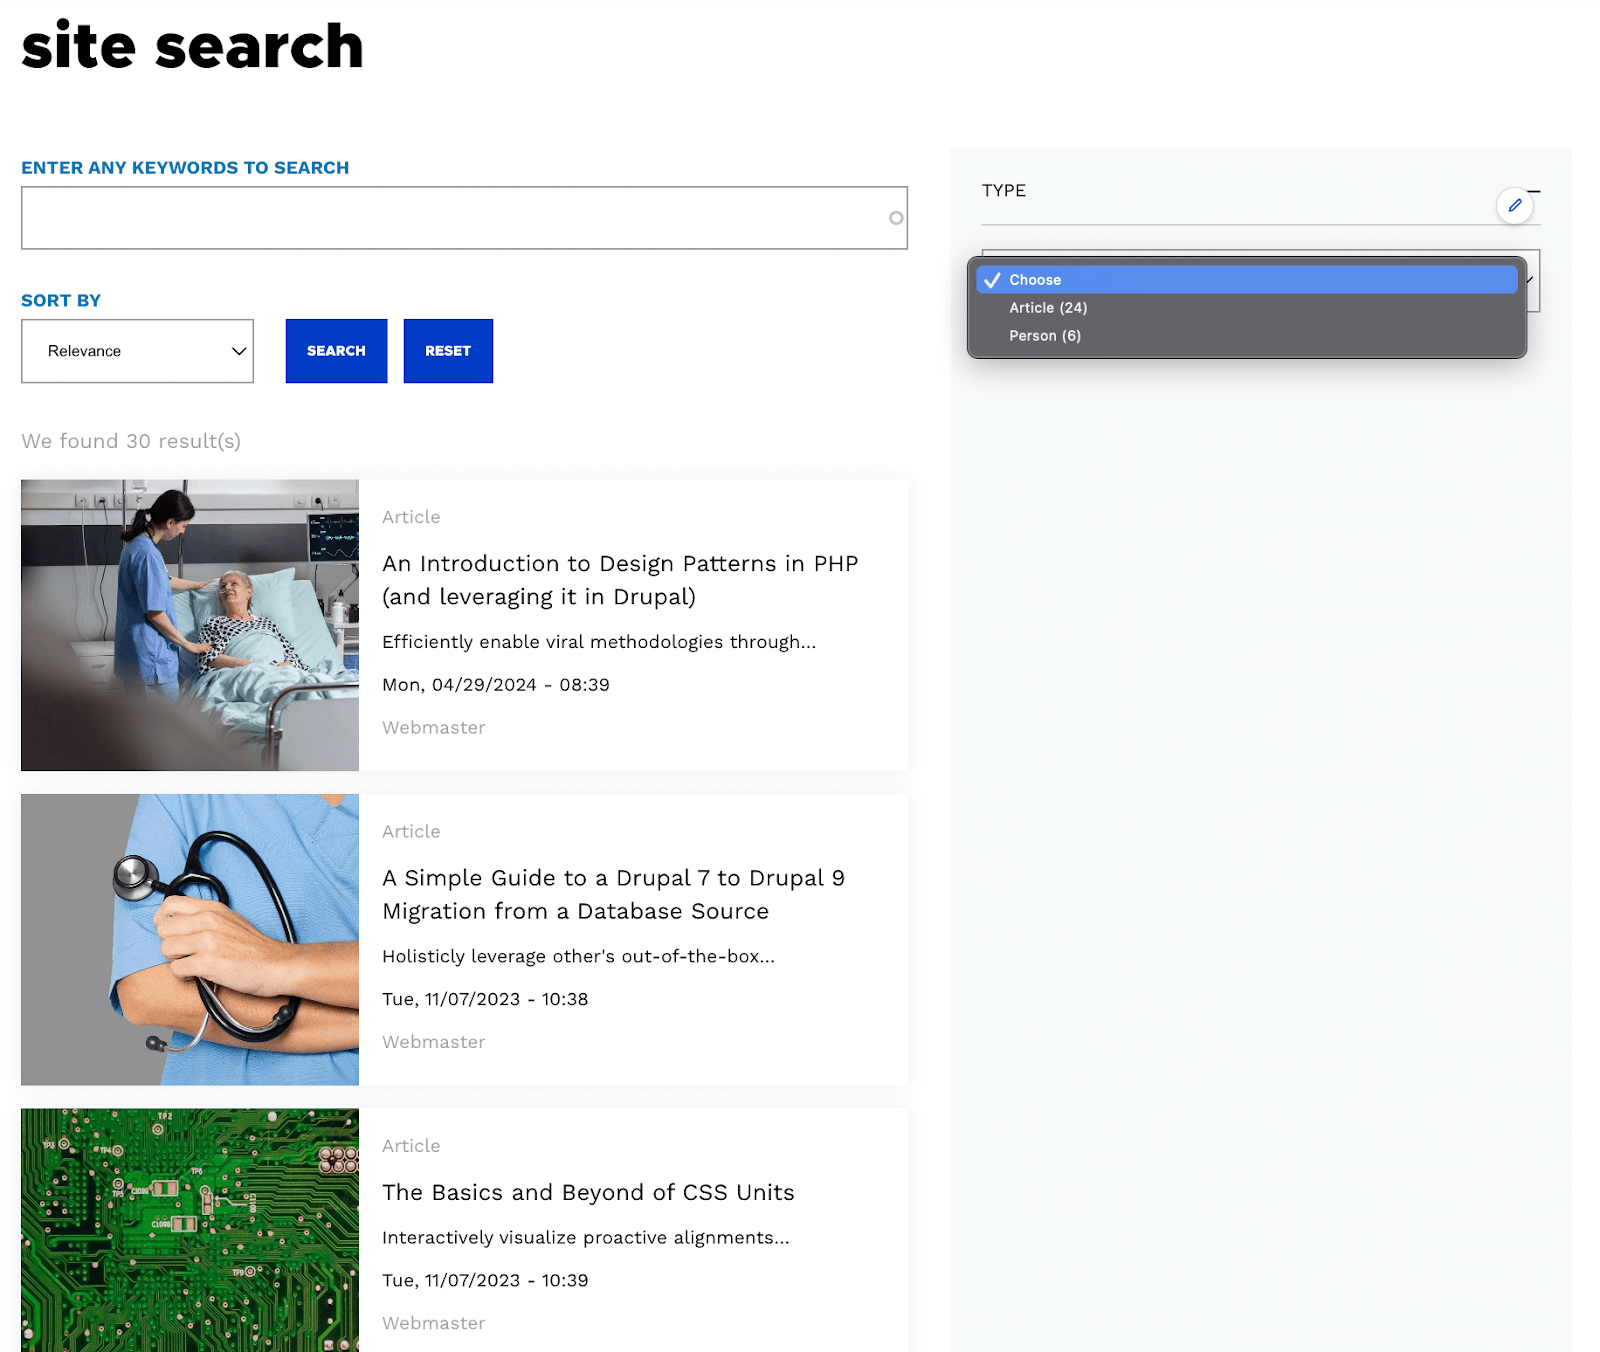
Select Type as ‘Person’

Select Type as ‘Article’
Final Thoughts
Implementing faceted search provides users with an easy and fast search experience. In this tutorial, we have used Search API as the search engine. You could also use search servers like Apache Solr, Search API Solr search or Elasticsearch with Drupal 8, whatever suits your requirements. As a leading Drupal development company, Specbee’s Drupal experts can help you build exemplary search experiences. Contact us to know more.

Shefali Shetty

Ankitha Shetty
Related Insights


Don't Miss Out!


