The Views module is one of the coolest core modules in Drupal. It basically works like a visual query builder. It offers a user-friendly interface (and a bunch of configurations) to define what data you want and how to display it instead of writing SQL queries manually. No coding needed! It’s like using a drag-and-drop query builder to fetch and display content dynamically.
Views help pull content from your database and display it in different formats (tables, grids, lists, etc.). You can customize what to show, how to sort it, and even add filters so users can refine their search.
Come, let’s learn more about this fantastic Drupal module and dive deeper into its features.
How to install and configure the Views module
The views module is a core module and, therefore is installed in the Drupal setup by default. Please navigate to Structure > Views > Add view.
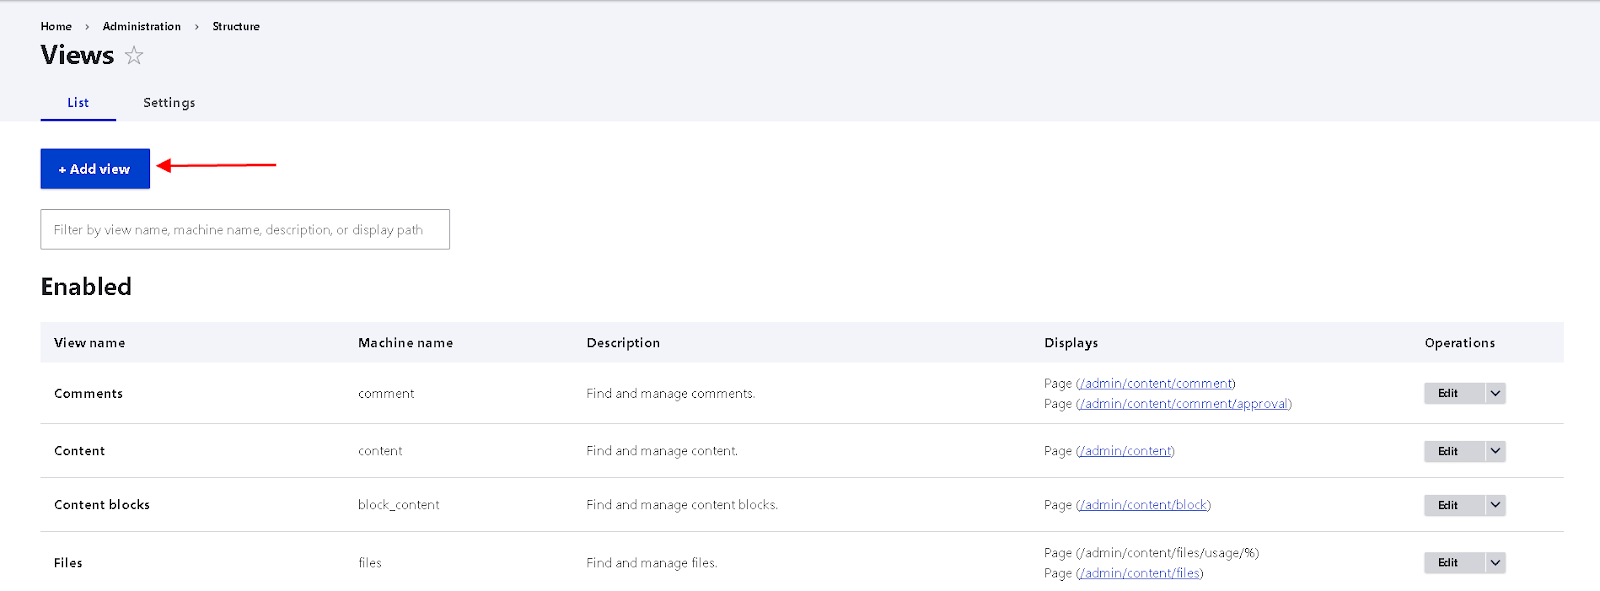
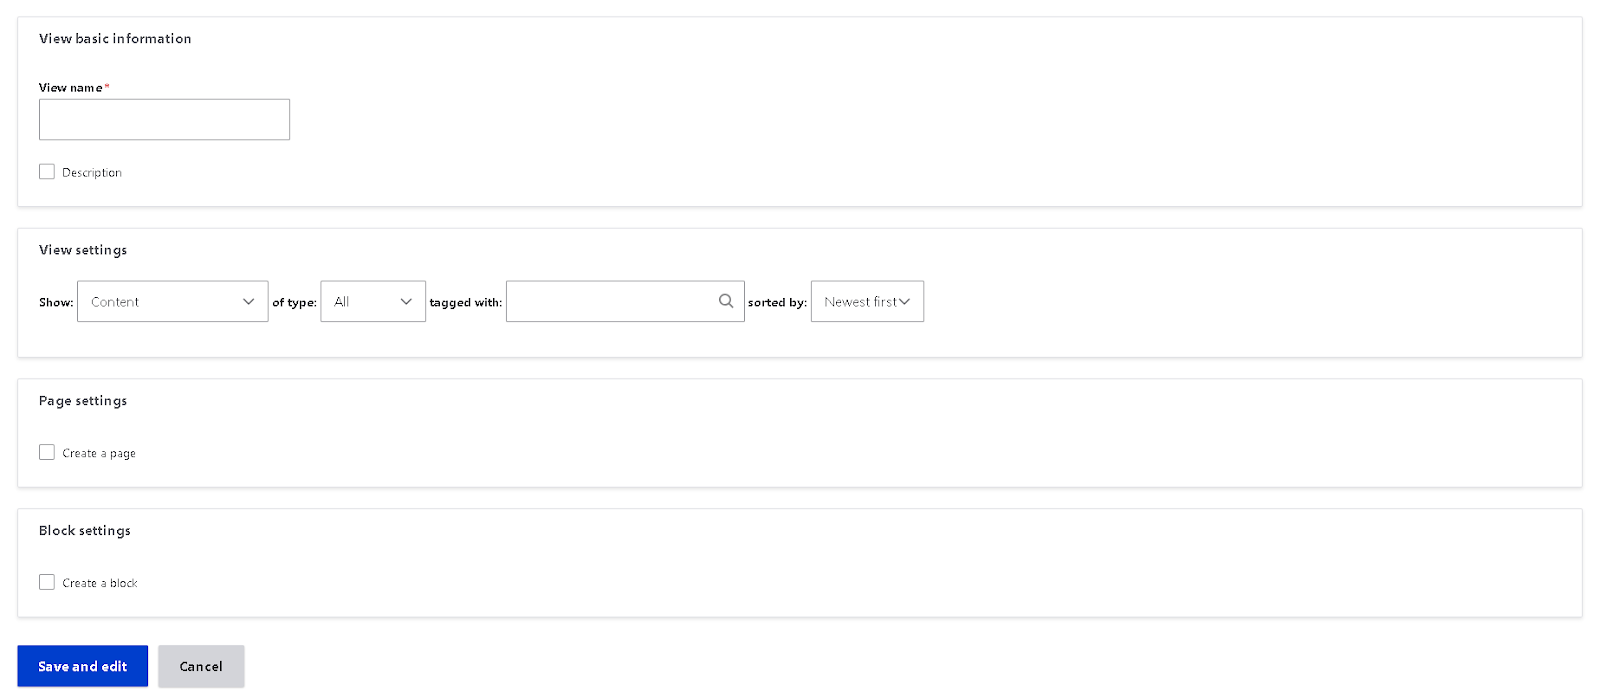
After clicking "Add View," you can enter a name for your view and configure key settings, such as the type of content to display, whether to create a view page or a view block, and how the data should be rendered.
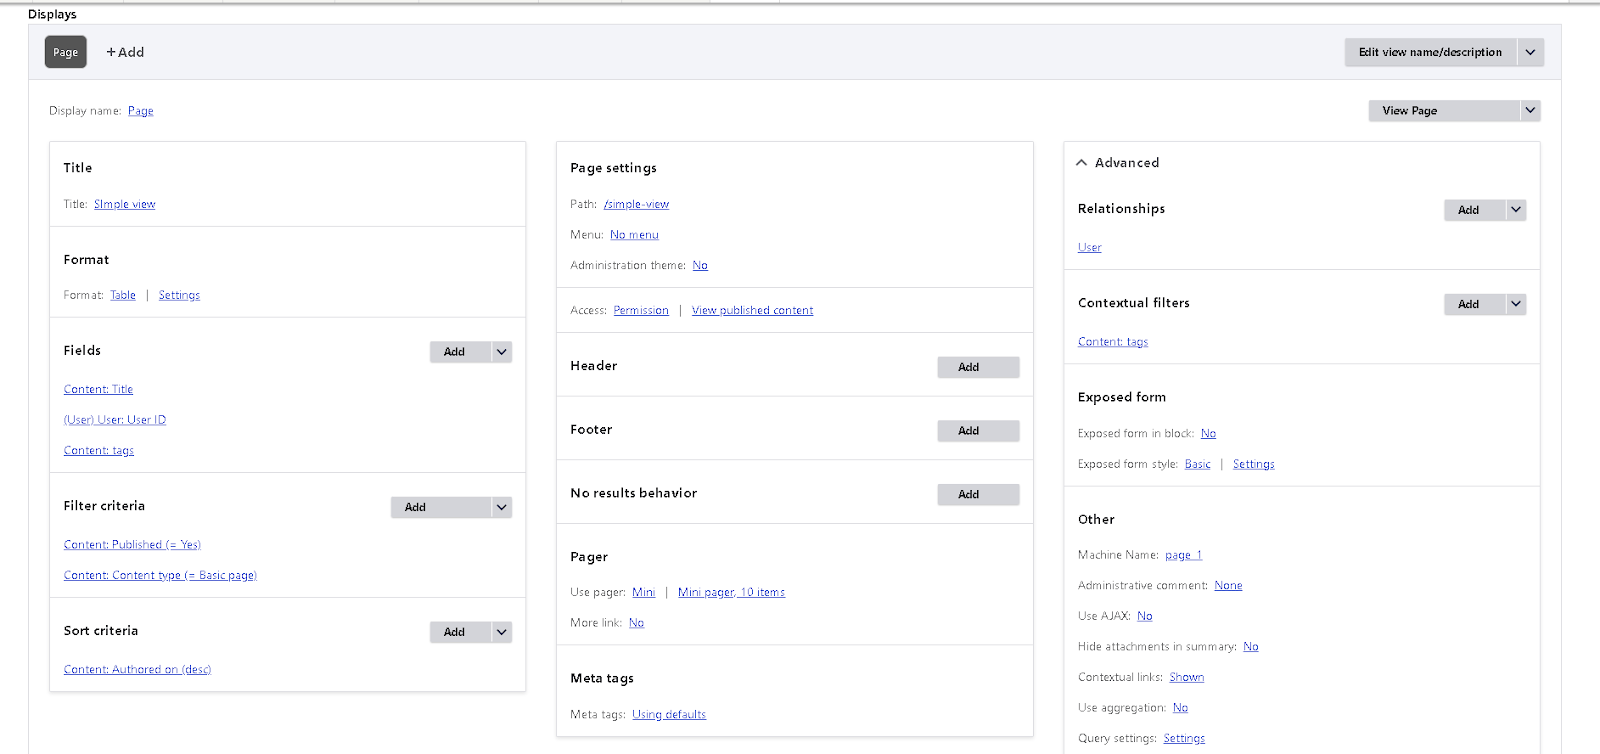
After saving, the Views configuration interface opens, providing various options to query your database and display content the way you want. The interface is designed to be intuitive and easy to navigate.
Features included in the Views Module
In this blog, I will explain each option provided by the Views module and its use cases.
Want to learn how to export data from Views using the Views Data Export module? Click here!
A single view can have multiple displays configured. The Views module offers seven display options:
- Attachment
- Block
- Embed
- Entity Reference
- Entity Reference Revisions
- Feed
- Page
Below are the options that are available in the Views module, that we can configure based on requirements to render the desired results.
Title
- This field is the view’s title field. Each display can have its unique title so it will be easier to differentiate them.
Format
- The formats option allows you to decide how the rendered contents should be formatted.
- The format should be chosen based on how you want the design to look like.
- The below image shows all the formats available.
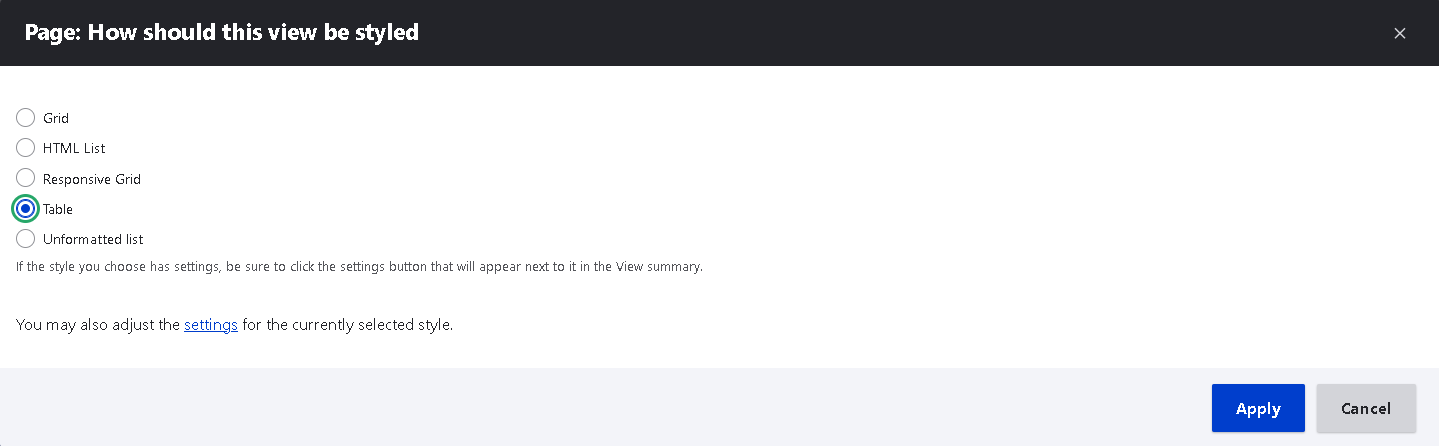
For example, the Table format will render the desired results in the form of tables as shown in the below image.
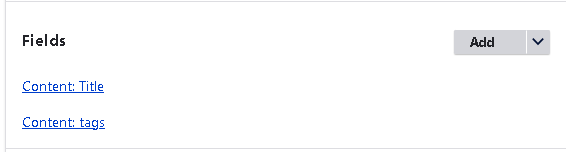
Fields
- In this section, you can individually add the fields that you want to render in the view.
- For example, Consider a content type with an Image field, Body field, Abstract field, and Banner title field.
- Now in your view, you can select what fields you want and only those fields will be rendered in the view.
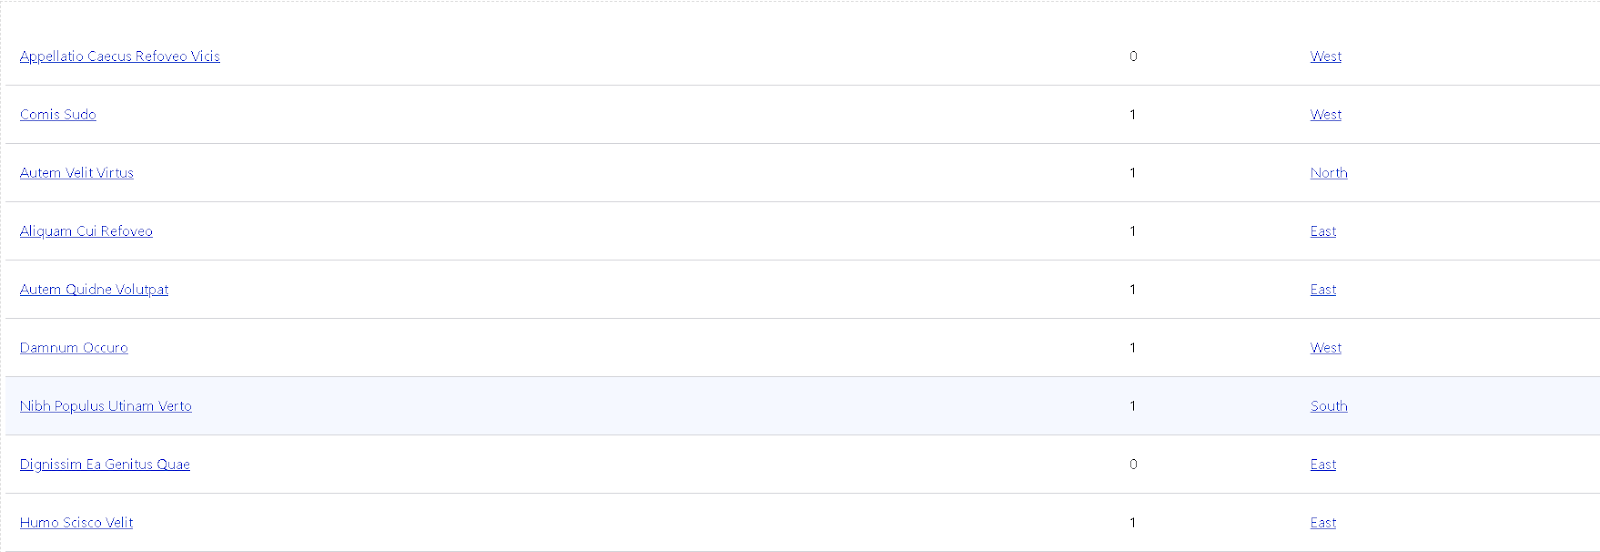
- In the image below, we are rendering only the title of the content and Tags [Taxonomy term] to which the content is tagged.
The resulting view will look as shown in the below image.
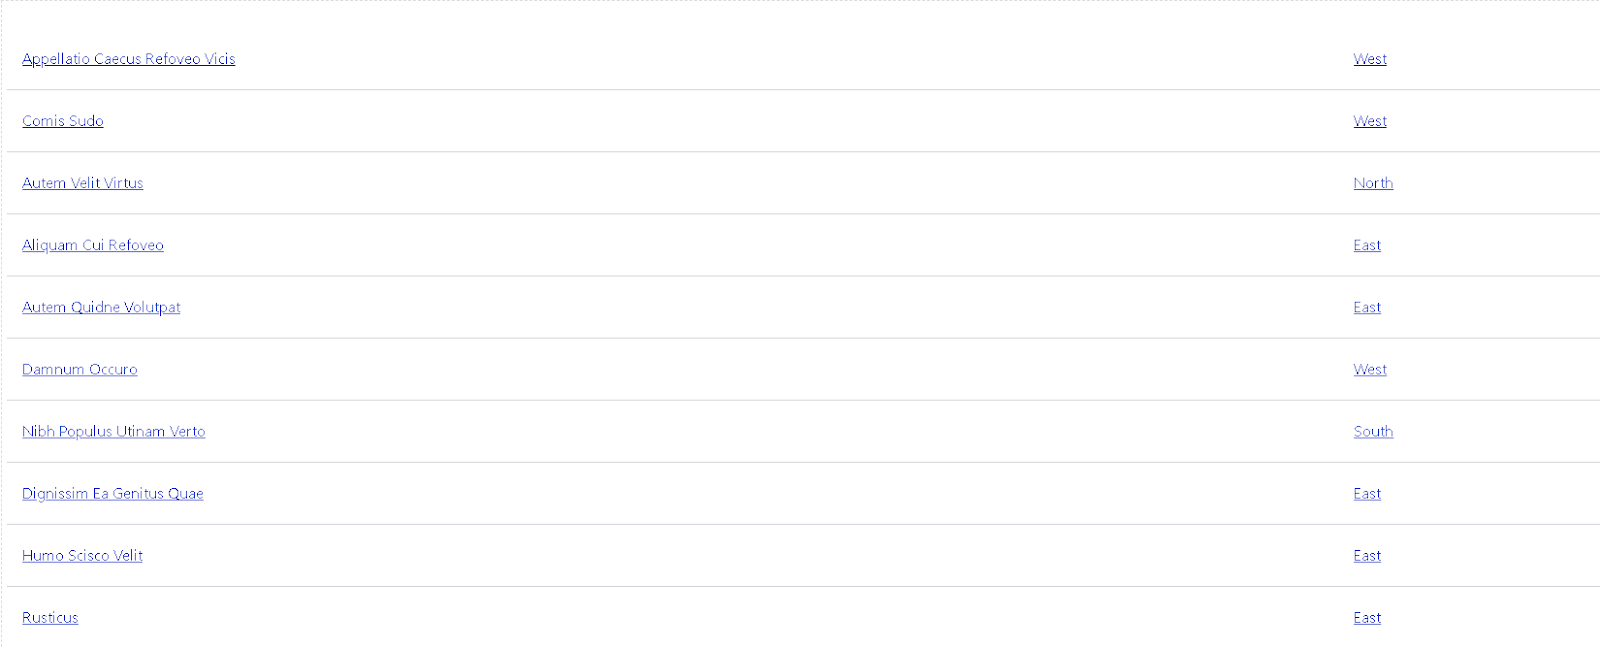
Here on the left, we have the Content title and on the right we have the respective taxonomy term tagged to it.
Filter criteria
- This section is used to filter contents that are rendered in view.
- For example, if you want to render the contents that are tagged to a taxonomy term named West, you can add a filter criterion that specifies that only contents that are tagged to West should be rendered.
- Click on add filter criteria and search for the taxonomy term field machine name.
- In the configure field section, we can select what filter we want to implement.
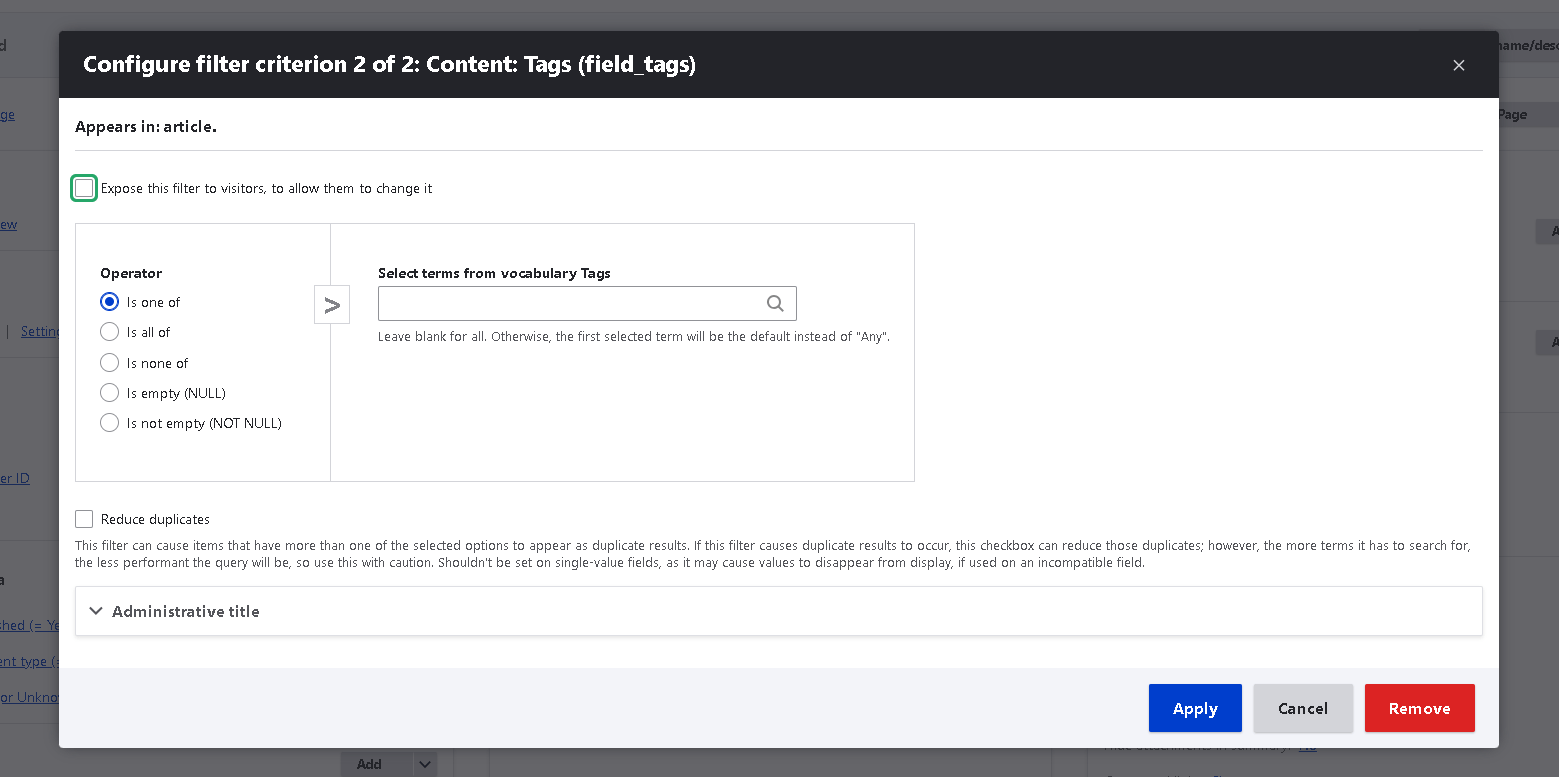
The "Expose this filter to visitors" option adds a filter input, allowing users to refine the view's content.
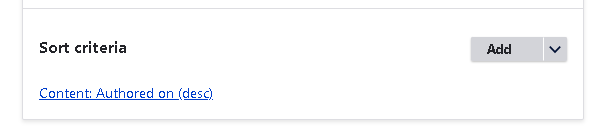
Sort Criteria
- This filter configures the sort criteria. Can be ascending or descending. We can also select various kinds of fields such as authored on dates, or if there are any date fields in the content, and sort the contents based on that.
Page settings:
- Path: Here we can specify the path of the view page. This is not needed for any other view displays
- Menu: Here we can configure if you want the view to be accessed from the menu
- Administration theme: We can set the view theme to the administration theme if we want.
- Header: Here we can add fields or Custom texts which will be rendered in the header of the view.
- Footer: Here we can add fields or Custom texts which will be rendered in the footer of the view.
- No results behavior: Here we can specify the behavior of the view if no results are rendered in the view.
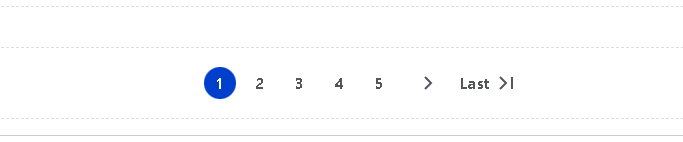
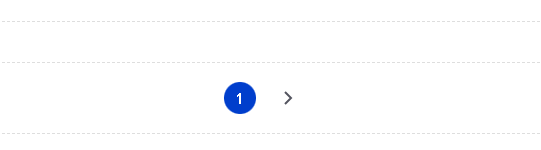
- Pager:
- The pager configuration enables us to display all contents at a time, have pager implementation done, or have a certain number of contents to be visible.
- The pager has 2 different variations available. Full pager and Mini pager
The full pager will look like as shown below
The mini pager will look like as shown below
- Metatags: This option enables us to add metatags to the view.
Advanced Section
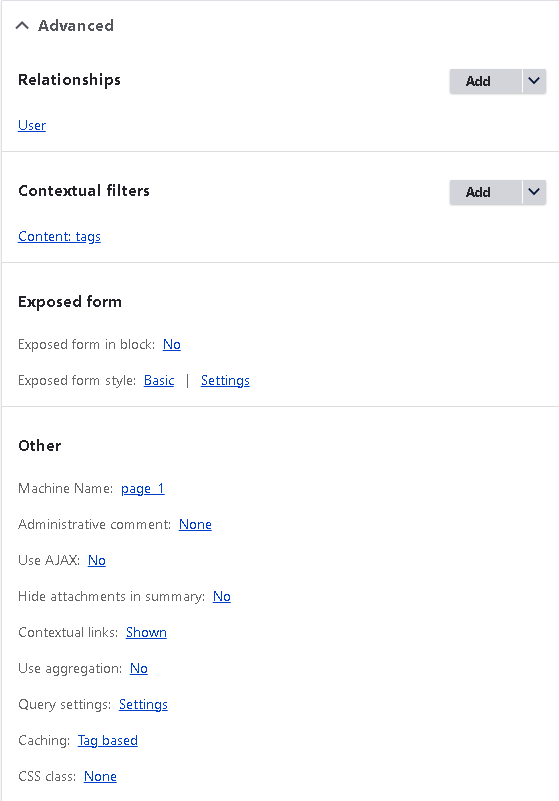
Relationships
- There are instances where we want to render fields that are not related to the listed contents, such as the user ID of the logged-in user or the name of the user who created the contents. In such cases, we use relationships. Here we can select the field we want and add it, and the fields present in the relationships entity will be available in the fields section of the view.
Contextual filters
- Contextual filters are filters that can be passed in the URL of the view.
- For example, If you want contents that are tagged to the west when someone accesses the view page from a different node, you can utilize this particular configuration.
- If contextual filters are configured, by passing the tag ID in the view url, we can filter the contents accordingly.
Exposed form
- The normal filter and Sort filters can be exposed for end users.
- Now in the exposed form section, we get 2 configs.
- Exposed form in block: This will enable the site builder to place the exposed form as a block in the view page.
- Exposed form style: In this config, we can configure how the exposed form should look like, labels for the submit button, etc.
- Contrib modules such as better exposed filters will help increase the functionality of this config as they provide more styles.
Machine name
- We can configure the machine name of the view display here.
Administrative comment
- We can add any comments regarding the view here that will help future developers to understand the view better.
Use AJAX
- This will enable the Ajax on the view. Normally the page reloads whenever a filter is applied, but with AJAX, page reloading can be avoided.
Hide attachments in the query
- We can hide attachments in summary using this config.
Contextual links
- When you show the contextual links, it will render a pencil type of icon in the view which will enable the administrator to edit the view by clicking on that pencil icon directly.
Use aggregation
- Enabling this config will add a group by condition to the query executed.
Query settings
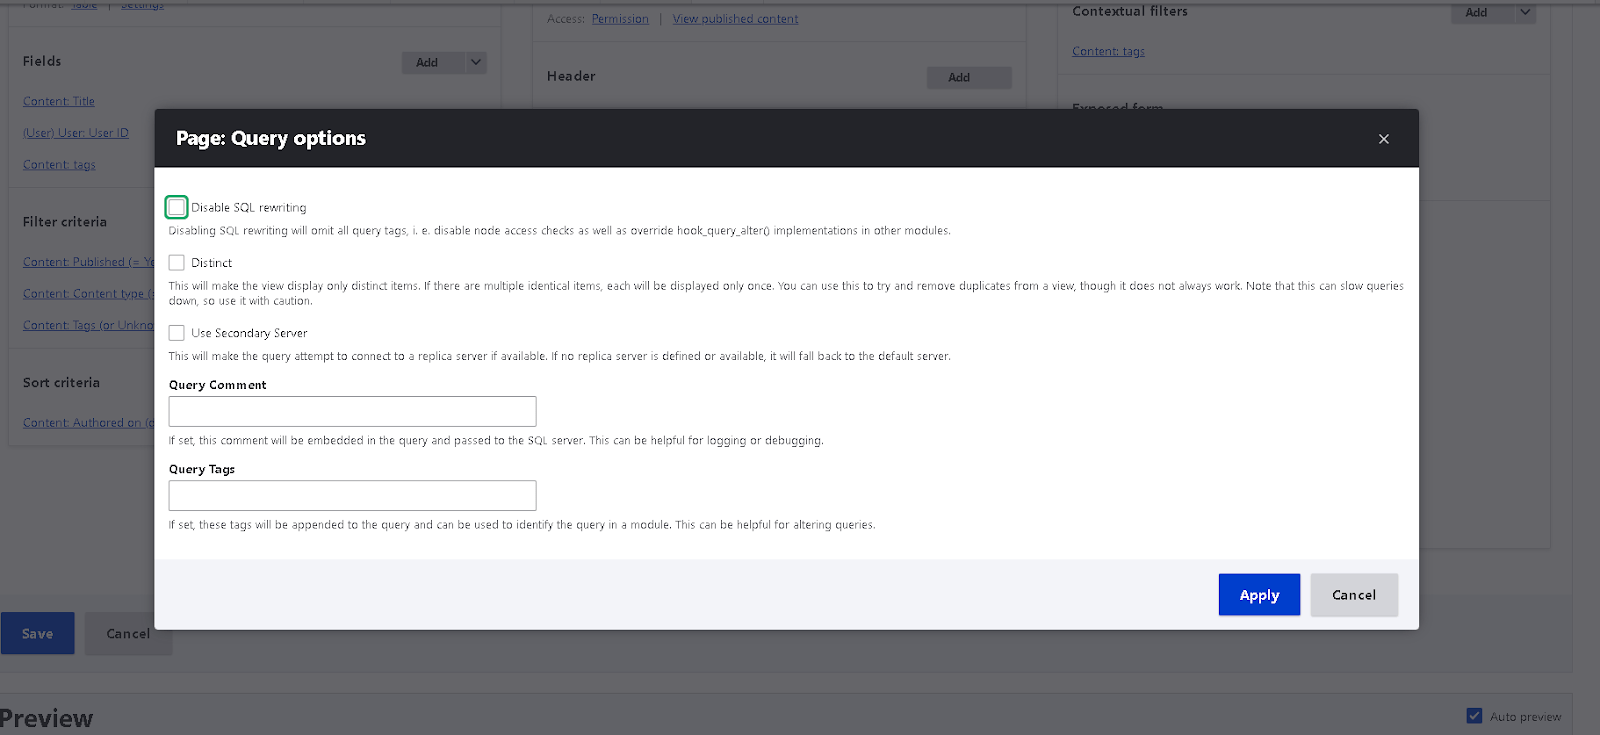
- By disabling SQL rewriting, we can prevent the view from being overridden by any query alter hooks.
- Distinct will make sure there are no duplications in your data.
- Use a secondary server: Attempts to connect to a replica server first, falling back to the default if unavailable.
- Query comment: It will add your comment to the query.
- Query tags: This will add tags to the query. These tags can be targeted using hooks.
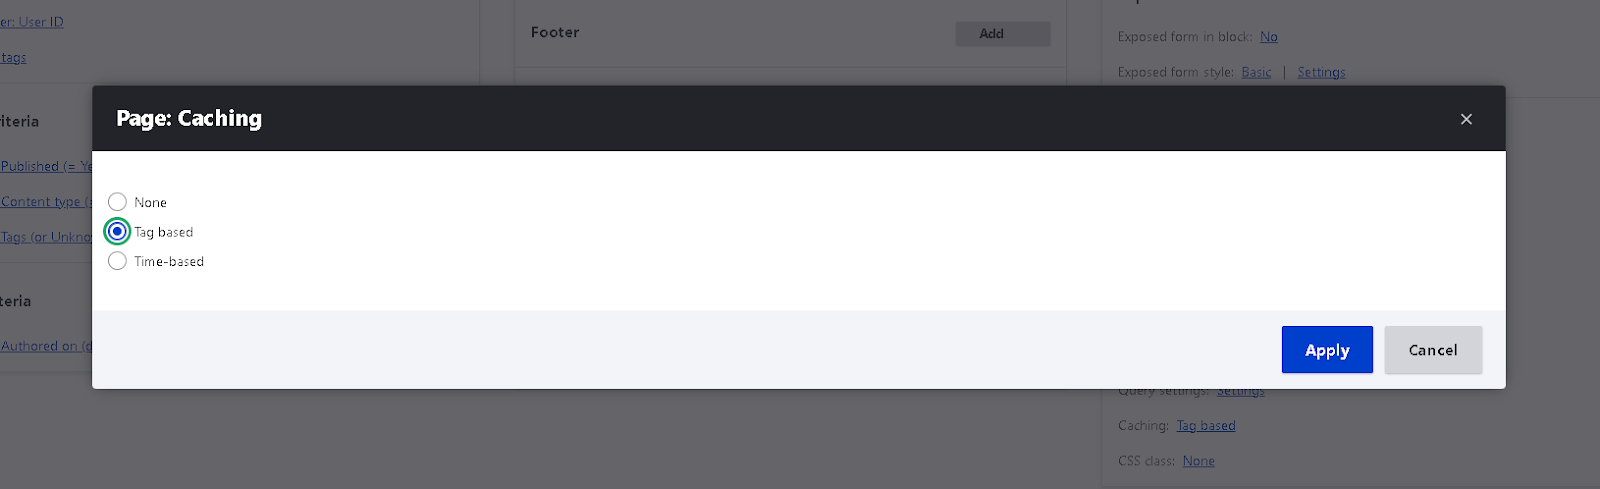
- Caching: In this section, we can select how the view should be cached.
- CSS class: In this section, we can add a CSS class using which we can style the view. The class will be added to the view.
Final thoughts
Looking ahead, as Drupal continues evolving, we can expect Views to integrate more seamlessly with modern technologies like headless architectures and AI-driven content personalization. With improvements in performance, UI, and integration with structured data, Views will remain a key tool in shaping the future of Drupal websites. Need help leveraging the full potential of Views and other Drupal features? You can count on our Drupal development services to build custom, high-performing, and scalable websites tailored to you. Talk to us!

Venkatraman G
Related Insights


Don't Miss Out!


